Burbank Branch Photos
Some focus stacked pics of the Burbank Branch in N scale
I have been a Helicon Focus user for 20 years and I used it to stack photos of the SP Burbank Branch in N scale layout.

I have been a Helicon Focus user for 20 years and I used it to stack photos of the SP Burbank Branch in N scale layout.
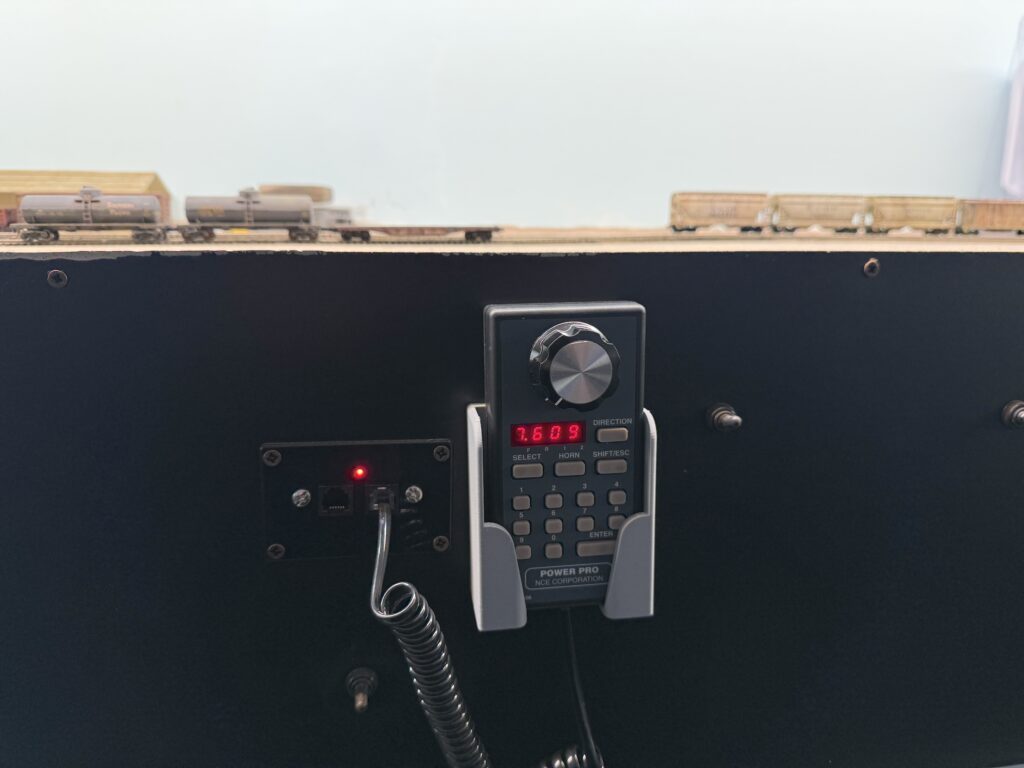
The latest updates on the Burbank Branch feature 3D printed DCC throttle holders, bridge, scenery and ops session.
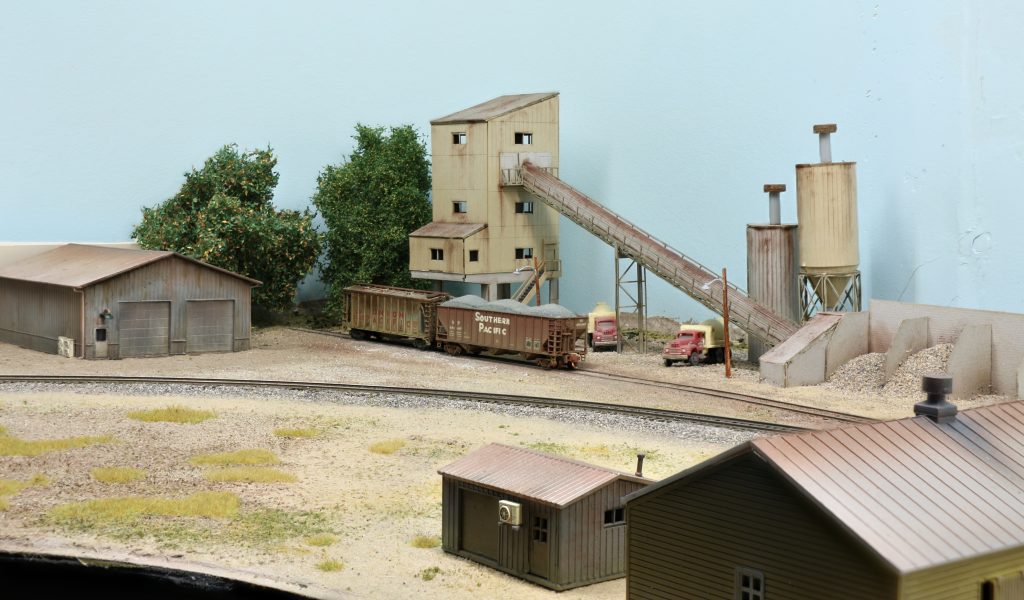
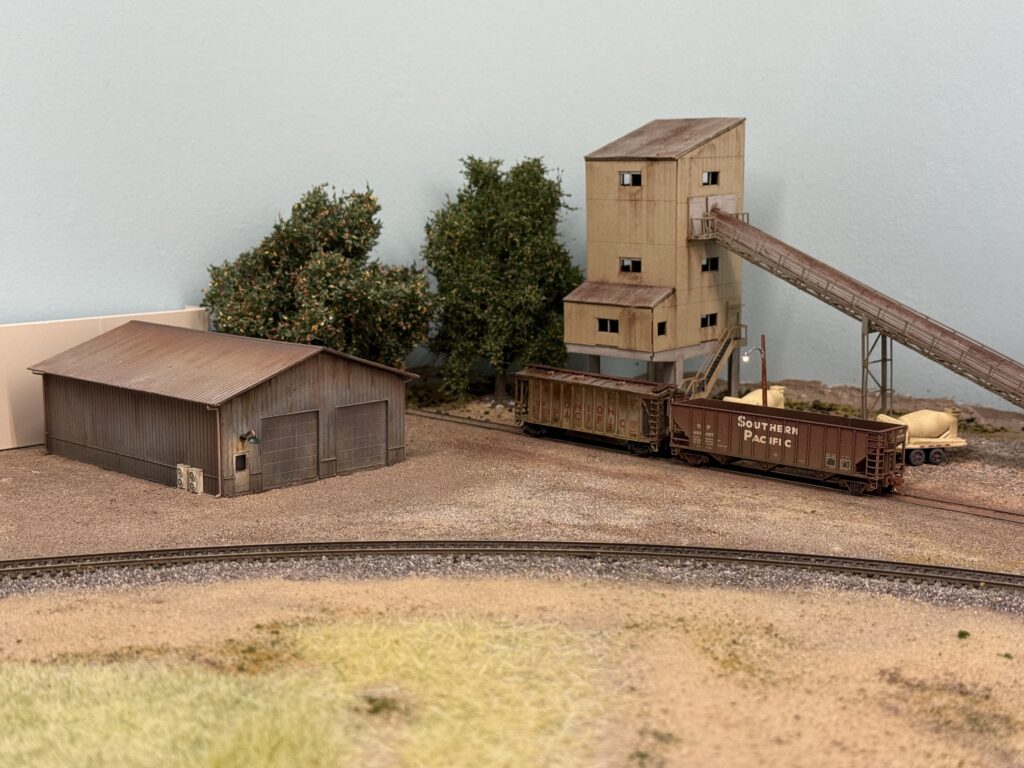
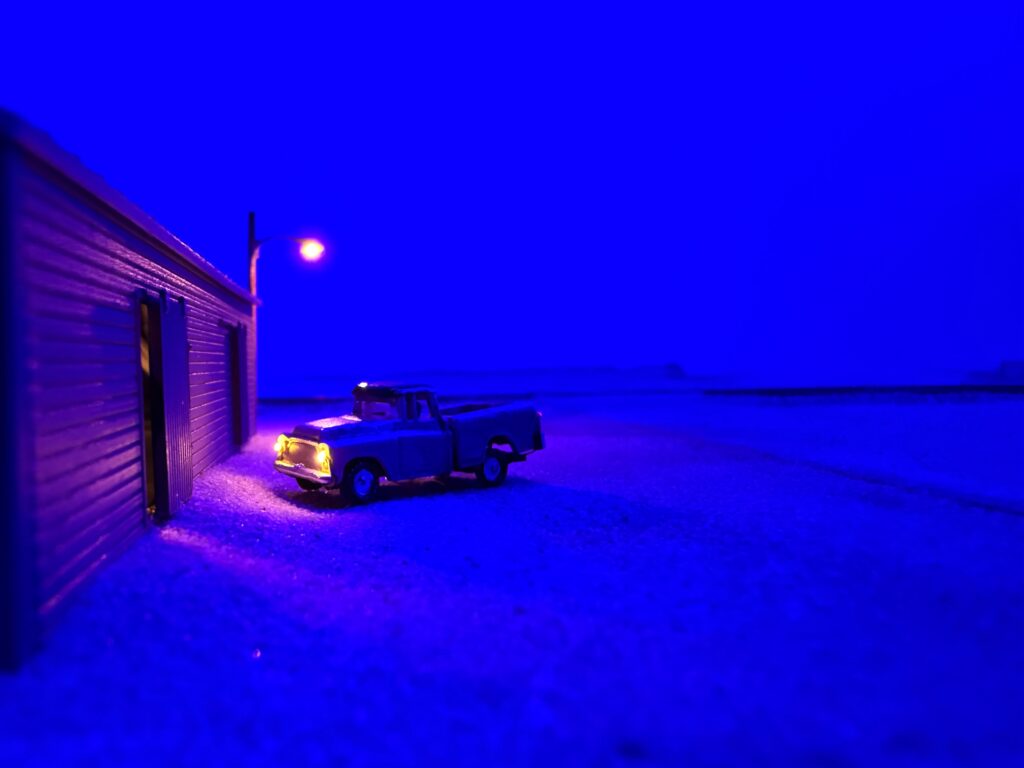
Following is the ConRock Ready Mix Cement Plant, the first scene I started scenicking on the layout. It is far from 100 percent complete, but it already gives a much more satisfying look during switching sessions compared to bare plywood.
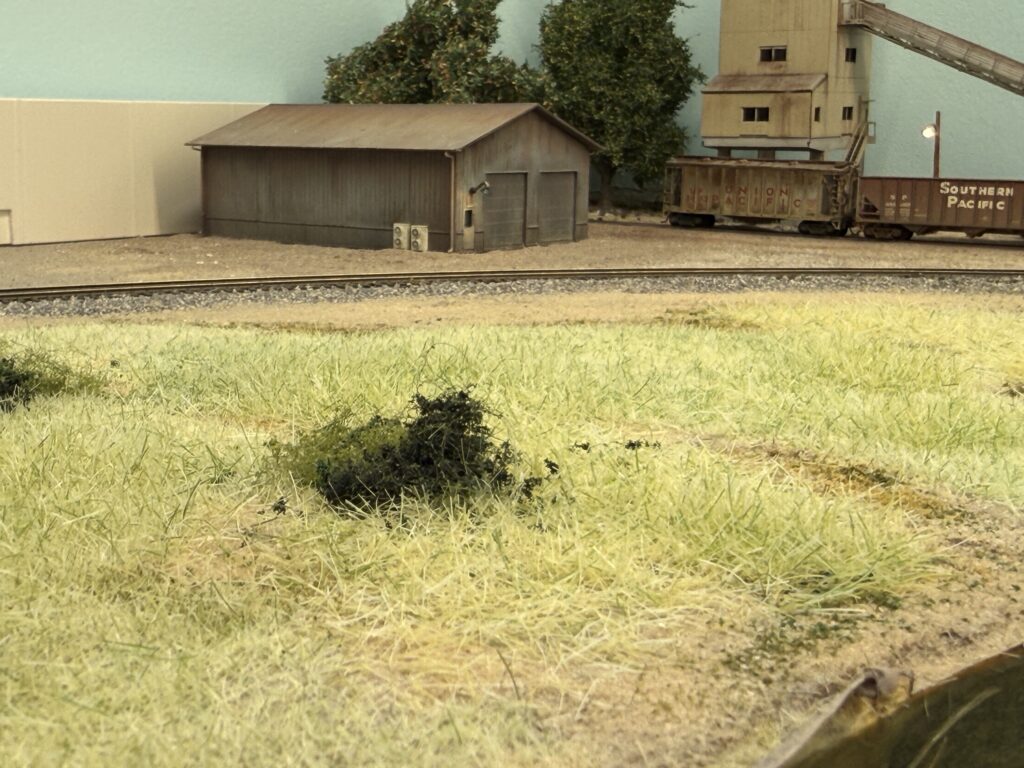
I was not completely satisfied with the static grass. The color mix looked too light and too green, so it felt unrealistic to my eye. So, I removed it and started over with different products.
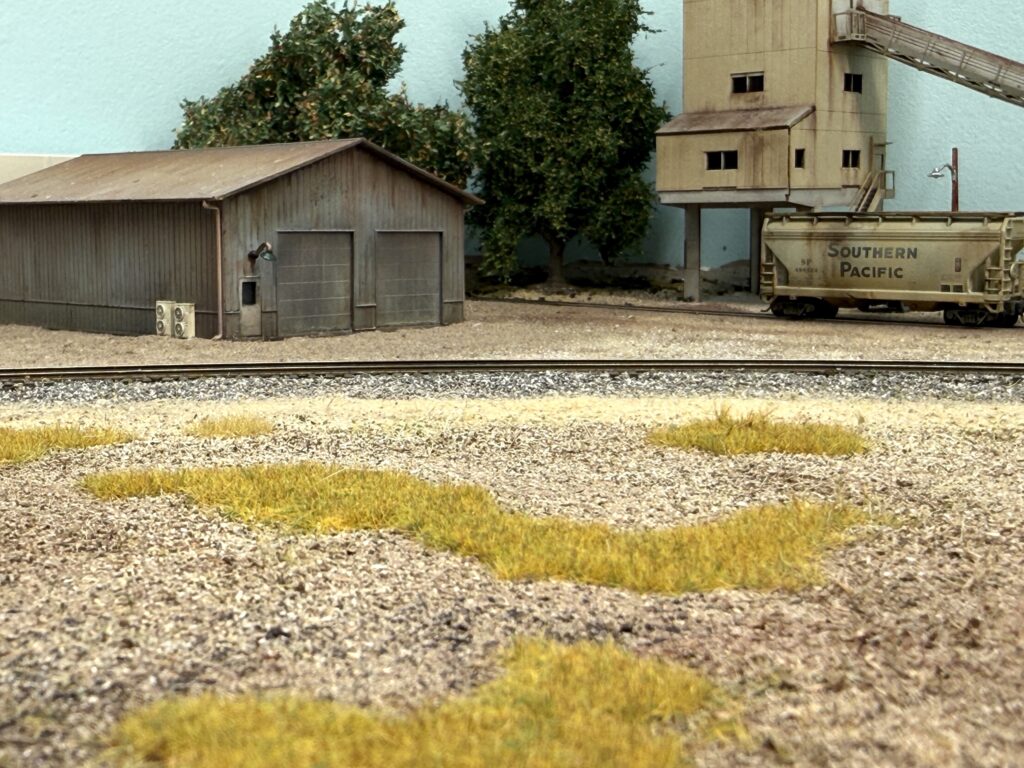
Then, I purchased WWScenics static grass from the UK and found their product very good in terms of both application and color tone. Here is the first layer of 2 mm Wild Meadow static grass applied over terrain made from real dirt and Noch brown “Streumaterial” item no. 08441.
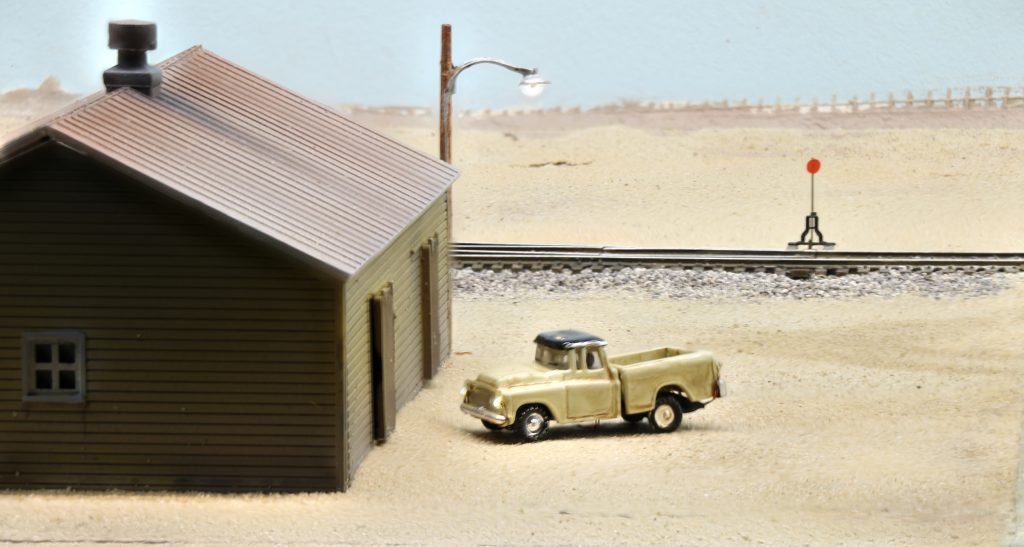
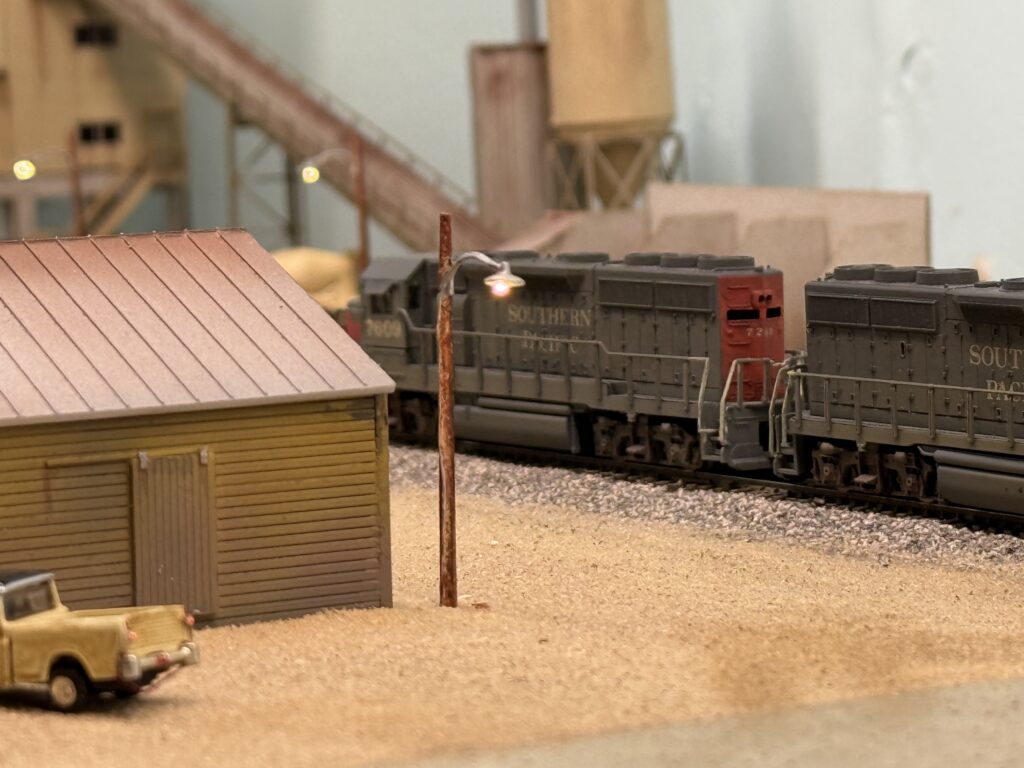
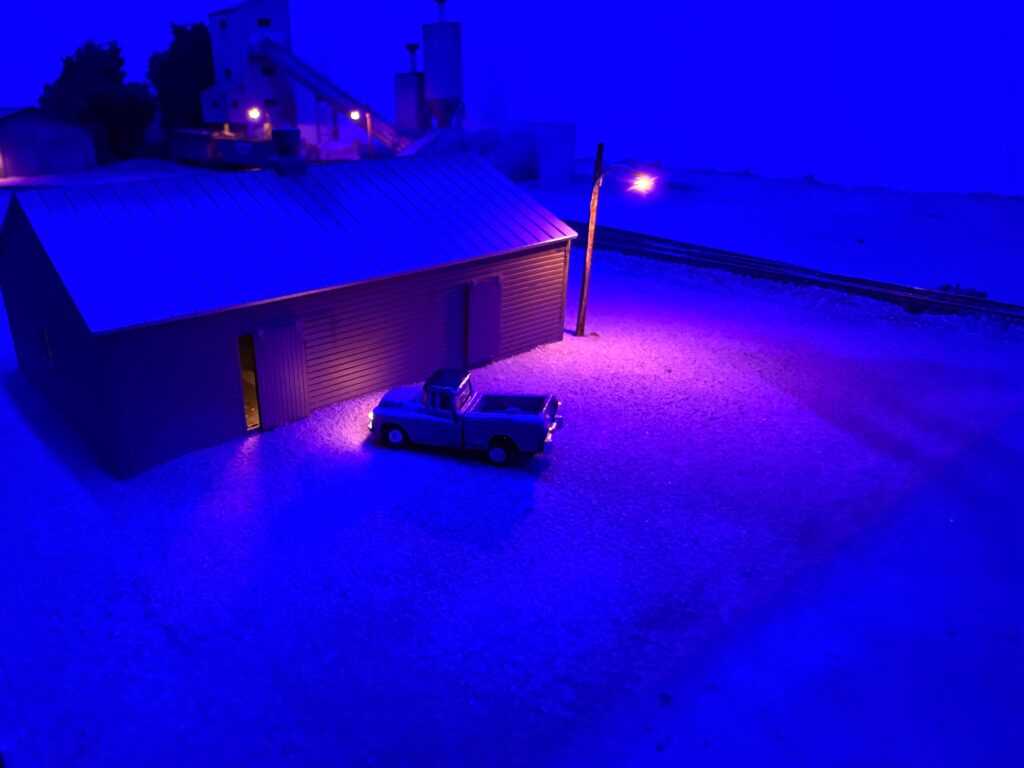
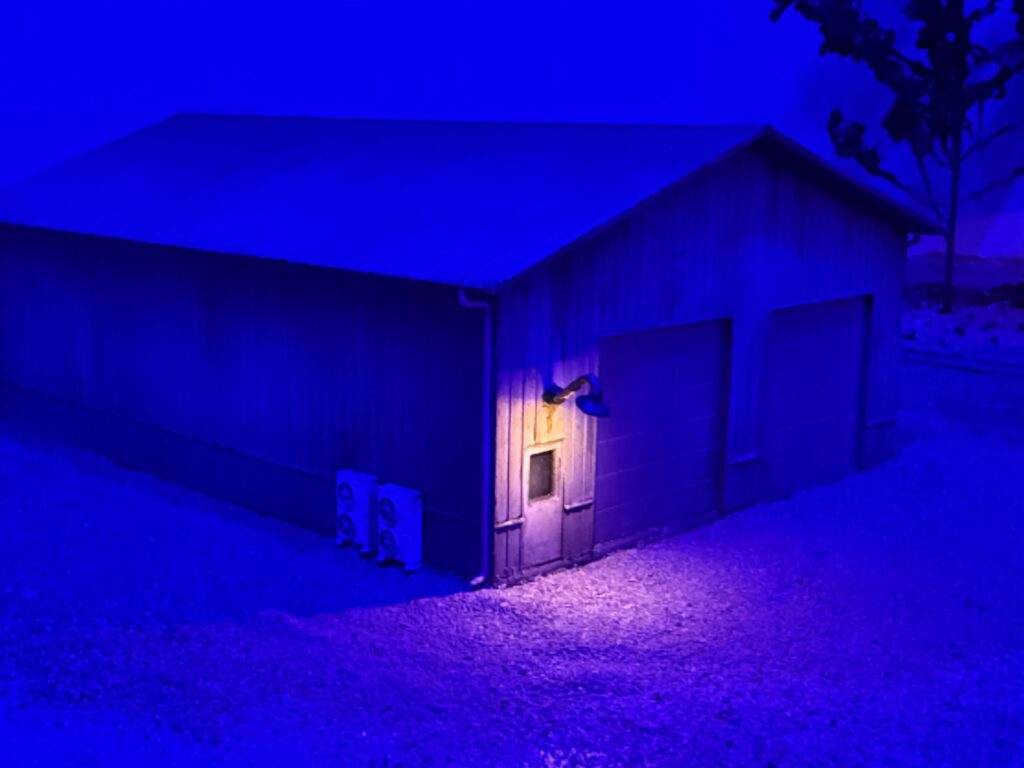
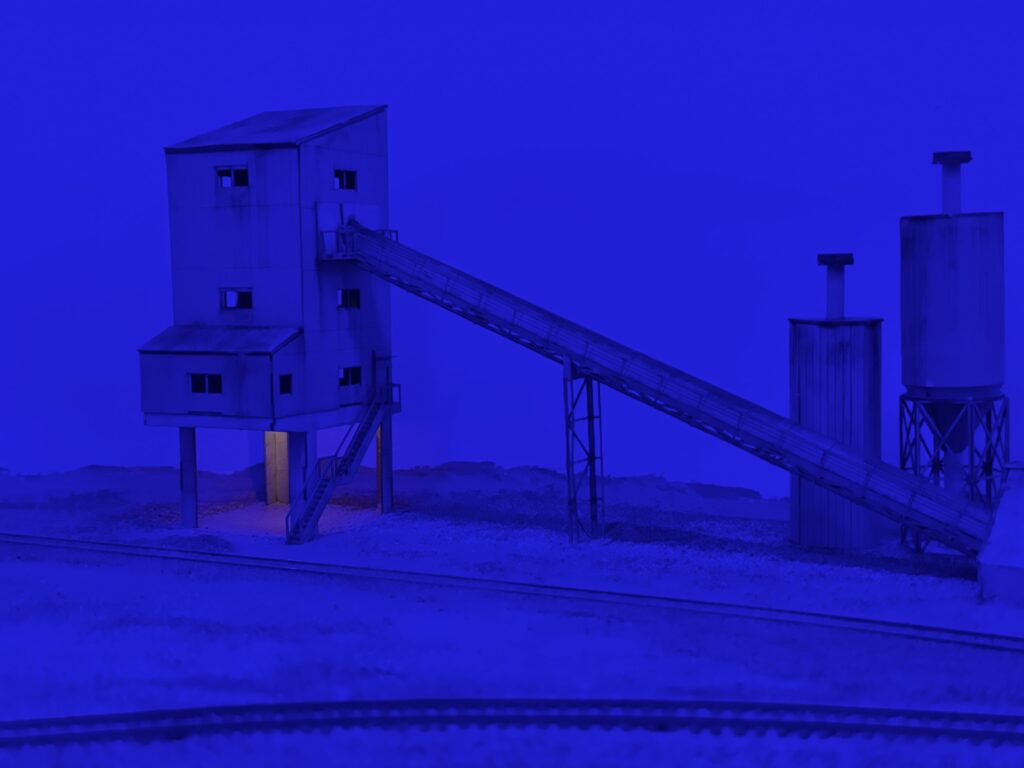
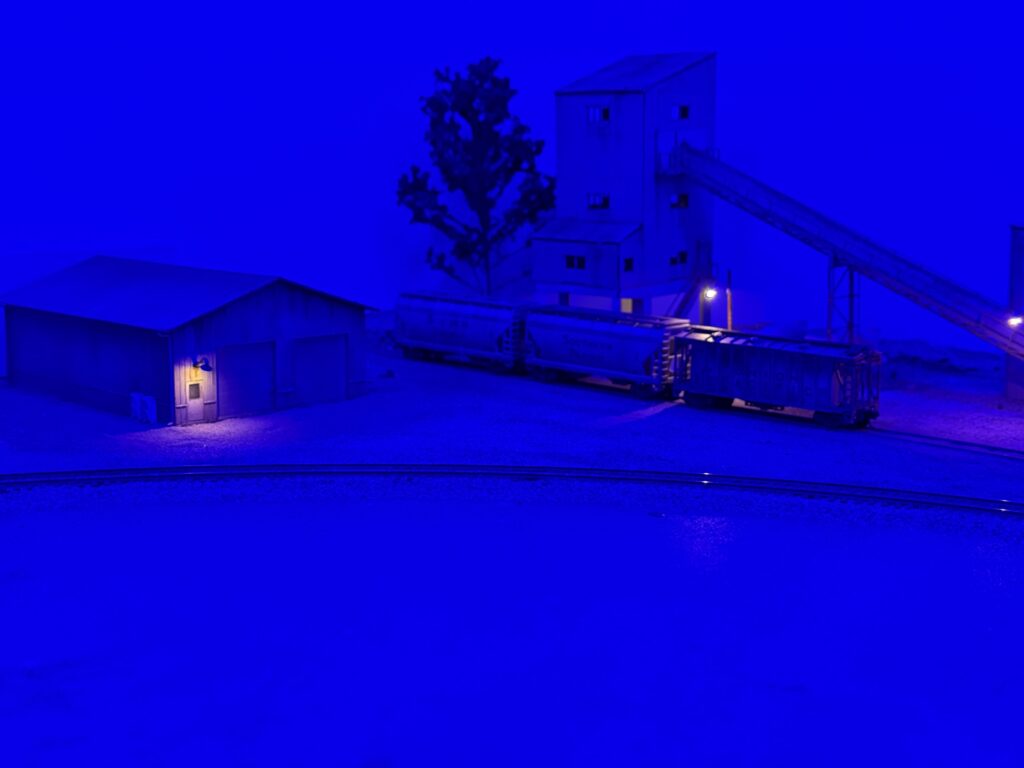
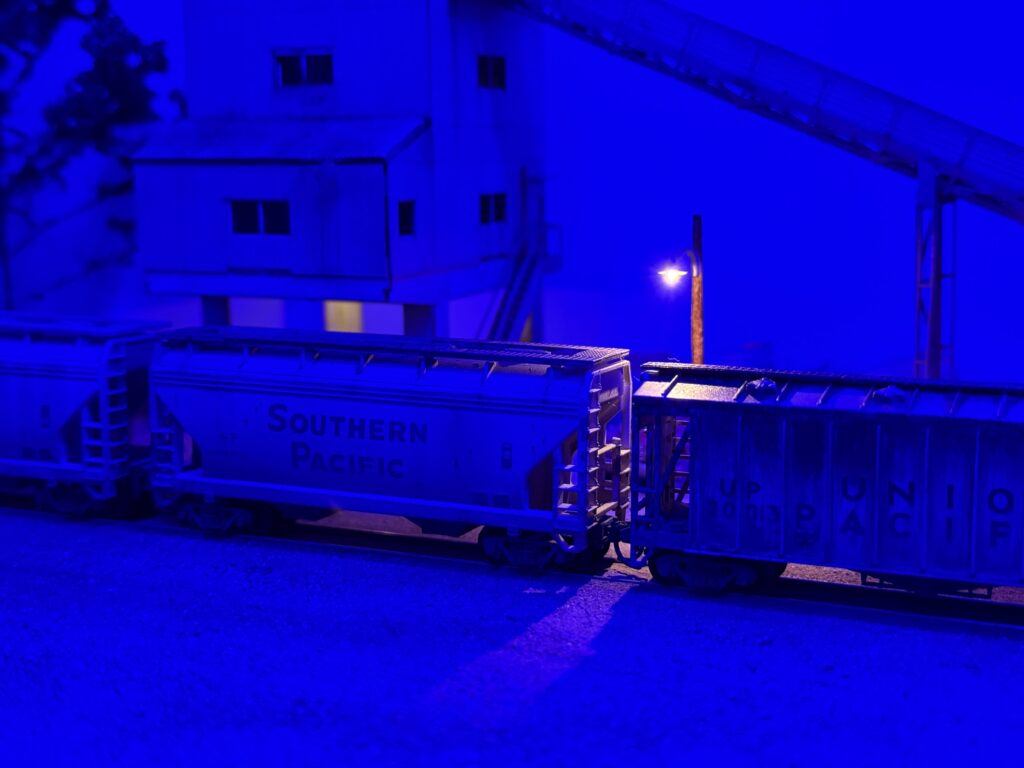
I also added a Woodland Scenics lighted vehicle, which adds a nice touch of realism to night scenes.
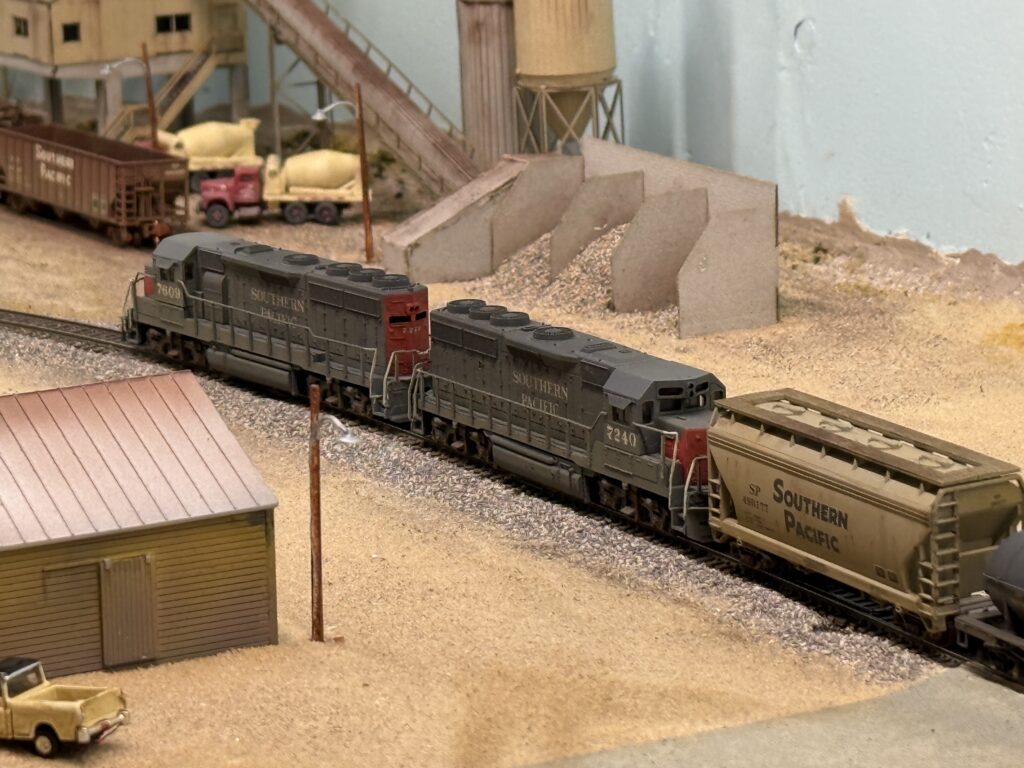
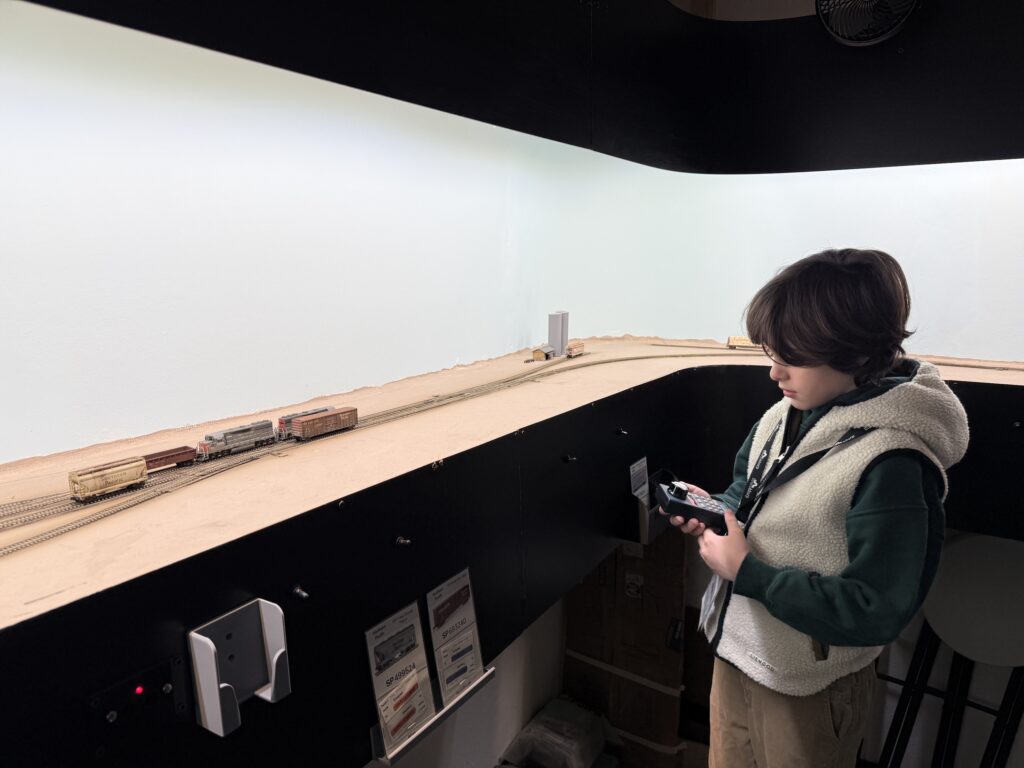
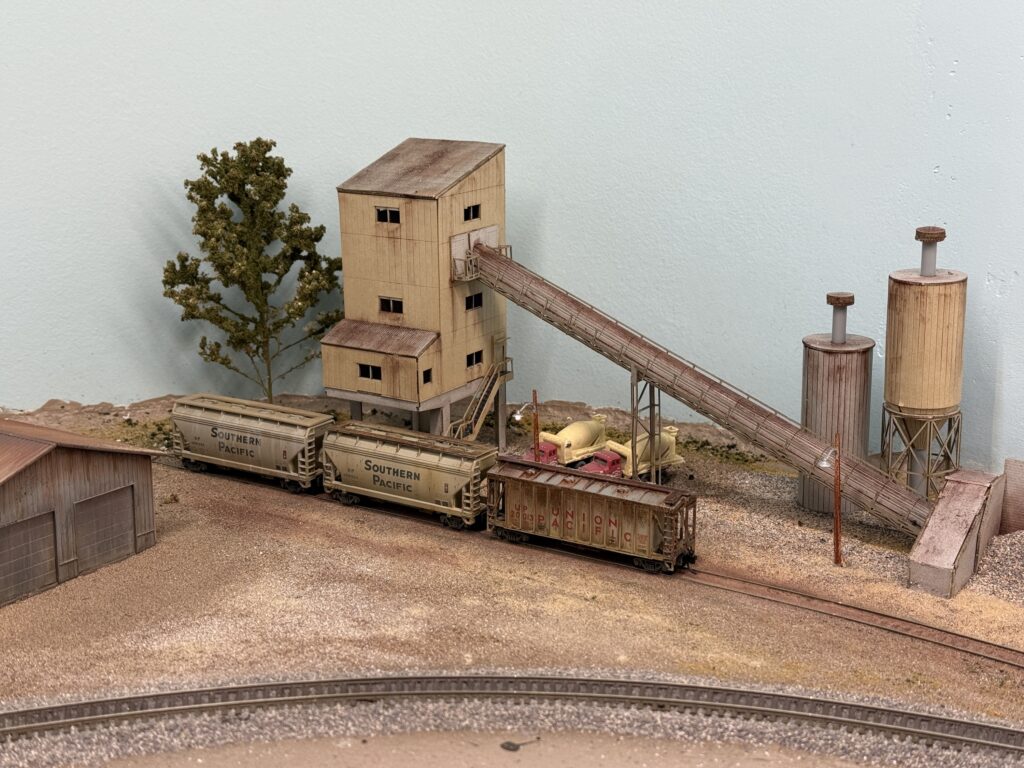
Here, my seven-year old son took the engineer role. We switched a few cars using a consist of two custom painted Atlas GP38-2 units.
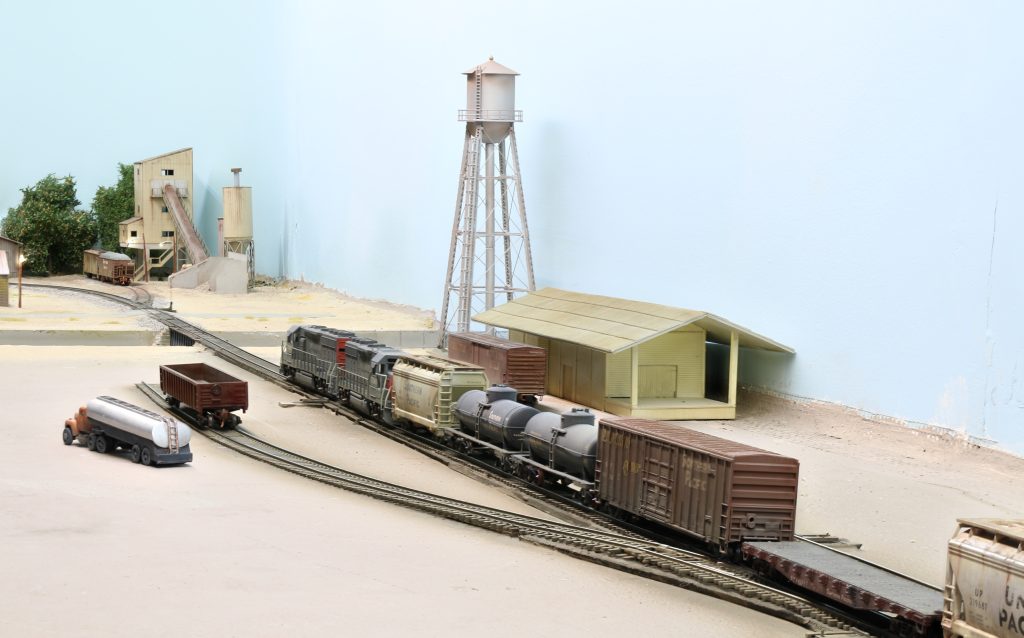
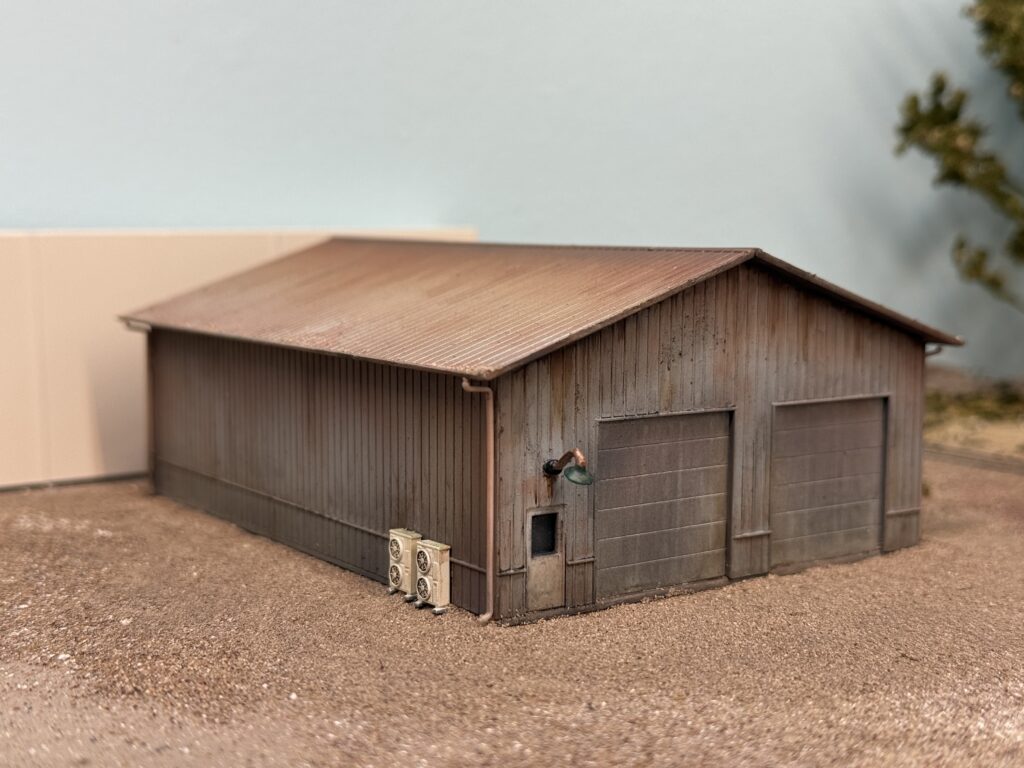
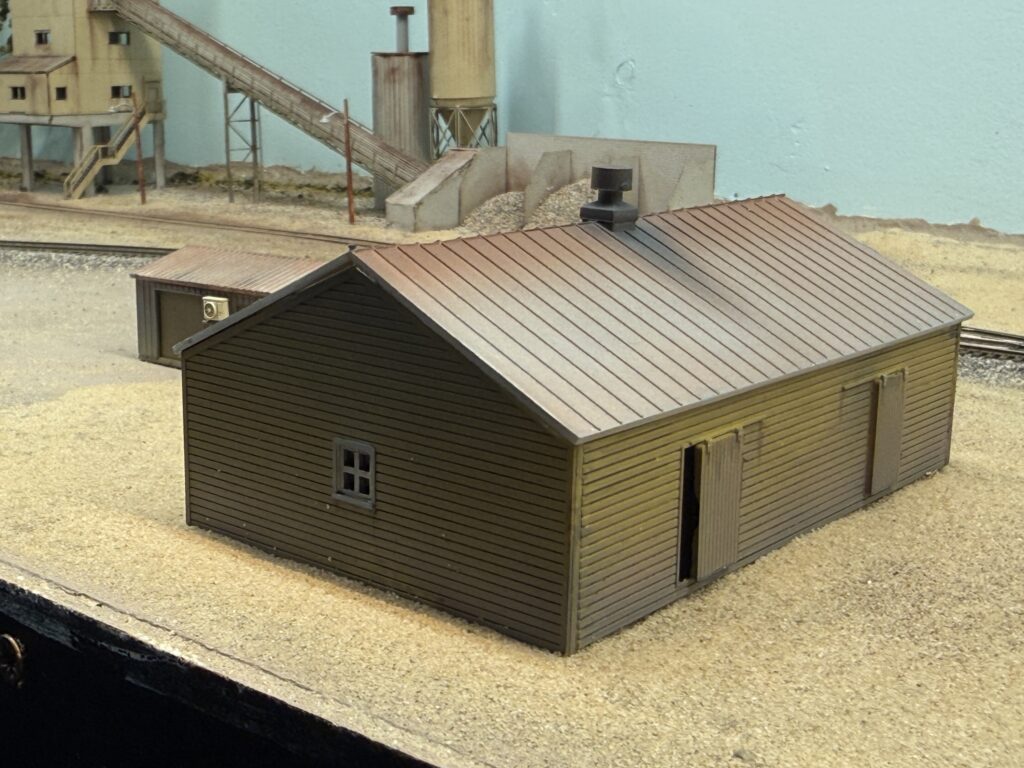
New structures and scenery update on first section of the layout to receive full scenery. I assembled, painted, and weathered several buildings to serve as warehouses or general industry-related structures.
I used Walthers kits as well as a scratchbuilt building flat from styrene to add a bit more depth to the backdrop. I also finished the bridge over the LA River.

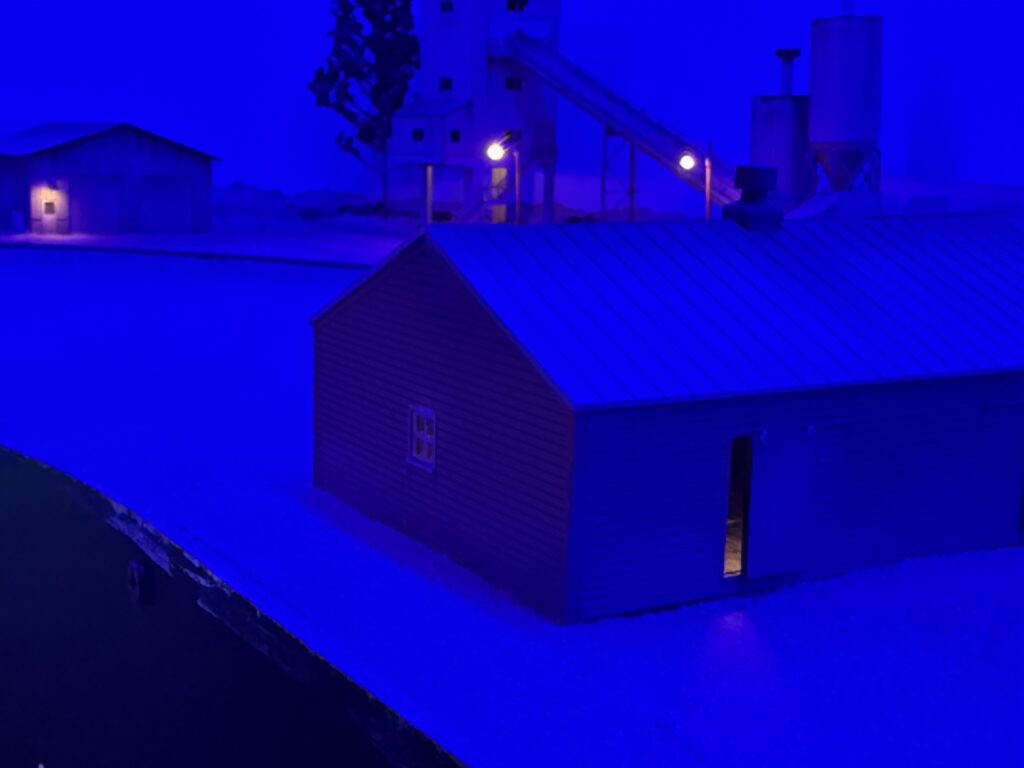
Then, I added lighting with small LEDs and Woodland Scenics goose lamps to make the night scene more interesting and realistic.
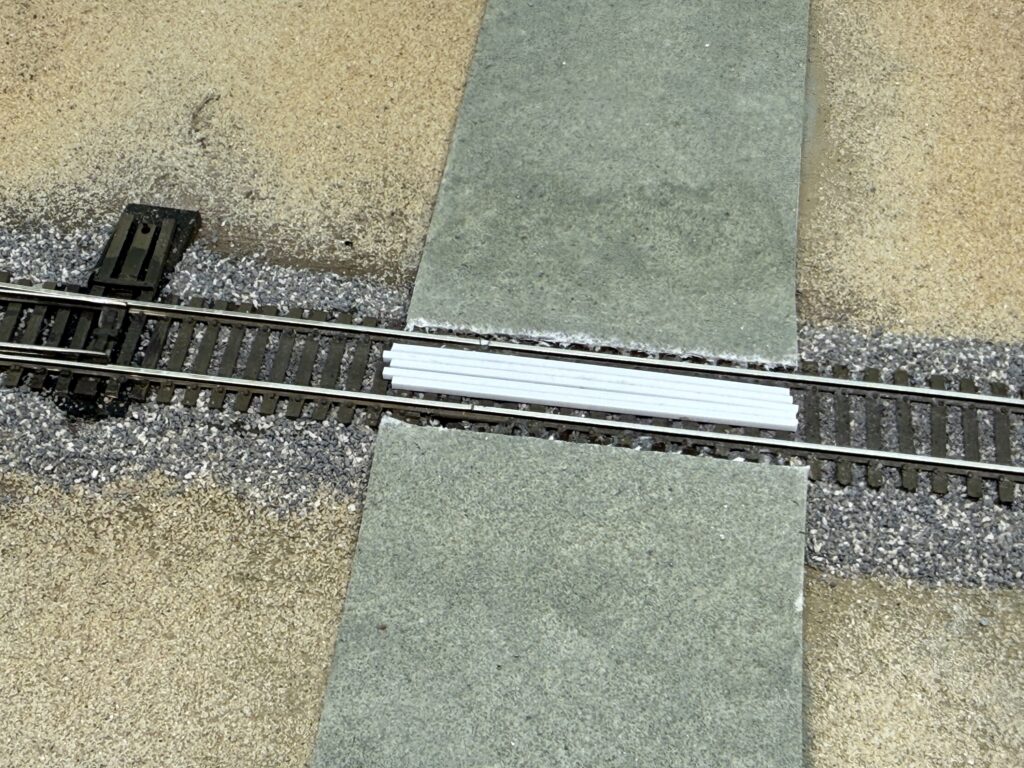
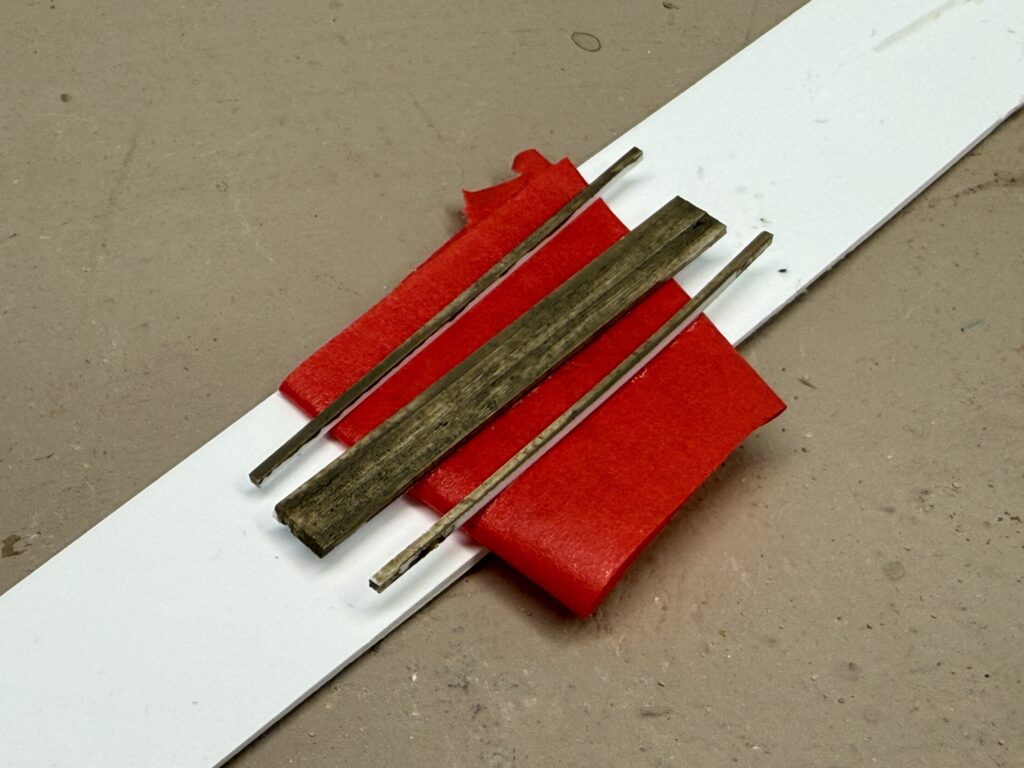
In addition, I used styrene strips to build a wood grade crossing. I hand-painted the styrene with a mix of gray and brown acrylics. Then, I sealed everything with a coat of flat clear from a spray can.
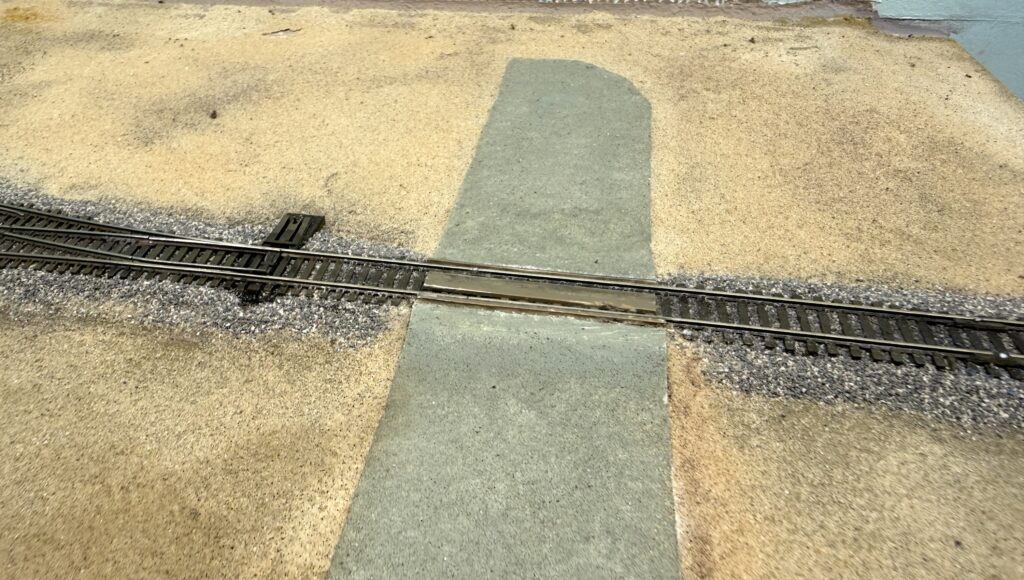
Furthermore, I weathered the area between the rails using powdered pigments mixed with plaster of Paris. Then, I and applied the mix on the track with a flat brush. Finally, I misted the area with water so the plaster would set and seal everything in place.
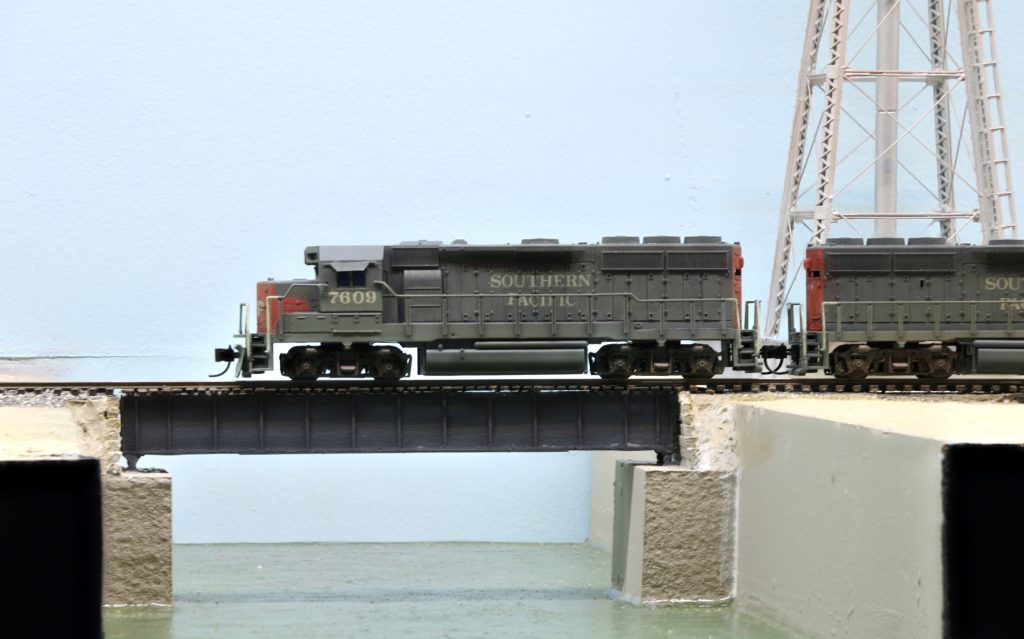
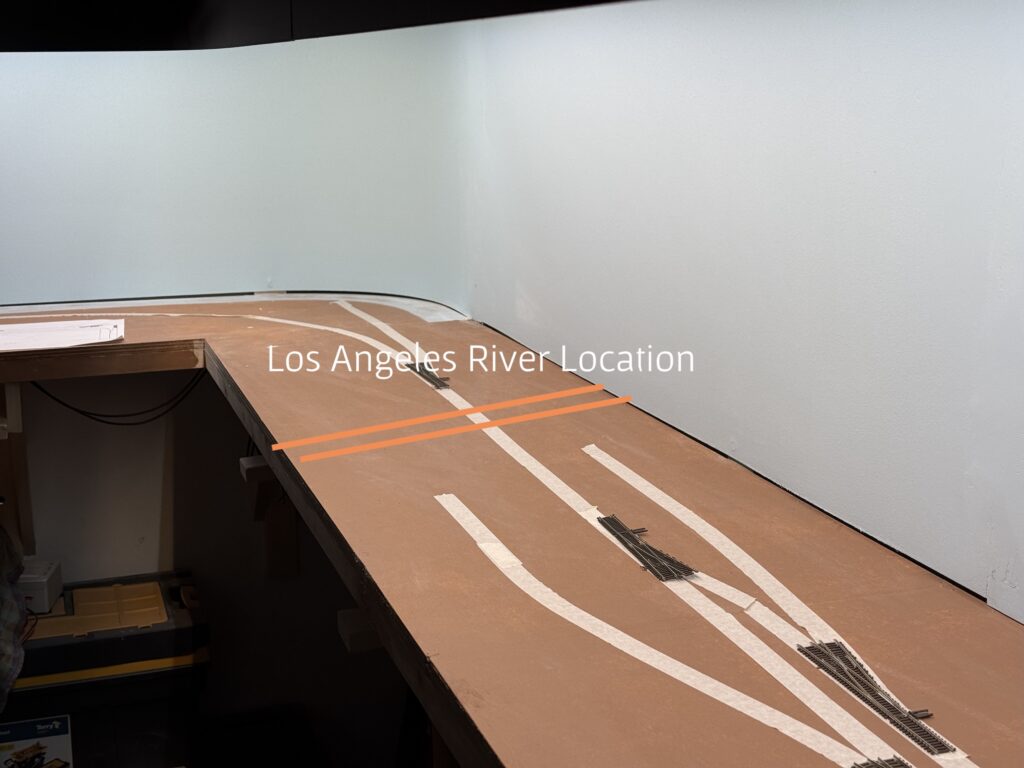
Installing a bridge over the Los Angeles River was high on my list, since river bridges have always fascinated me in model railroad layouts. In addition, bridges are a great way to add vertical variation to an otherwise flat urban setting, especially on a layout like the Burbank Branch in N scale .
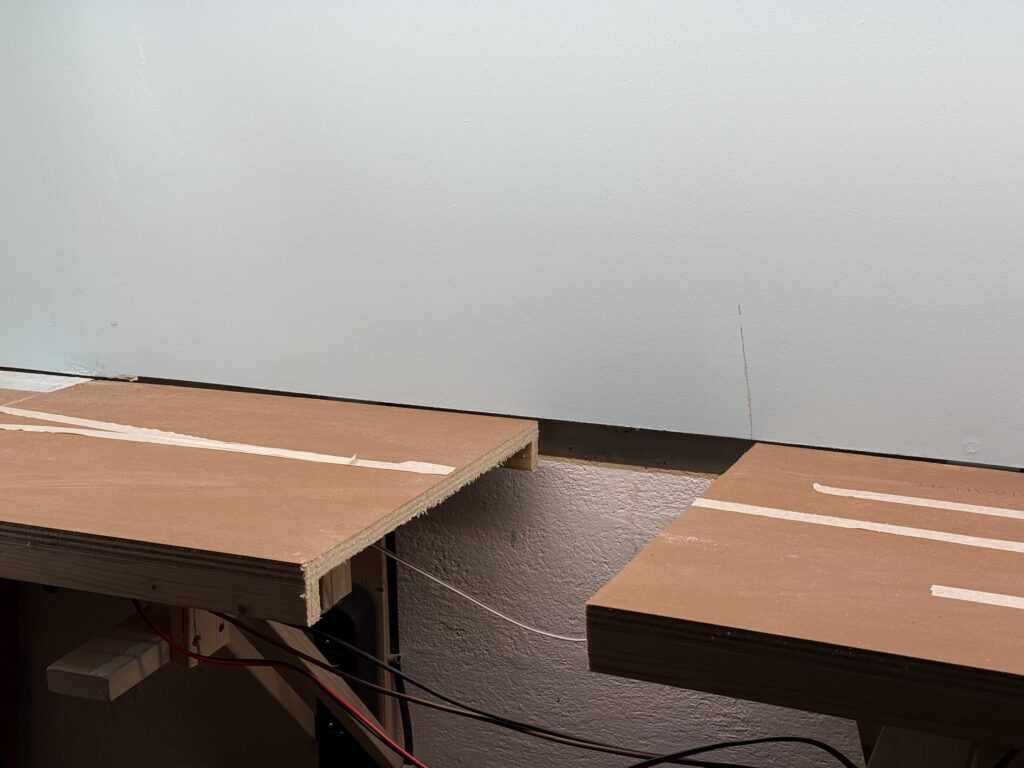
I started by measuring and cutting the plywood subroadbed support of my N scale layout.
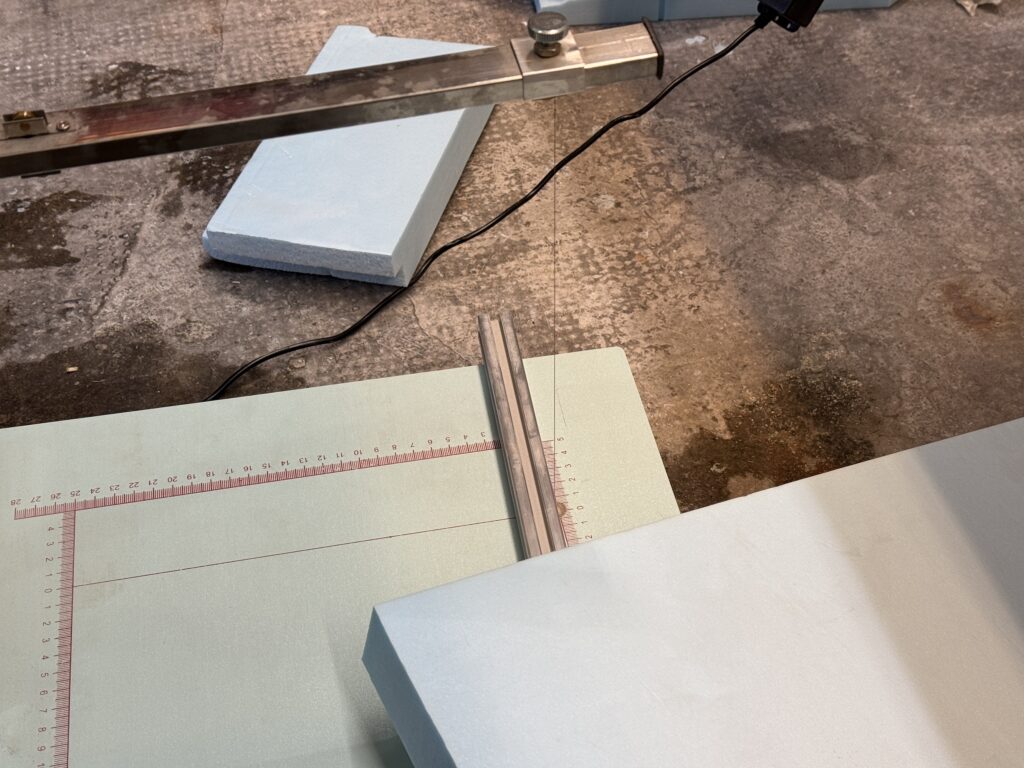
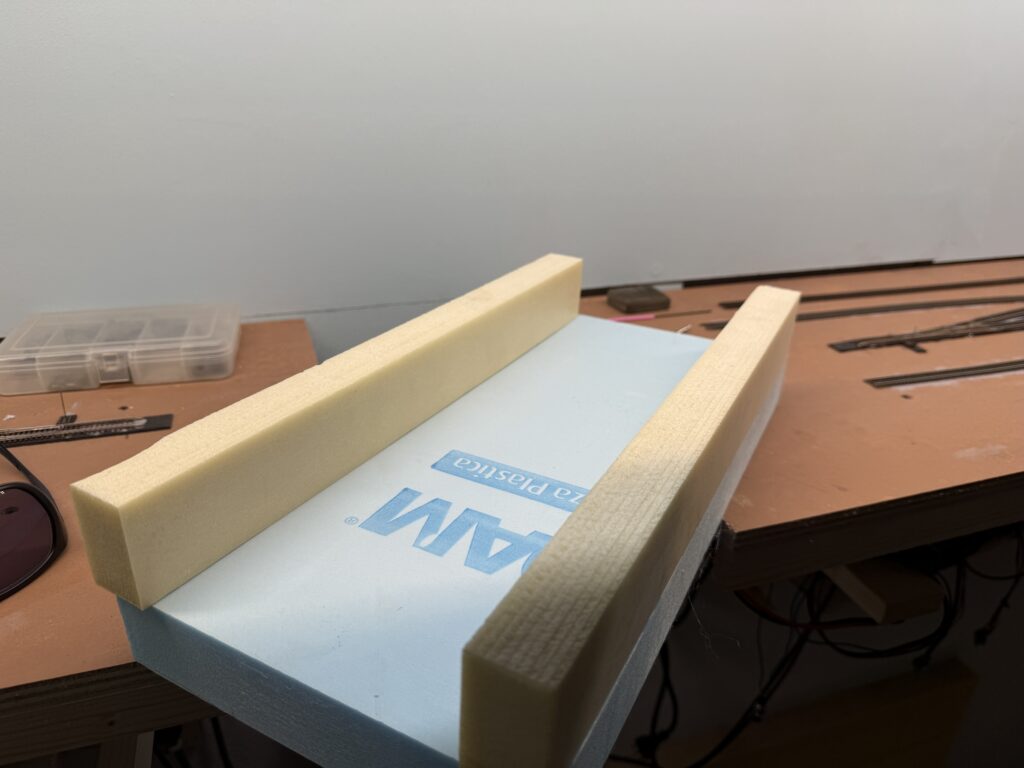
Then, I used styrofoam to shape the riverbed and the riverbanks, cutting it with a hot wire cutter.
I glued the riverbanks to the riverbed with acrylic glue.
Next, I applied a few coats of ultra-flat gray spray paint to seal the foam and create a solid base for the final color, and masked the banks.
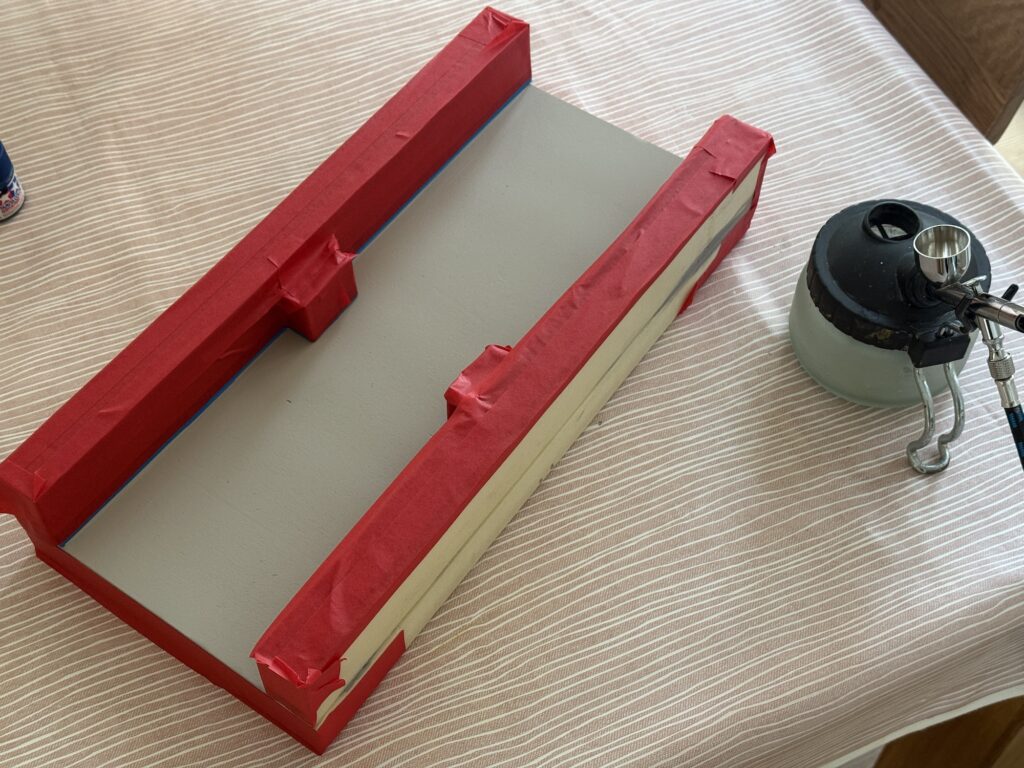
I started painting the riverbed with a coat of Tamiya XF-8, then I progressively added light layers of Vallejo Camouflage Medium Brown (71.038), and Vallejo Light Green Chromate (71.006) to get some variation close to the riverbanks.
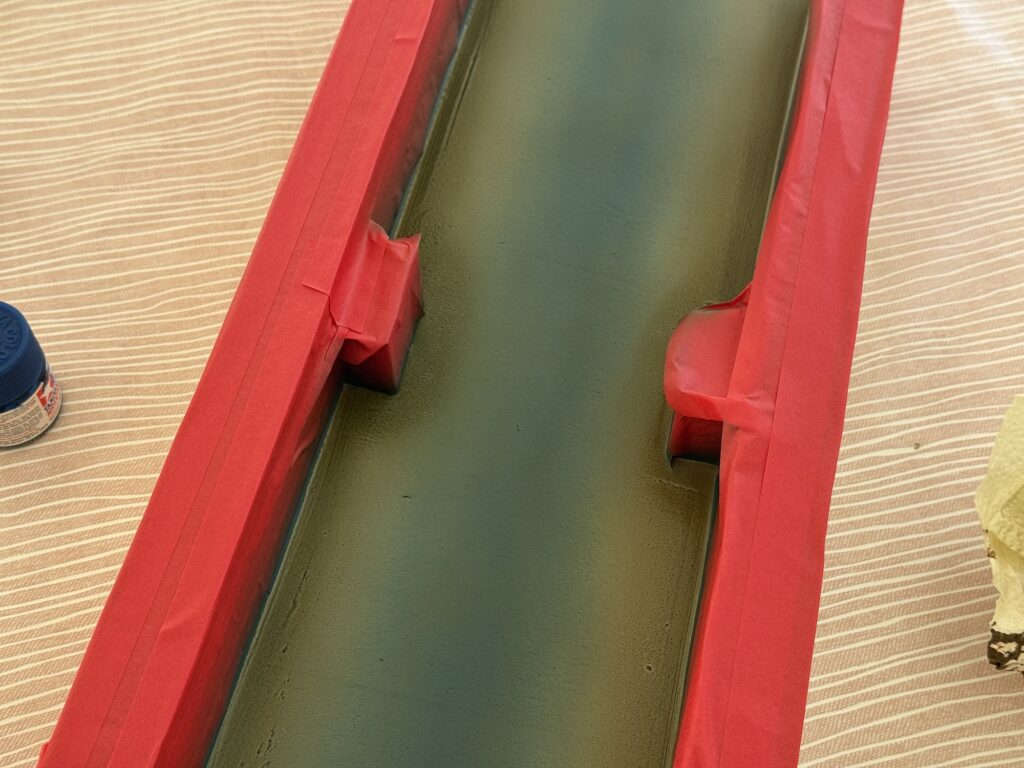
I painted the concrete riverbanks with a flat gray finish using an inexpensive spray can.
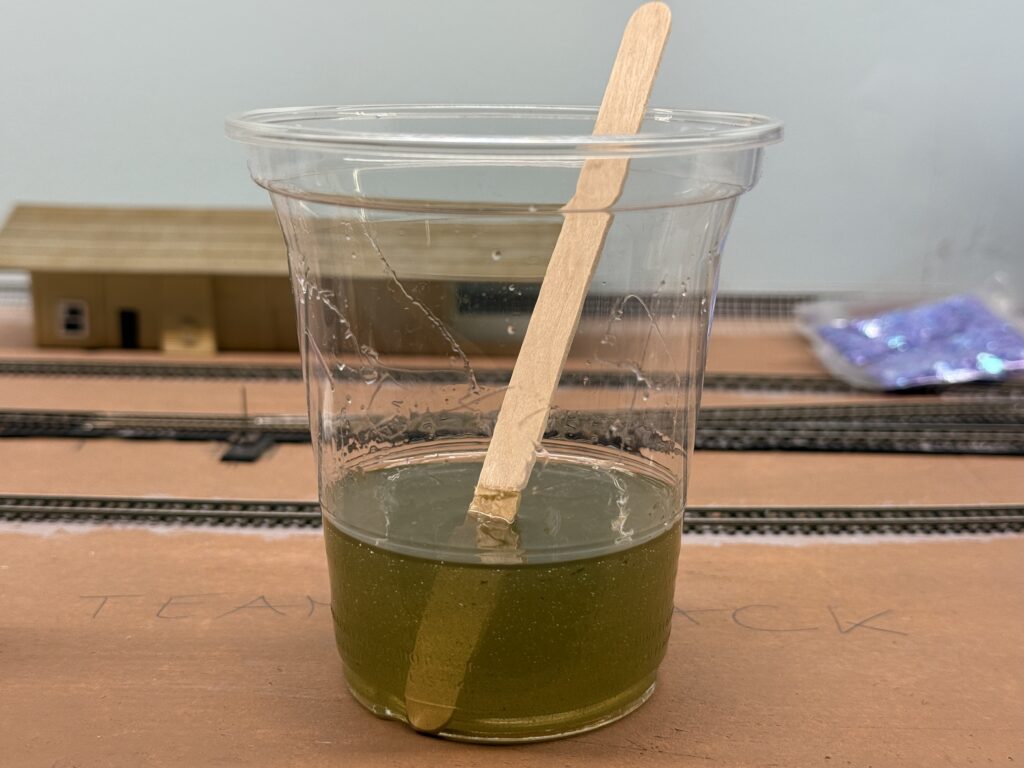
The riverbed and riverbanks are now painted. Therefore, they are ready for a layer of 2-part epoxy resin to achieve a realistic water effect.
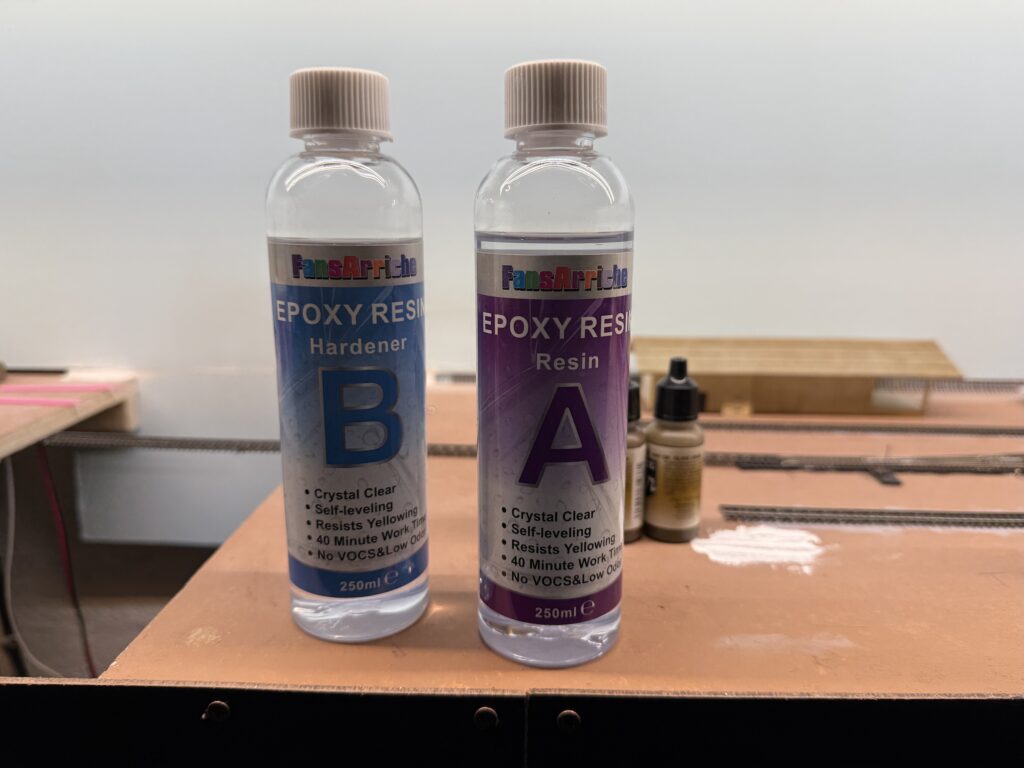
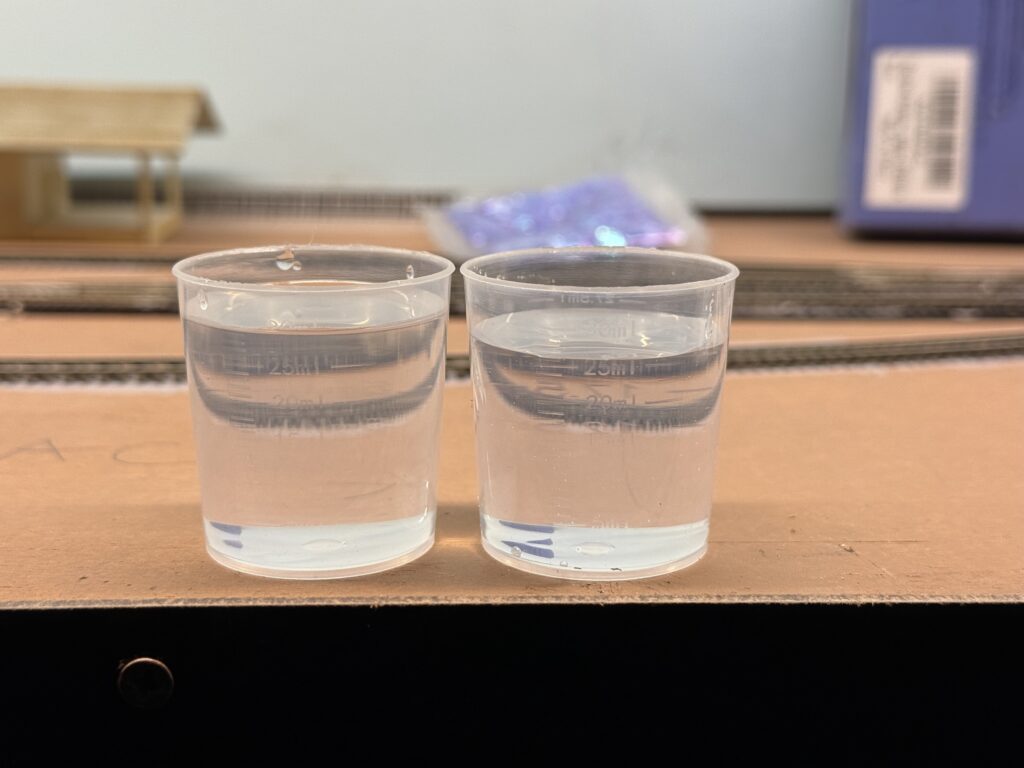
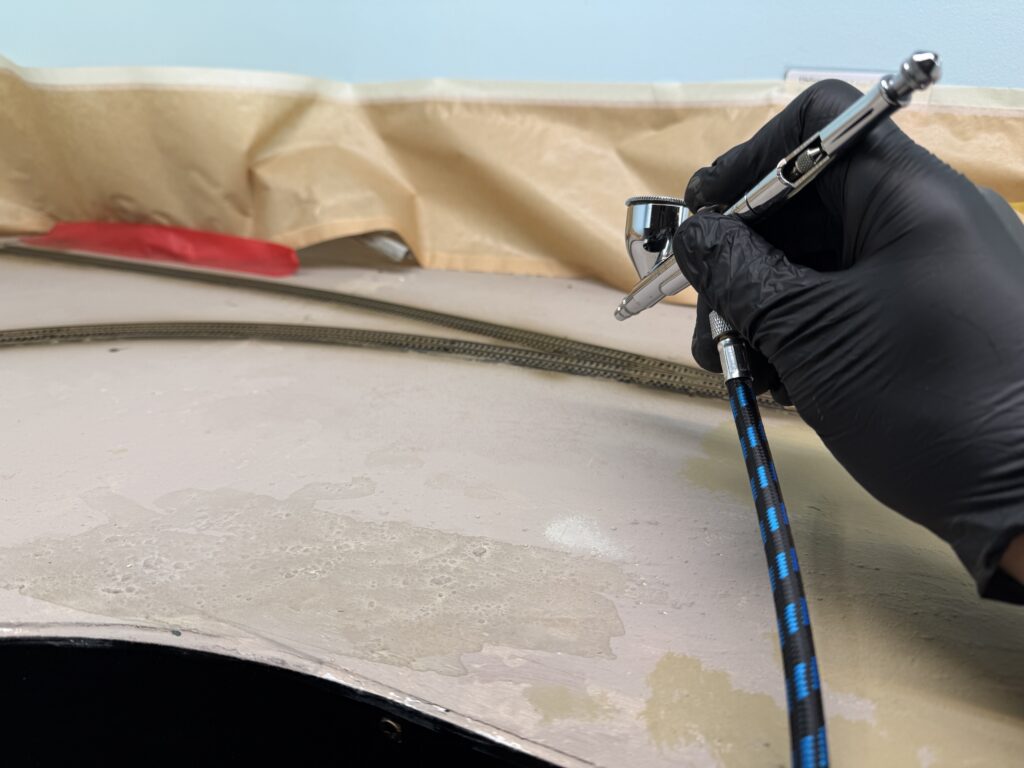
Always wear protective gloves when handling resin. After all, that material is incredibly sticky!

Additionally, I incorporated a few drops of Vallejo Dark Olive Drab (71.316). This gives the water a subtly greener, more natural appearance.
Once the resin had cured, I painted some subtle wave effect using Liquitex Gloss Medium. Then, I installed the riverbed in its final position on the layout. To ensure a perfect fit, I first test-fitted the riverbed and then marked the cutaway along the fascia with a pencil.
Subsequently, I cut the fascia accordingly with a saw. I then used a rasp and a file to fine-tune it.
Finally, I glued the riverbed to the benchwork. Following this, I applied a layer of putty to smooth out the joints, creating a seamless transition.
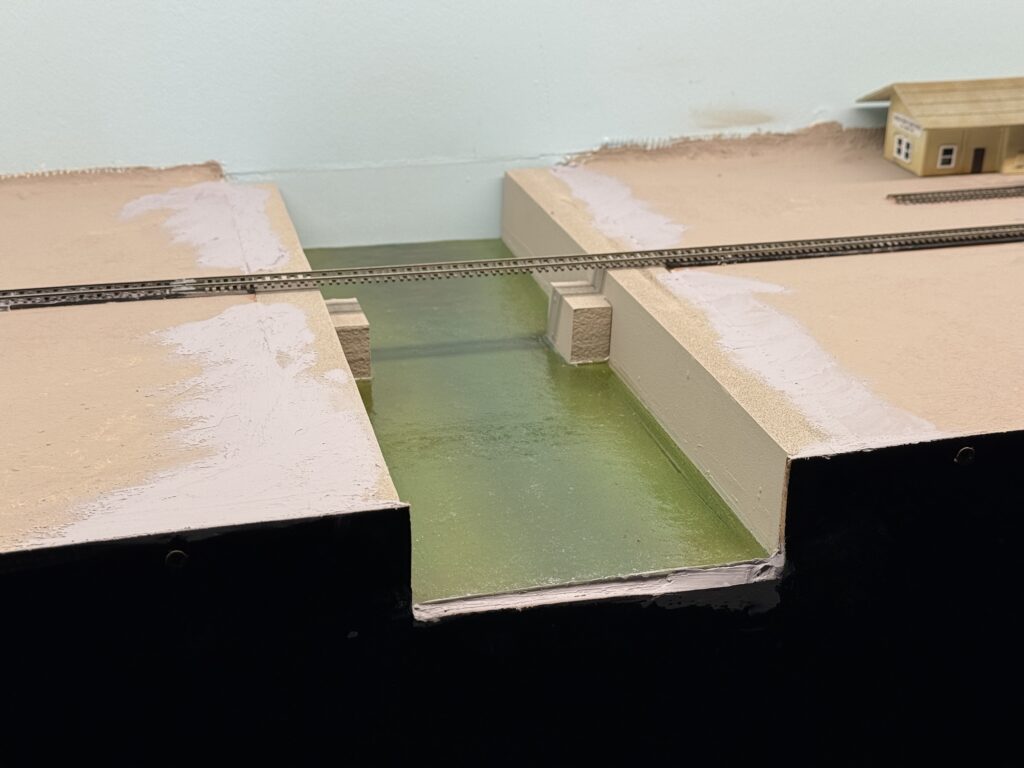
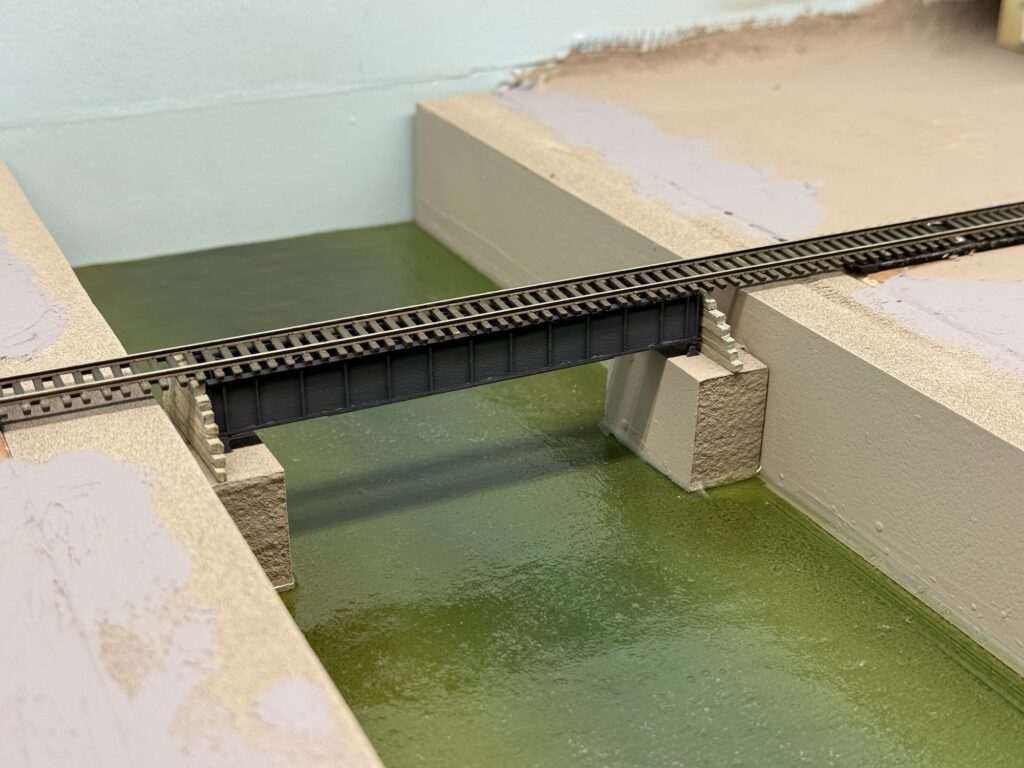
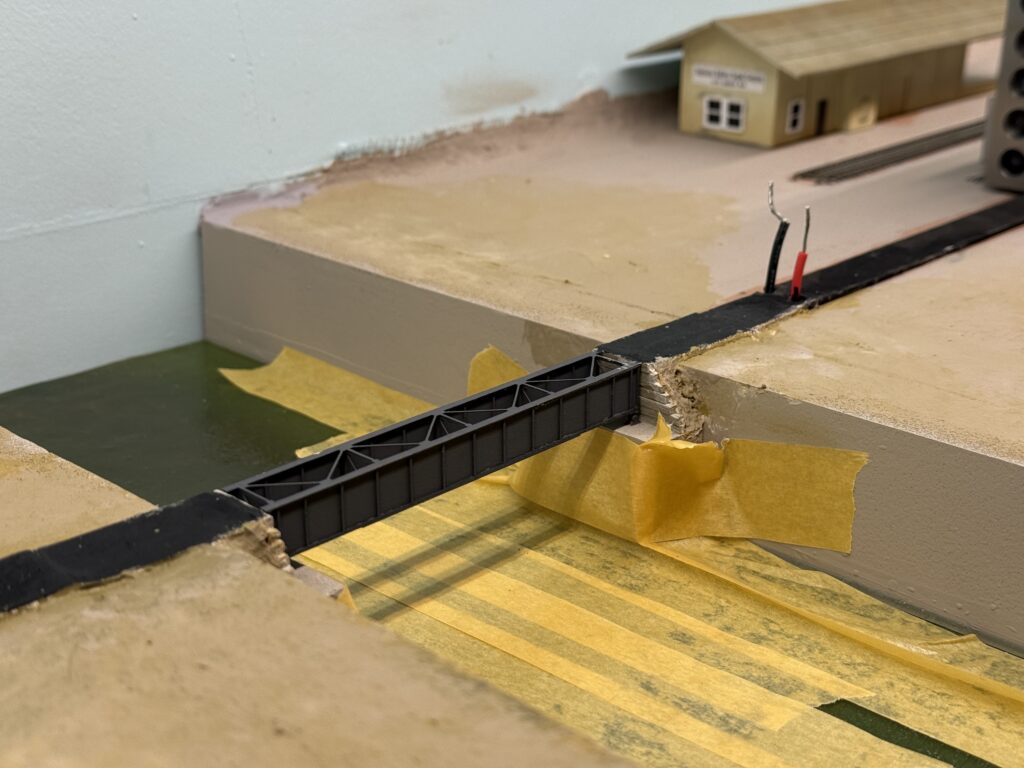
Then, I assembled an RSLaser 60-foot girder bridge kit and test fitted it in its final location.
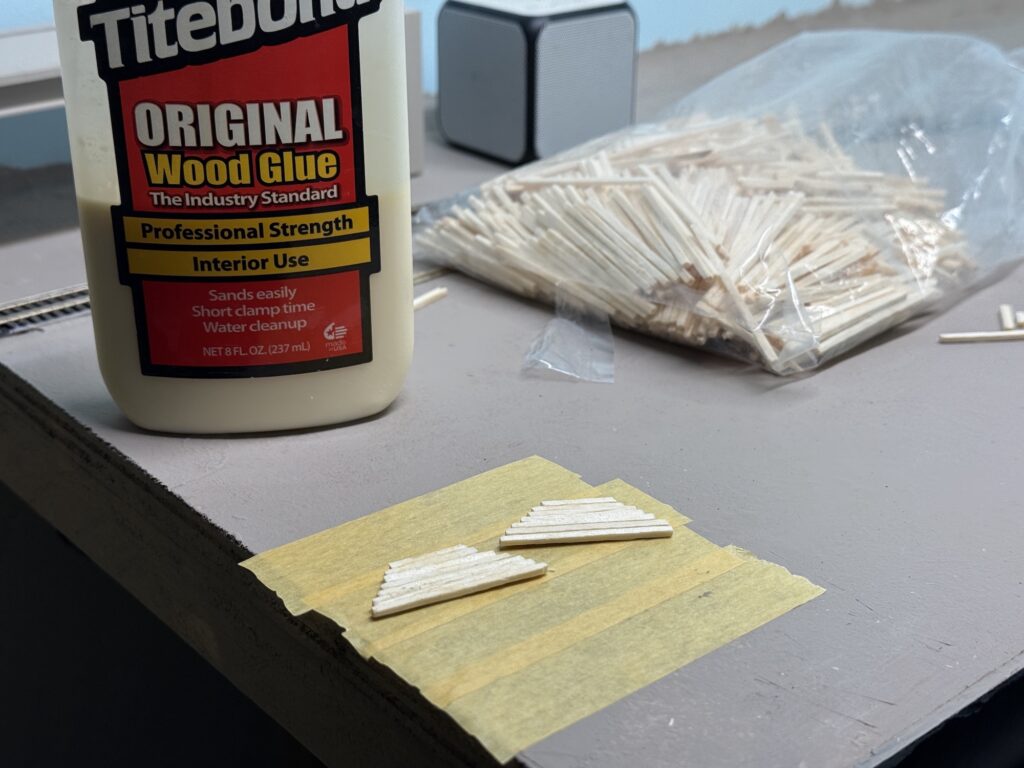
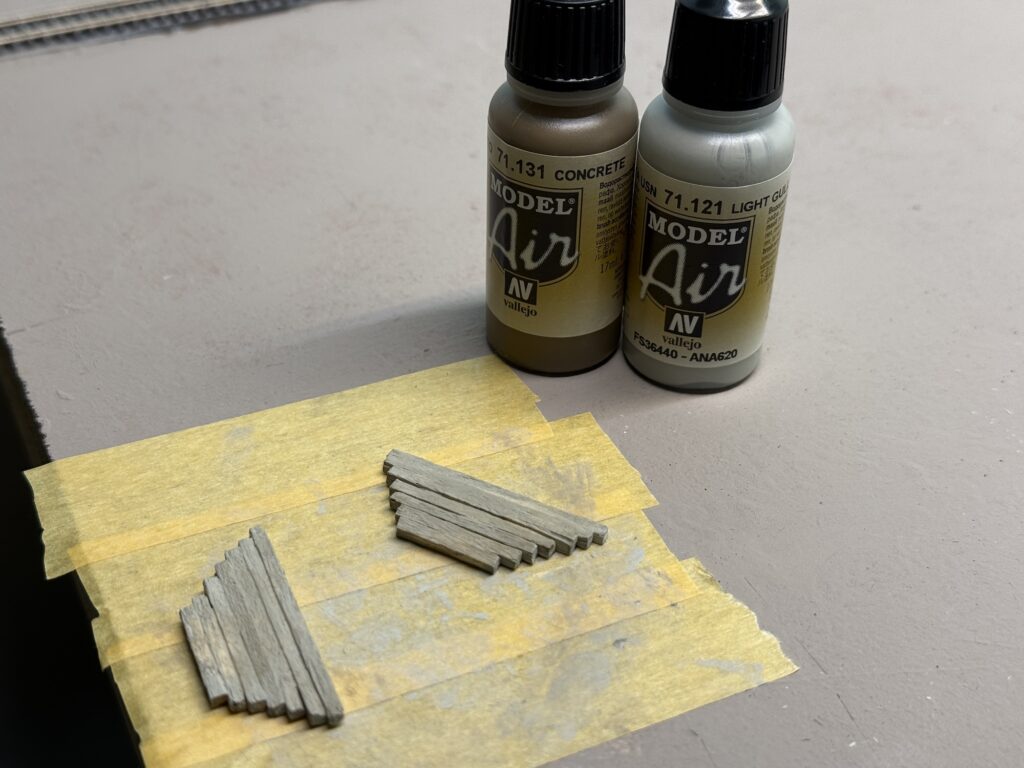
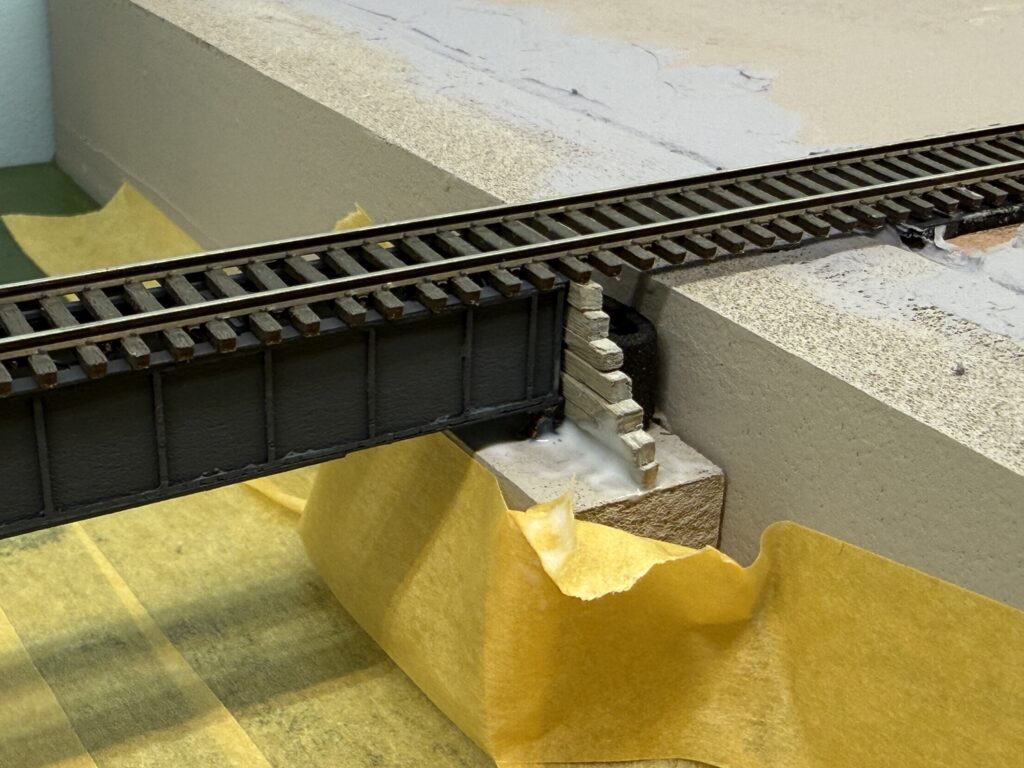
Afterwards, I scratchbuilt the retaining walls from tiny pieces of wood and painted them a warm gray tone using Vallejo Concrete and Vallejo Gull Gray. In the photo below, I’m test fitting them in place.
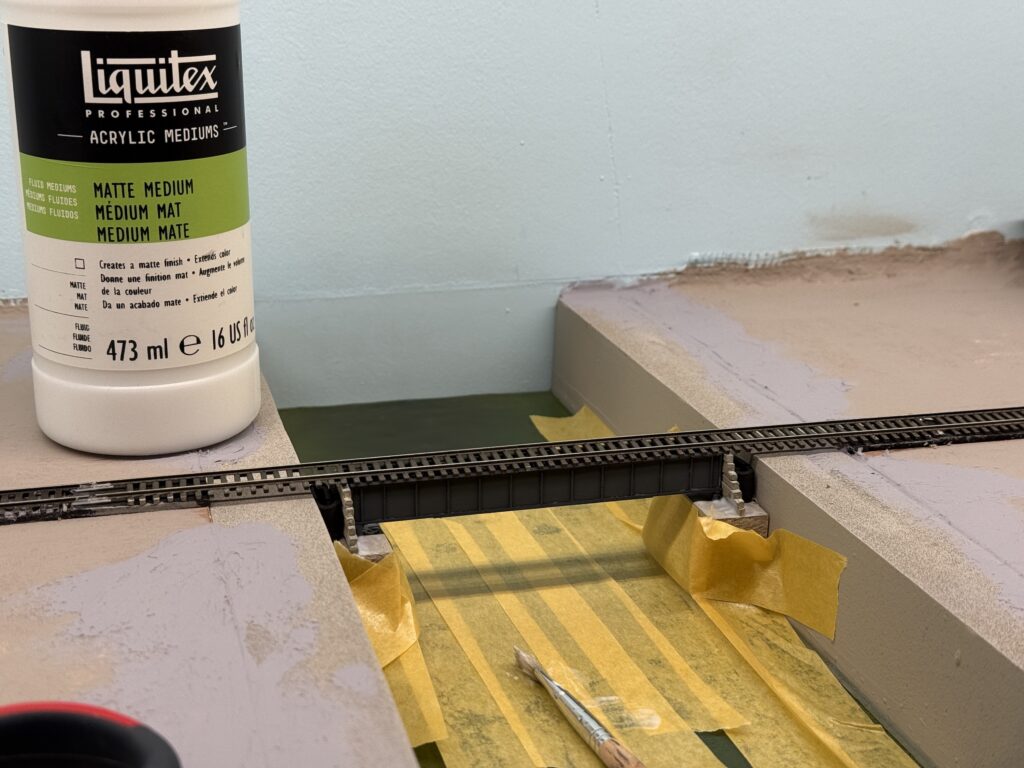
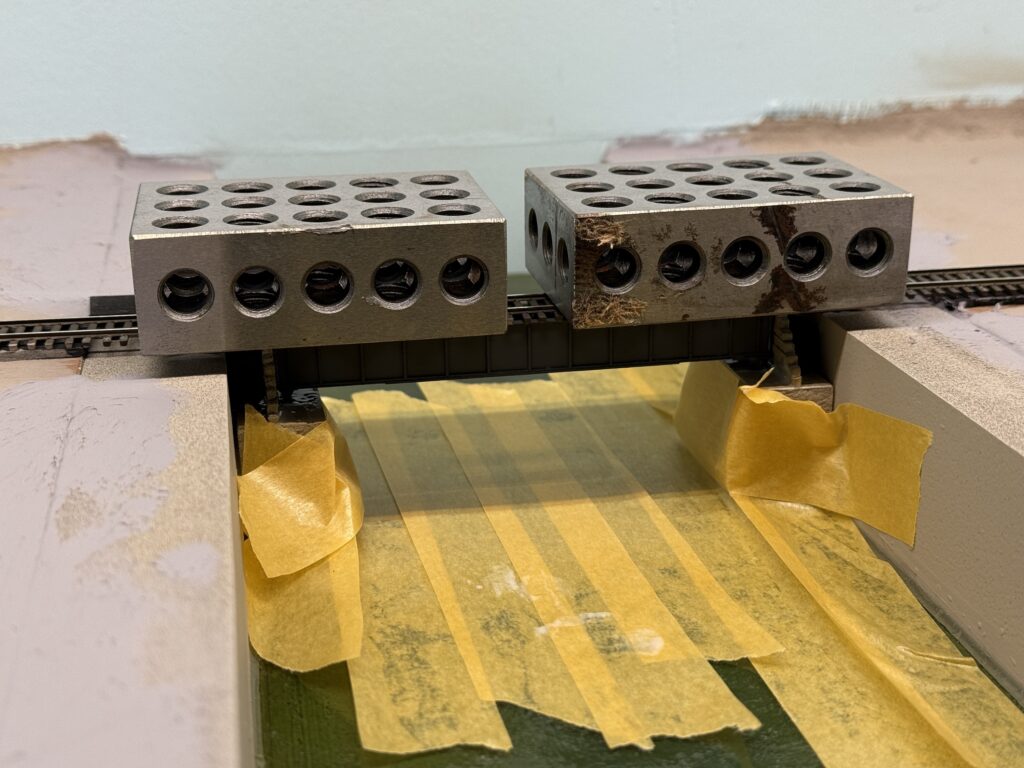
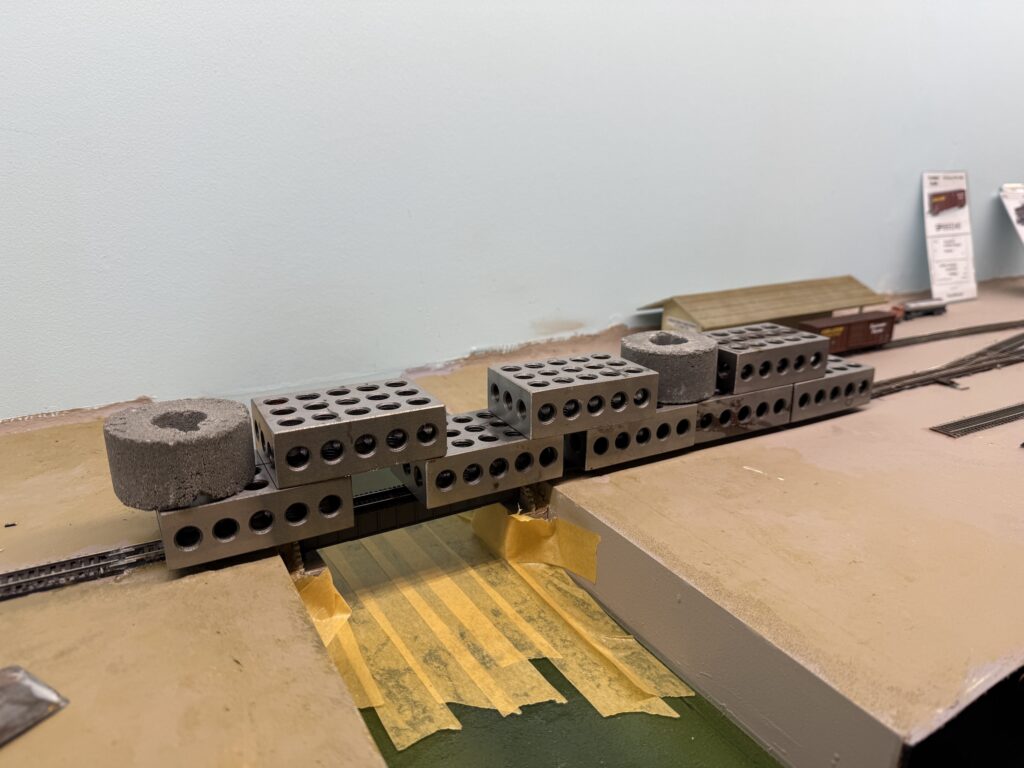
I glued the bridge to the abutments using Liquitex Matte Medium. Then, I secured the wooden retaining walls with more matte medium.
To keep everything aligned, I inserted a small piece of EVA foam to press the wall against the bridge. Afterwards, I placed a couple of metal weights on top of the bridge and let the glue dry.
I added some papier-mâché terrain behind the retaining walls and painted everything a tan color.
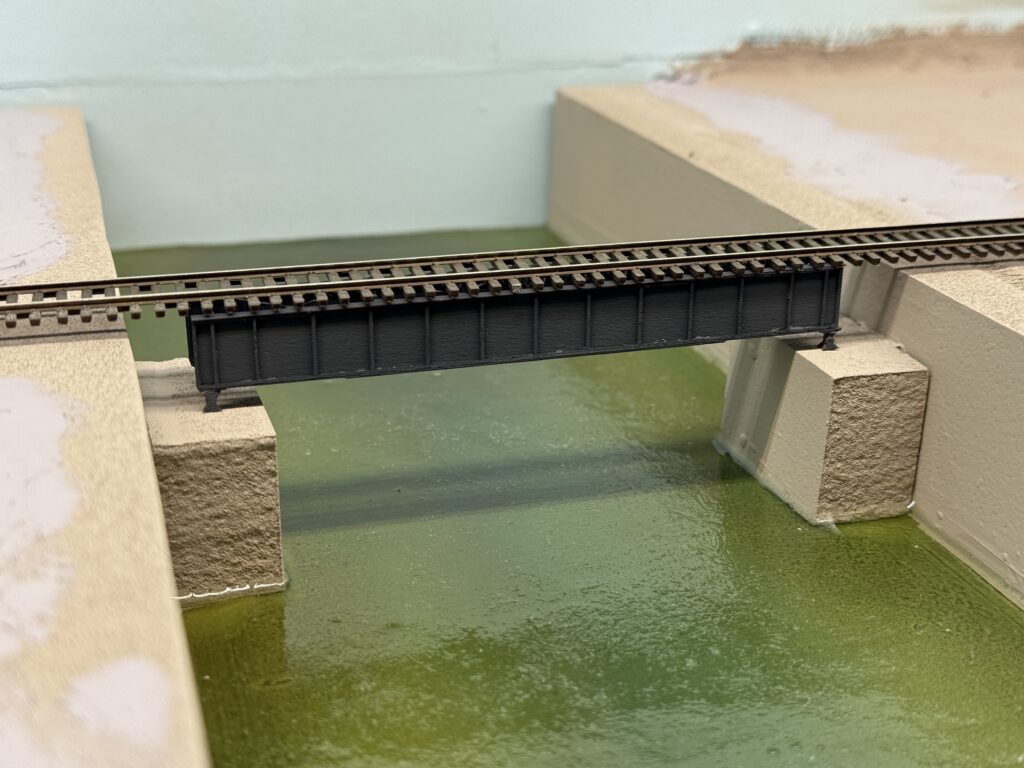
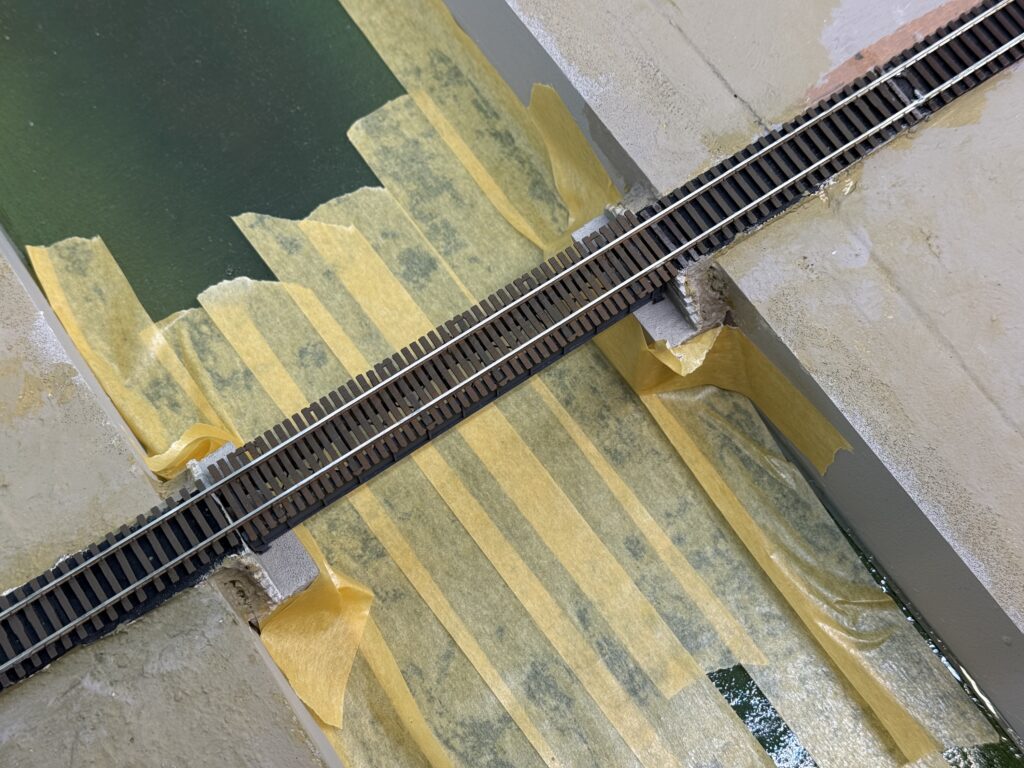
I prepared the bridge track with the correct tie spacing and soldered the feeders. Then, I carefully measured the section to install it in place of the temporary flex track I had used before the bridge was ready.
Once the track was in place, I connected all the feeders to the main bus, cleaned the rails, and tested the track.
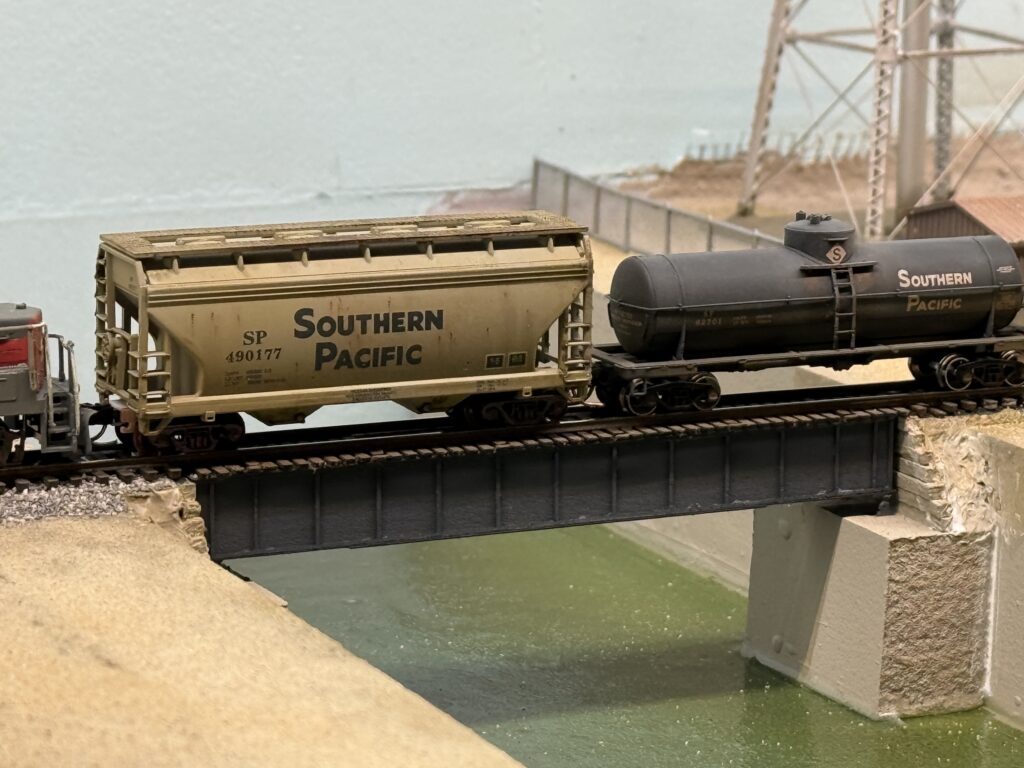
Here is the final result. It is still missing some terrain and vegetation around the edges, but overall the scene already feels much more complete.
The layout corner where the ConRock Ready-Mix Cement Plant is located will be the first area to receive scenery.
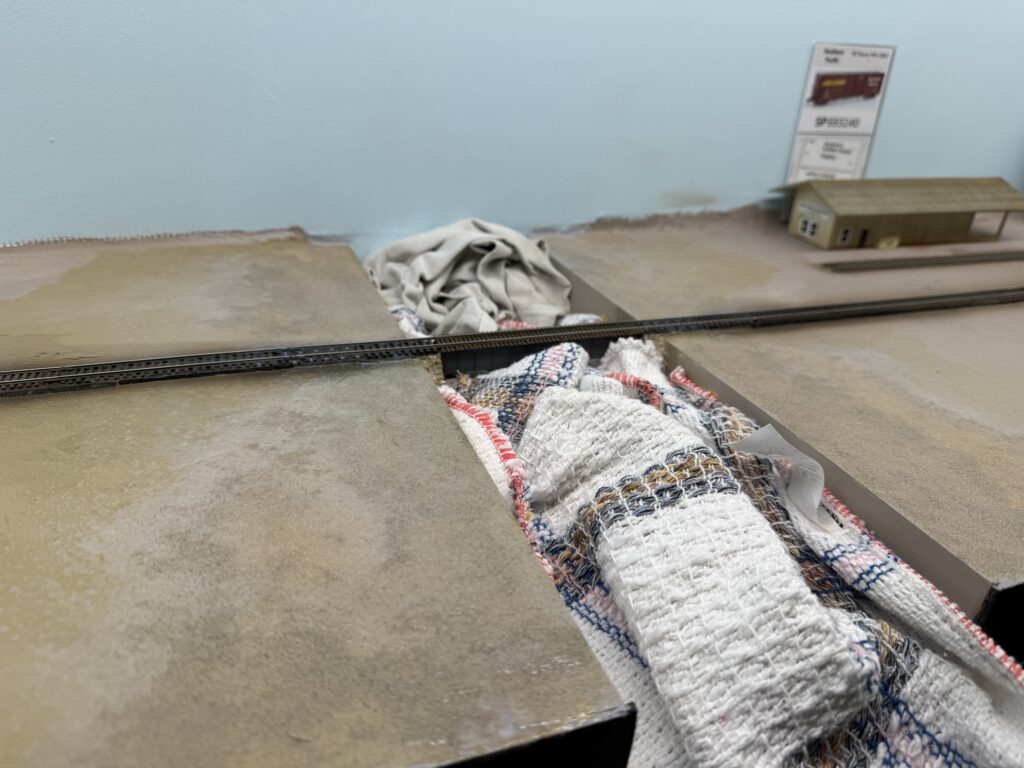
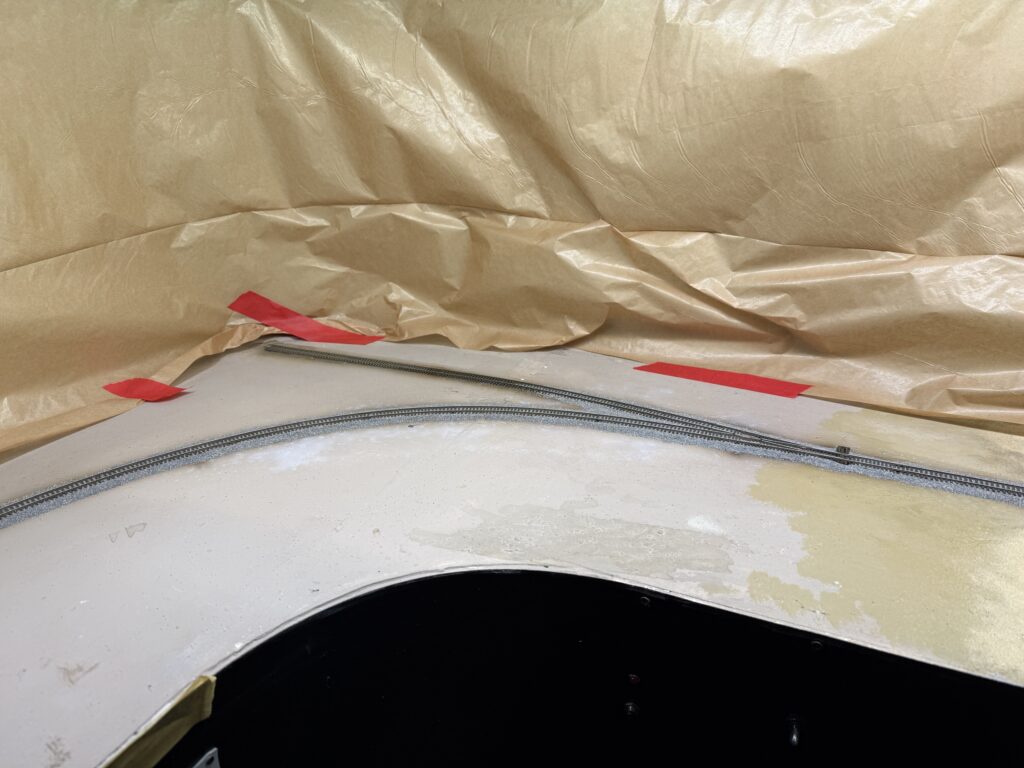
I added rough terrain texture near the bridge and ballasted the first section of track. To protect the bridge scene, I laid a couple of towels over the riverbed.
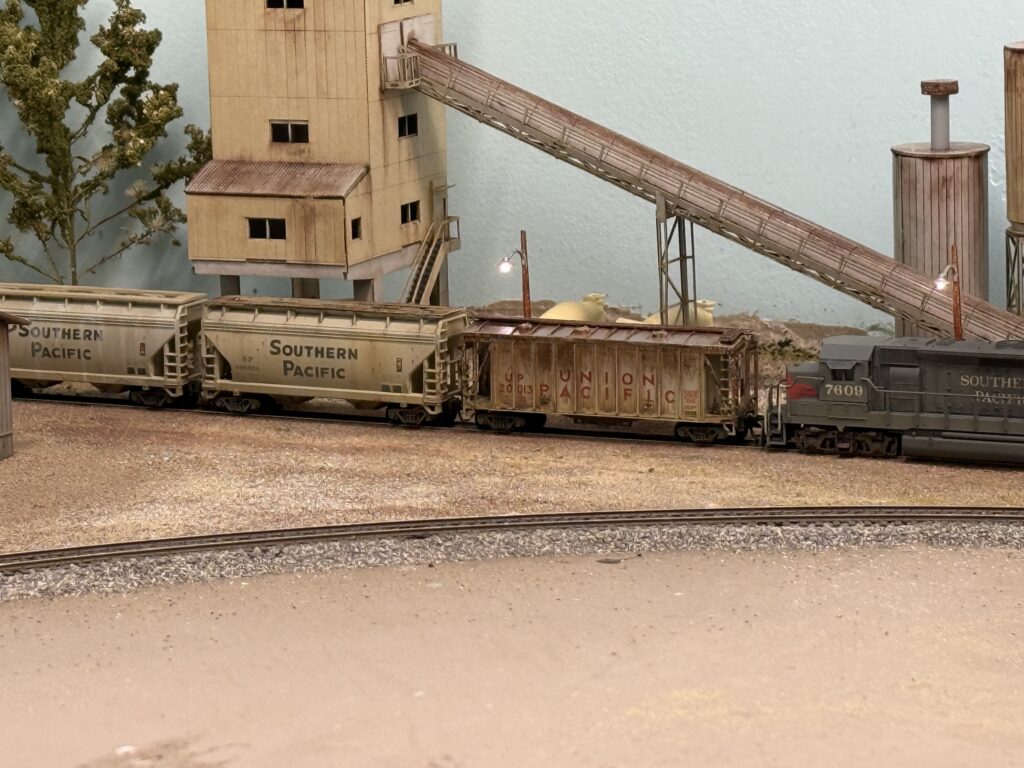
Then, I installed the cement plant structure. The building is a Japanese laser-cut paper kit that fits my needs perfectly.
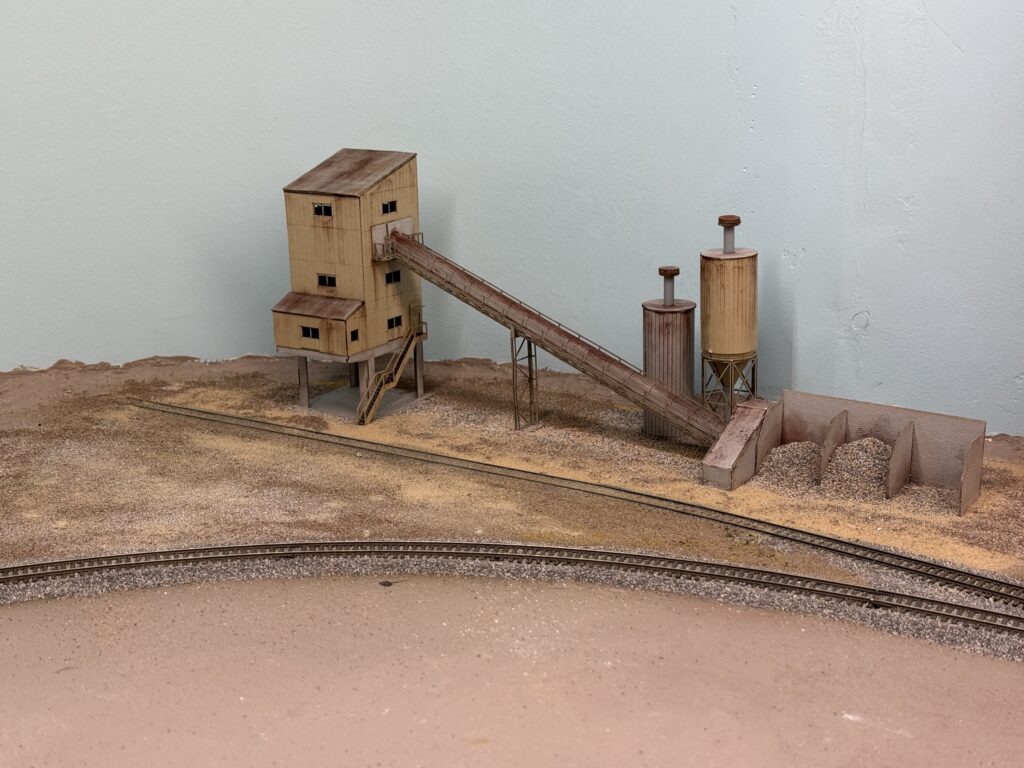
The kit is made by a Japanese brand called Advance. It is a 1:150 scale model, but it still looks very good and fits the scene nicely.
I first sprayed a 50:50 mix of alcohol and water to reduce surface tension. Then, I sprinkled on some terrain powders and followed up with a 50:50 mix of matte medium and water.
The kit was weathered with powdered pigments, and the surrounding terrain was glued in place using Liquitex Matte Medium.
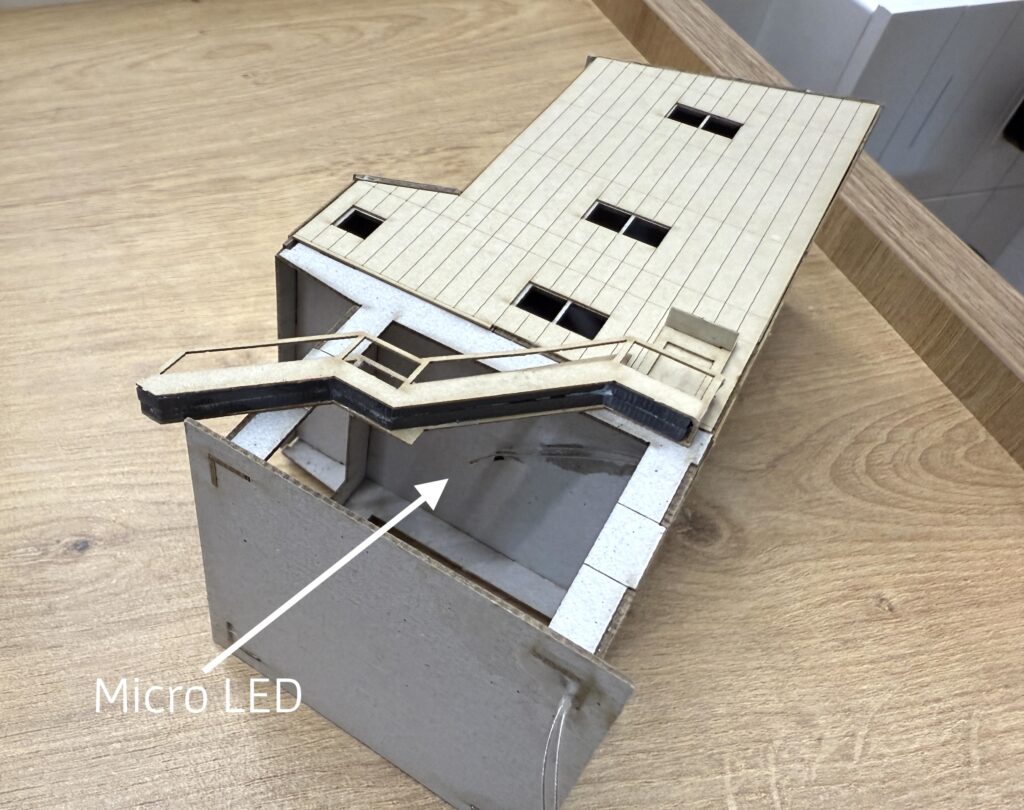
Before securing the structure to a sheet of styrene, which was later glued to the plywood base, I installed a micro LED to illuminate the scene at night. I secured the LED with CA glue and poked a hole in the structure base to run the wires through.
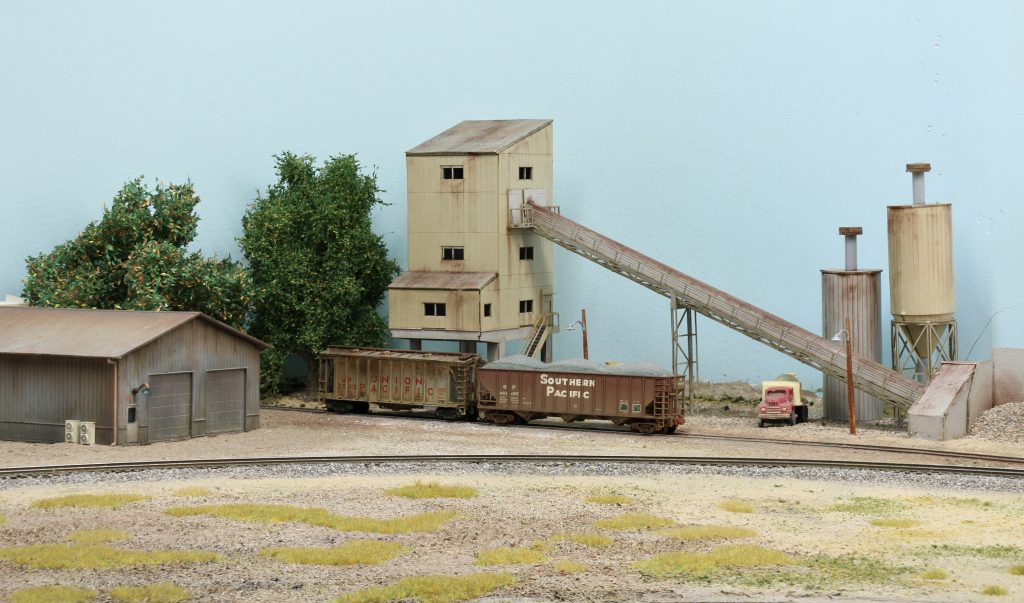
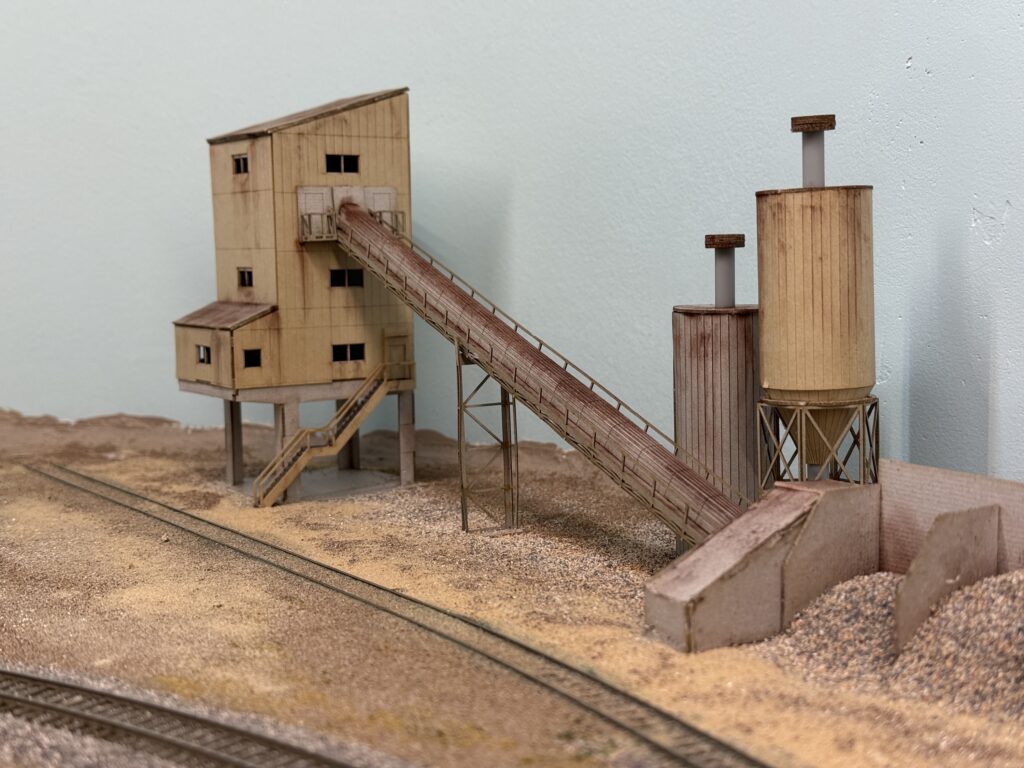
The cement plant is finally in place and it feels like the scene has gained real character. Next I will focus on adding life around it, because the area still looks a bit empty.
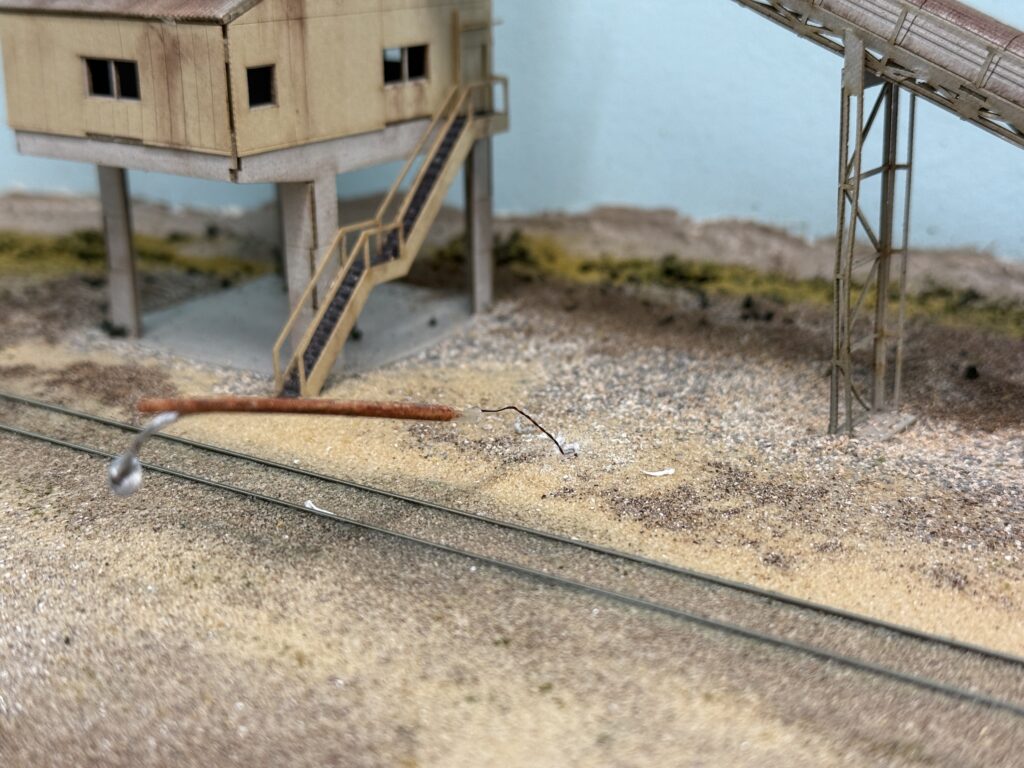
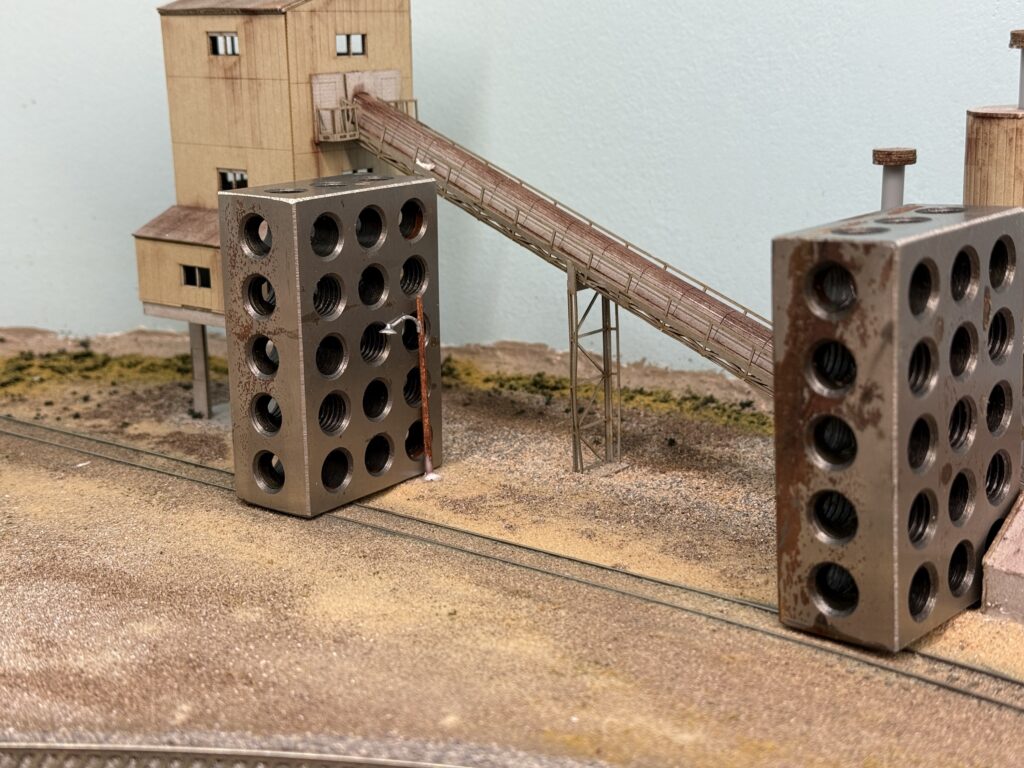
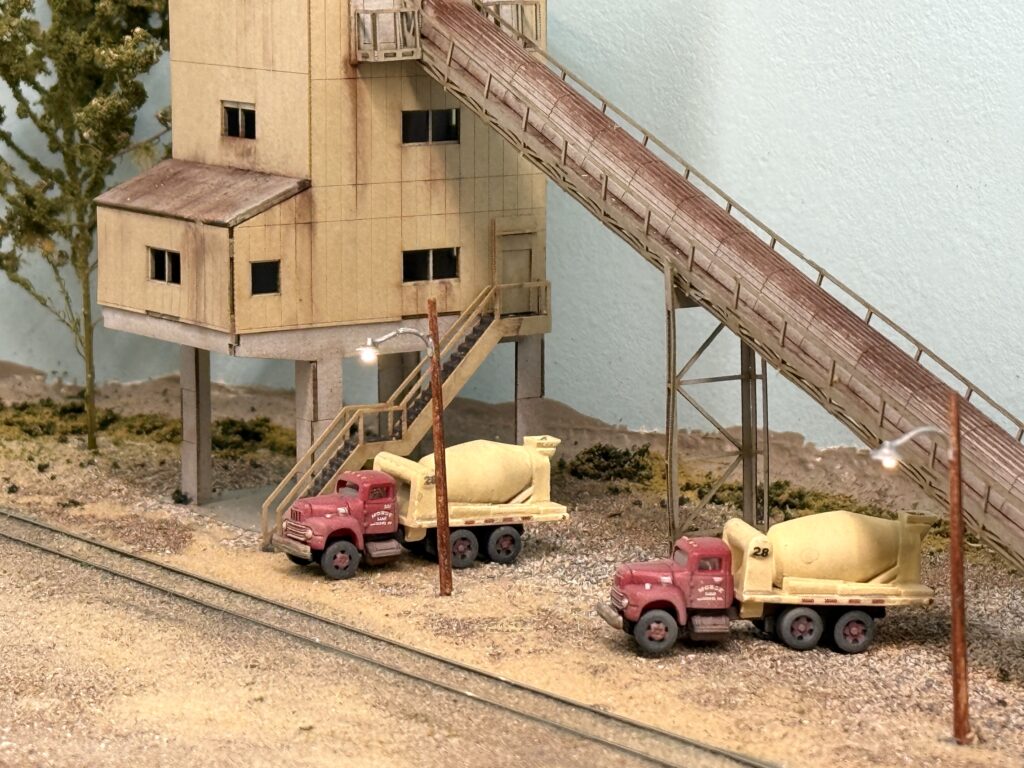
I added a couple of Woodland Scenics wooden streetlights. I drilled two holes, passed the wires through them, and glued the streetlights in place with matte medium. While the glue dried, I used some metal machine blocks to keep the poles in their final position.

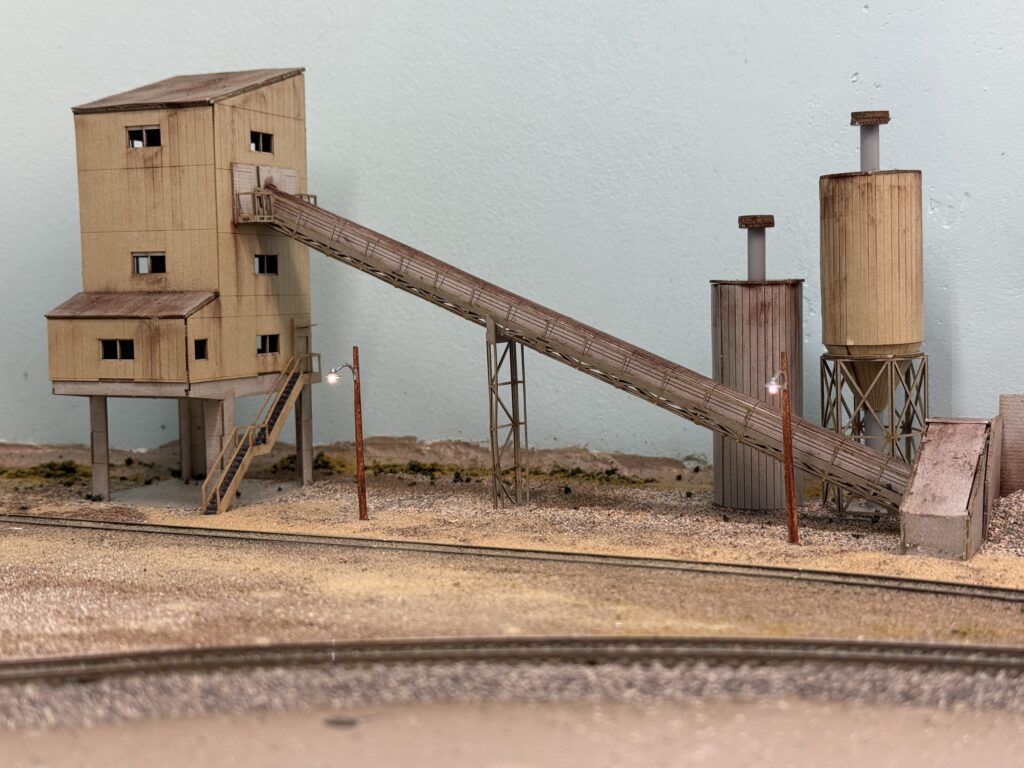
Afterwards I positioned a couple of concrete mixer trucks near the loading spots and added a tree.
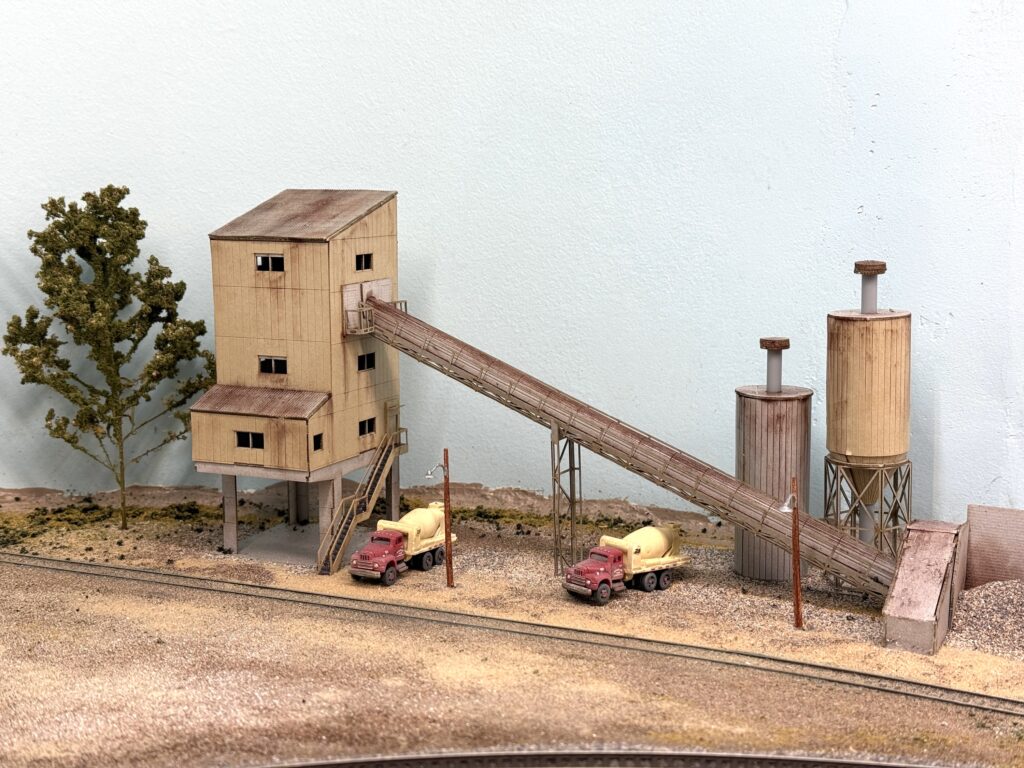
Once more vegetation is set, I will install a metal fence to frame the whole structure. So the scene will grow step by step and the finished area should blend nicely with the rest of the layout.
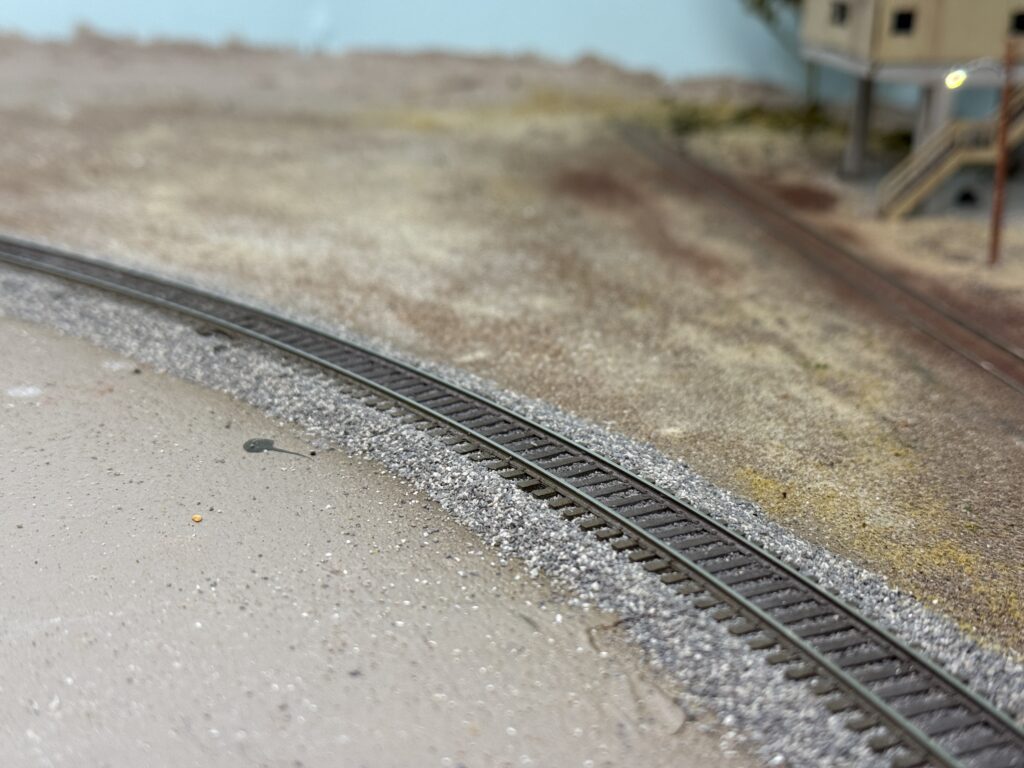
Adding track ballast is one of my favorite parts of the process. It is the stage when a model railroad truly starts to take shape and look real, like when I painted the track.
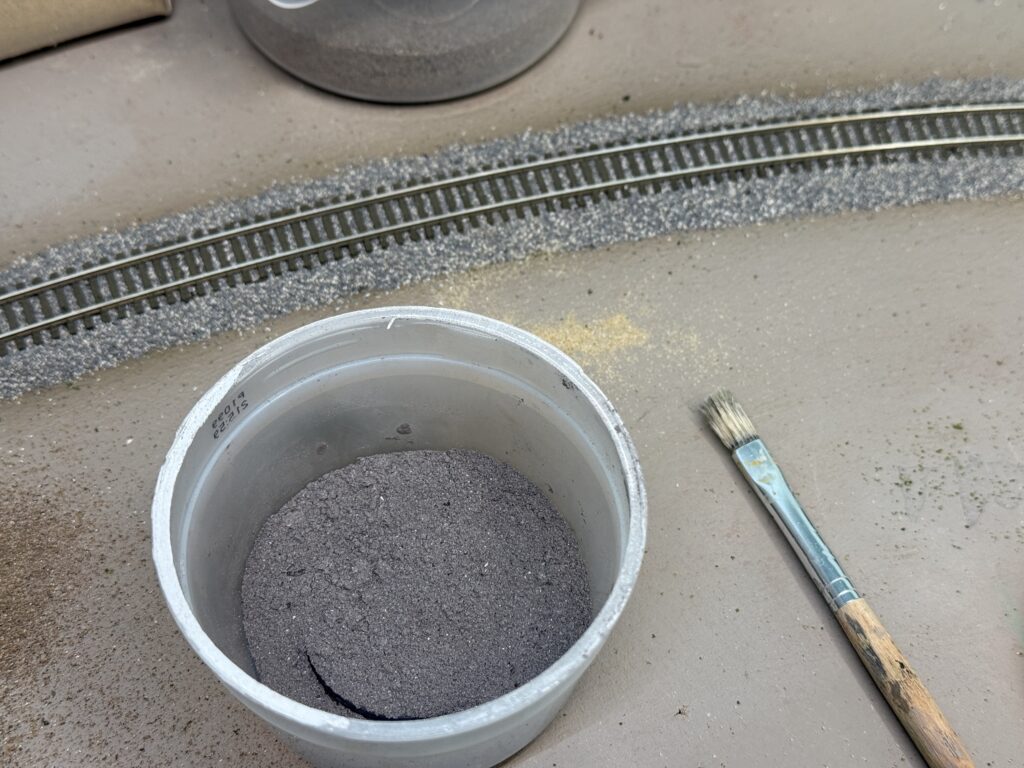
Afterwards, I used Woodland Scenics fine ballast as I usually do. This time I mixed equal parts of Gray (B1375) and Light Gray (B1374). I spread the ballast with a spoon, then shaped it carefully with my index finger and a soft paintbrush.
After that, I made sure no ballast remained on the ties or along the rail sides. I also payed special attention to the turnouts, usually avoiding the points area altogether.
With some careful painting, it is easy to disguise the missing ballast.
After the ballast was in place, I misted the tracks with a 40:60 mix of 99.9% isopropyl alcohol and water, letting it soak thoroughly. This helps break the water’s surface tension and allows the glue to penetrate the ballast. Once it was well soaked, I sprayed a 50:50 mix of water and Liquitex Matte Medium.
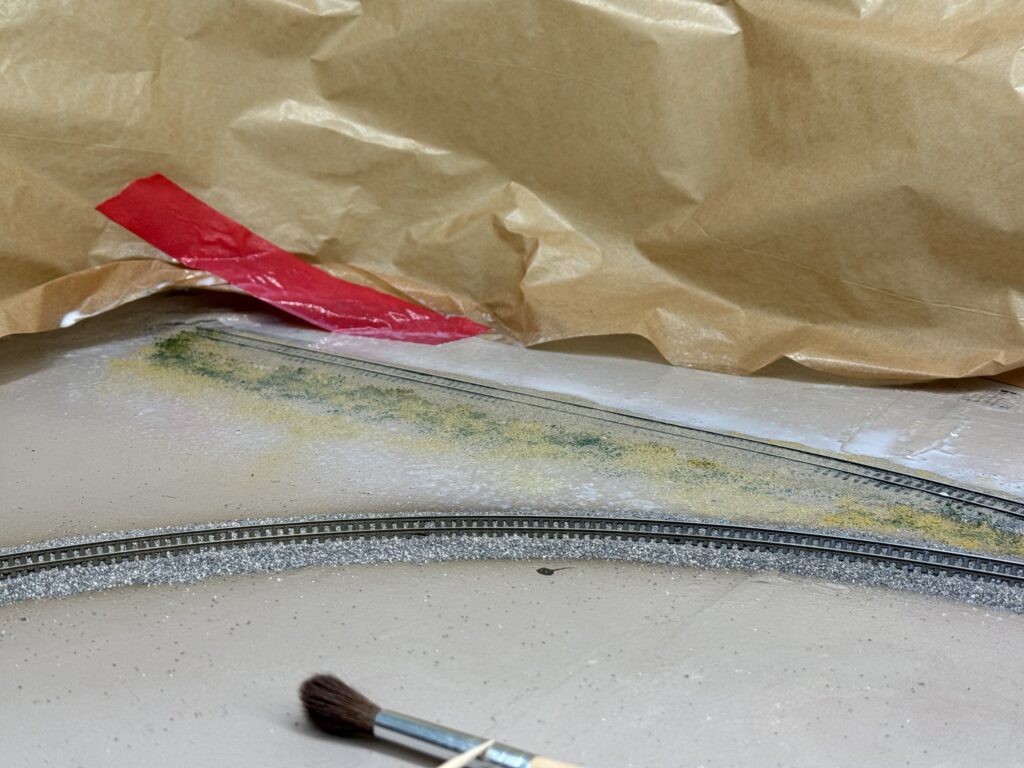
At the ConRock Ready-Mix Cement Plant, I used some tan terrain material to slightly bury the track and give it a more realistic, dirt-embedded look.
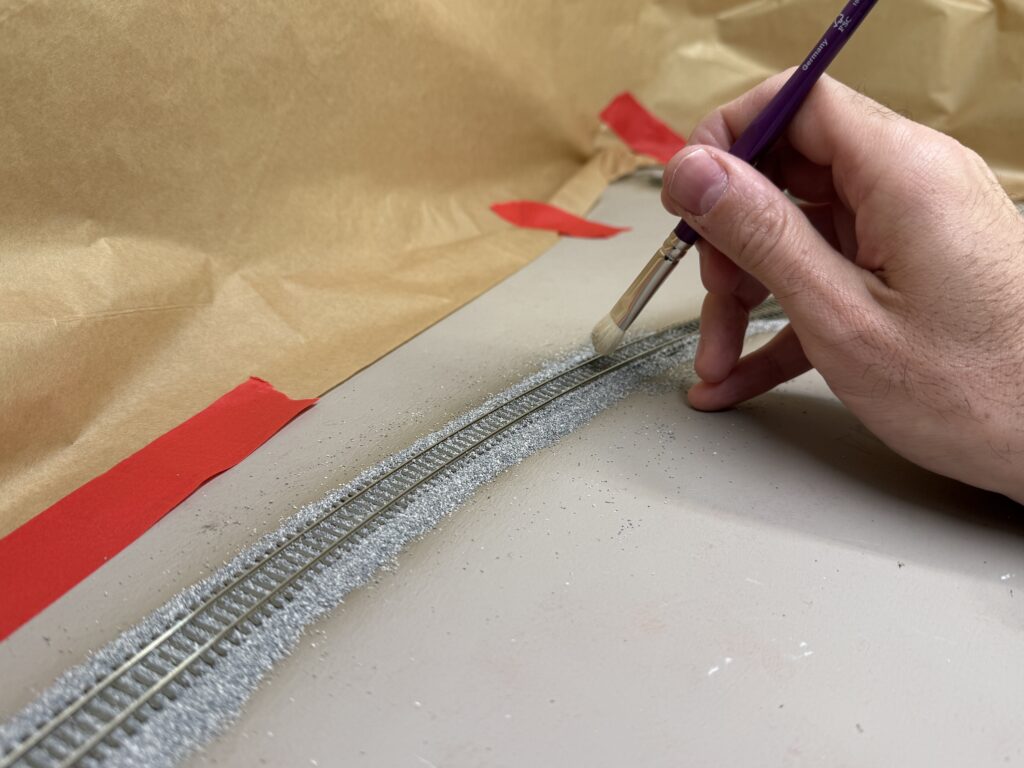
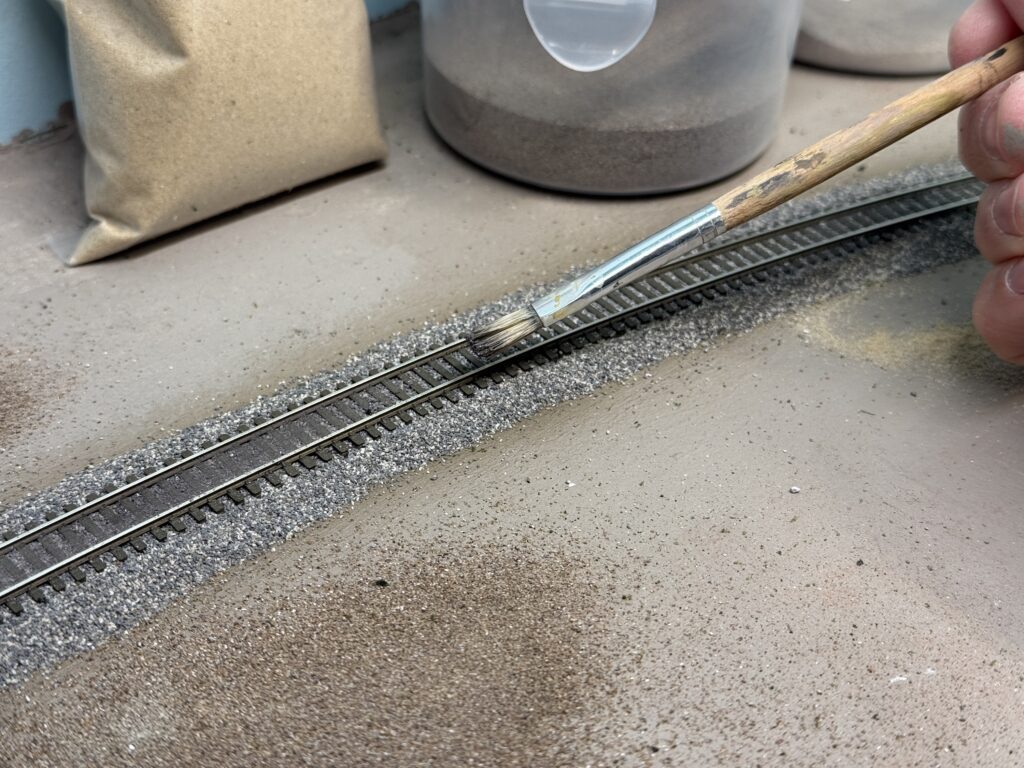
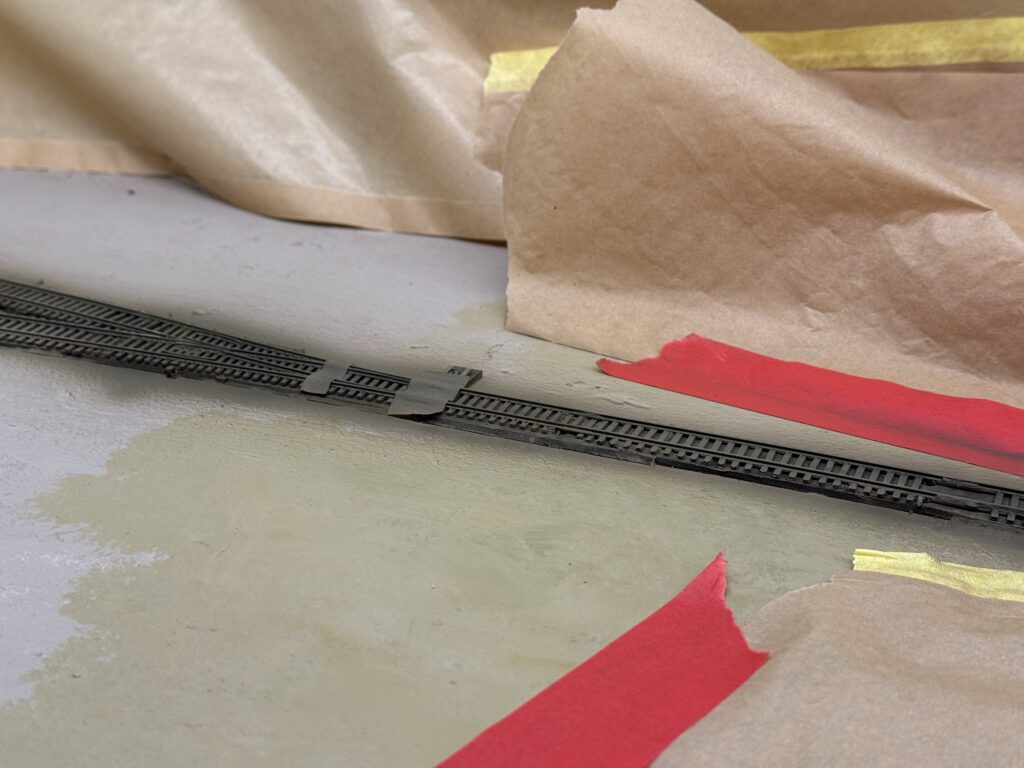
I weathered the area between the rails using a mix of plaster and black powdered pigments in a 2:1 ratio.
Then, I spread the mixture between the rails with a fairly stiff flat brush. Afterwards, I misted the area with water, which activated the plaster and sealed everything firmly in place.

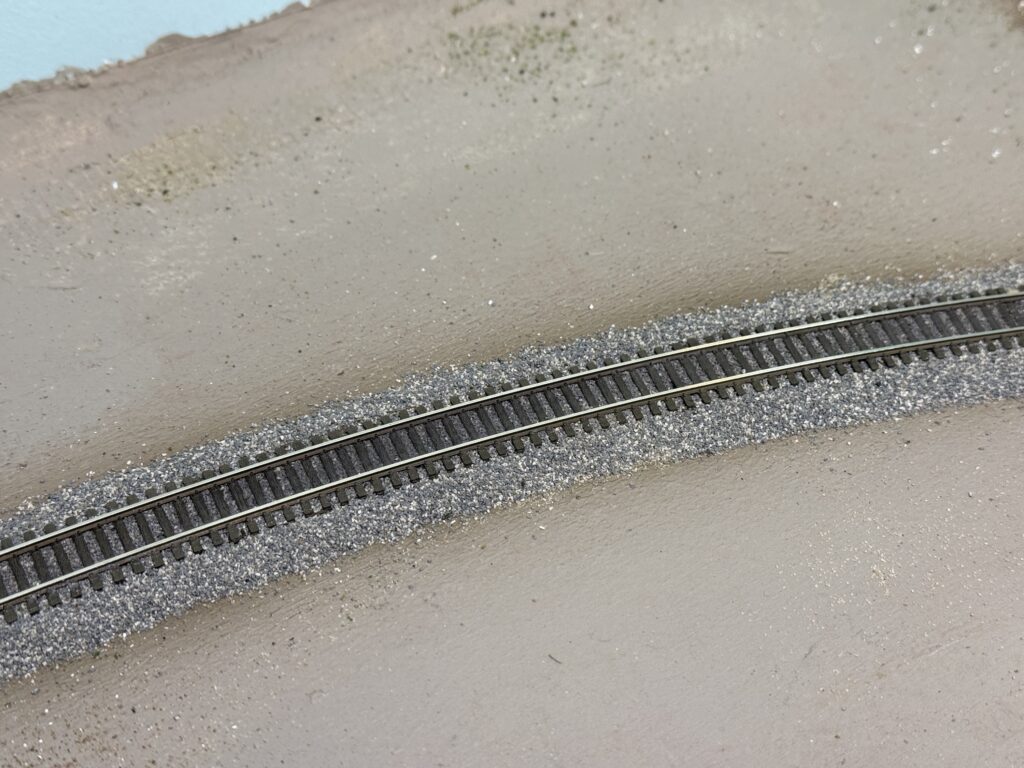
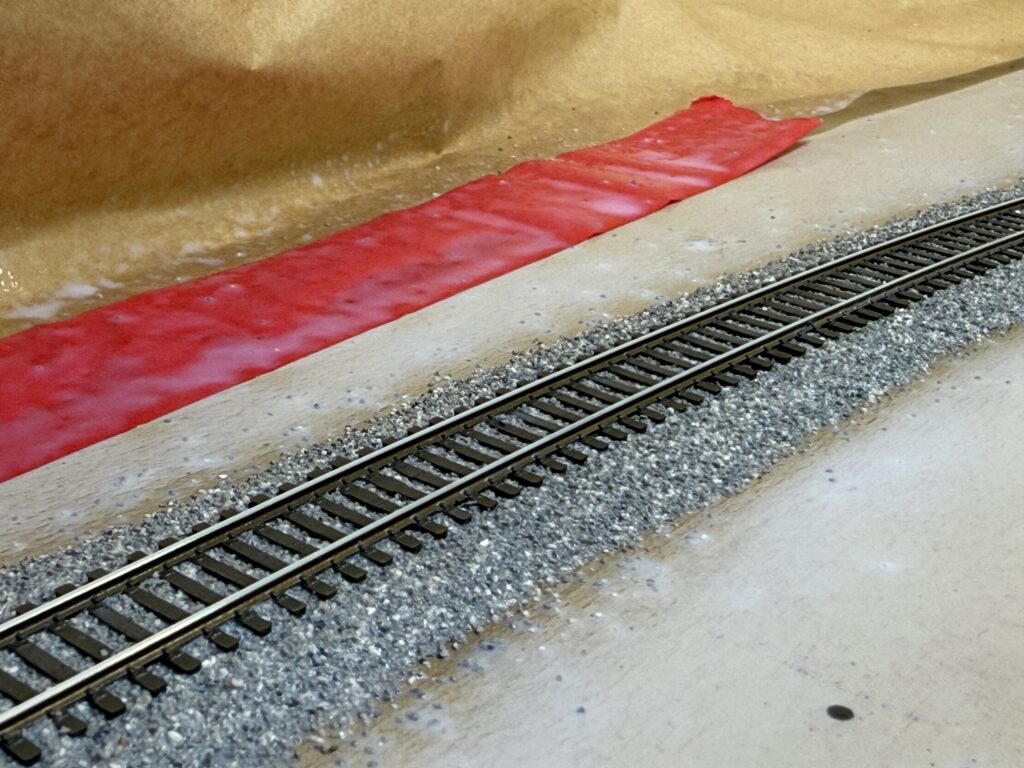
Here is a photo of the weathered track after the plaster of Paris and pigment mix had fully dried.

I found a fifteen-year-old bottle of Polly Scale Railroad Tie Brown that I had used on my previous SP Coast Line layout to paint the track.
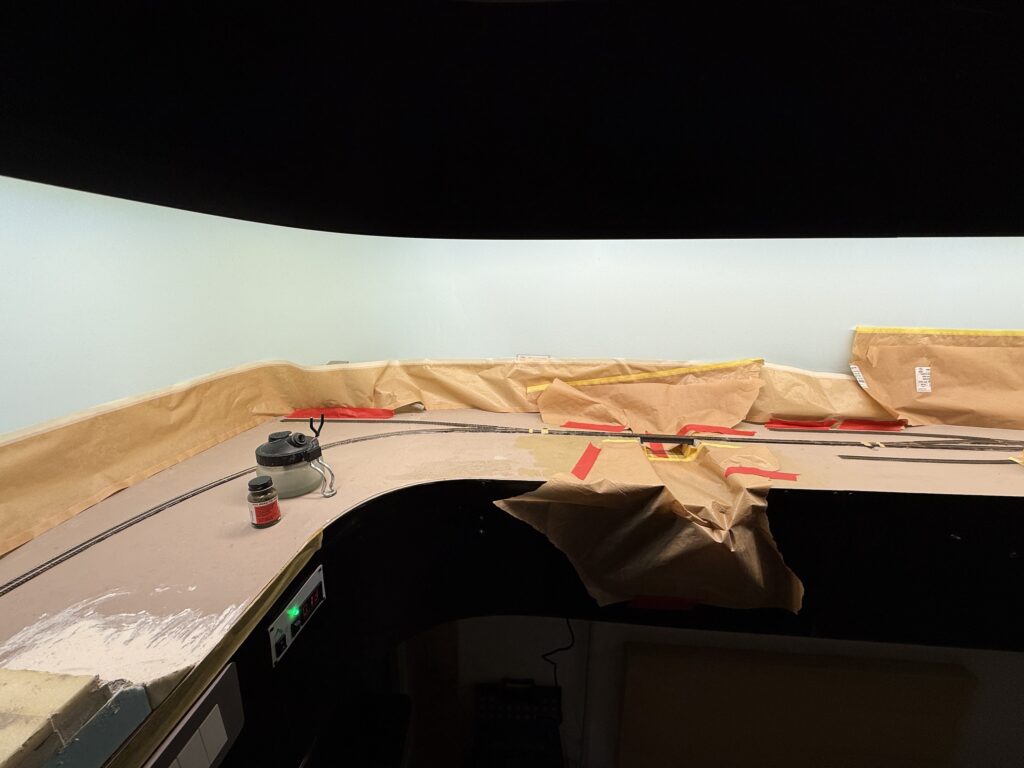
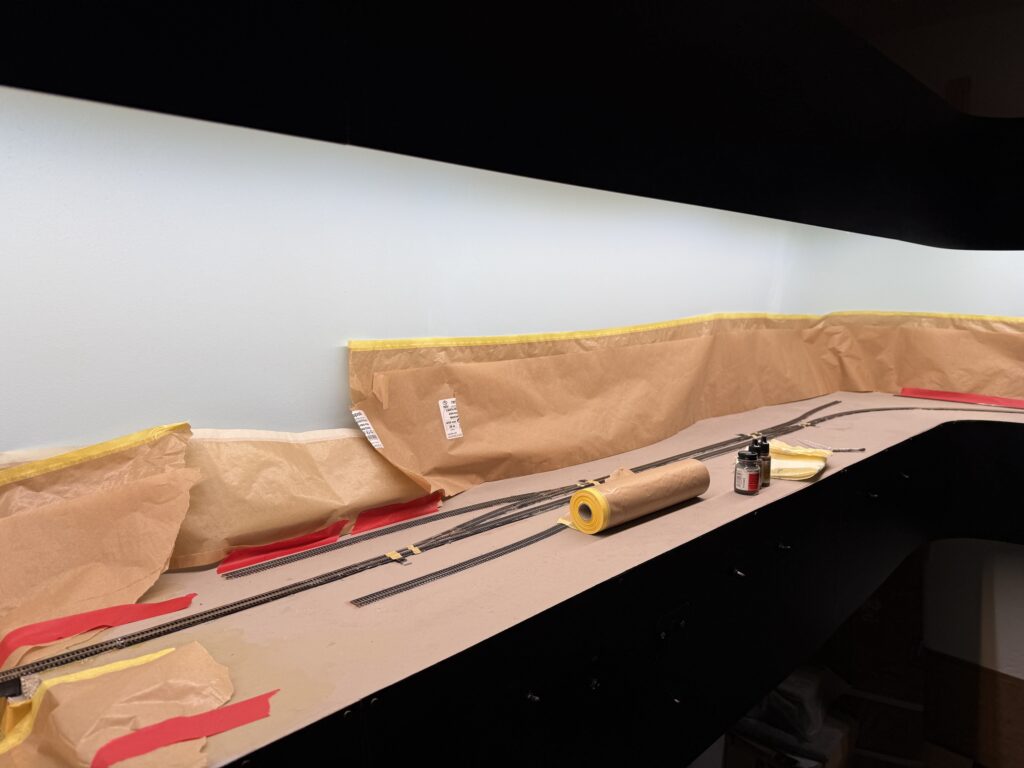
The paint had aged very well, so I was able to use it and airbrush it over all the tracks.
I masked the areas where the points hinge and where they touch the stock rails.
Afterwards, I used a fine paintbrush to carefully paint the masked sections, making sure the paint did not interfere with electrical contact.
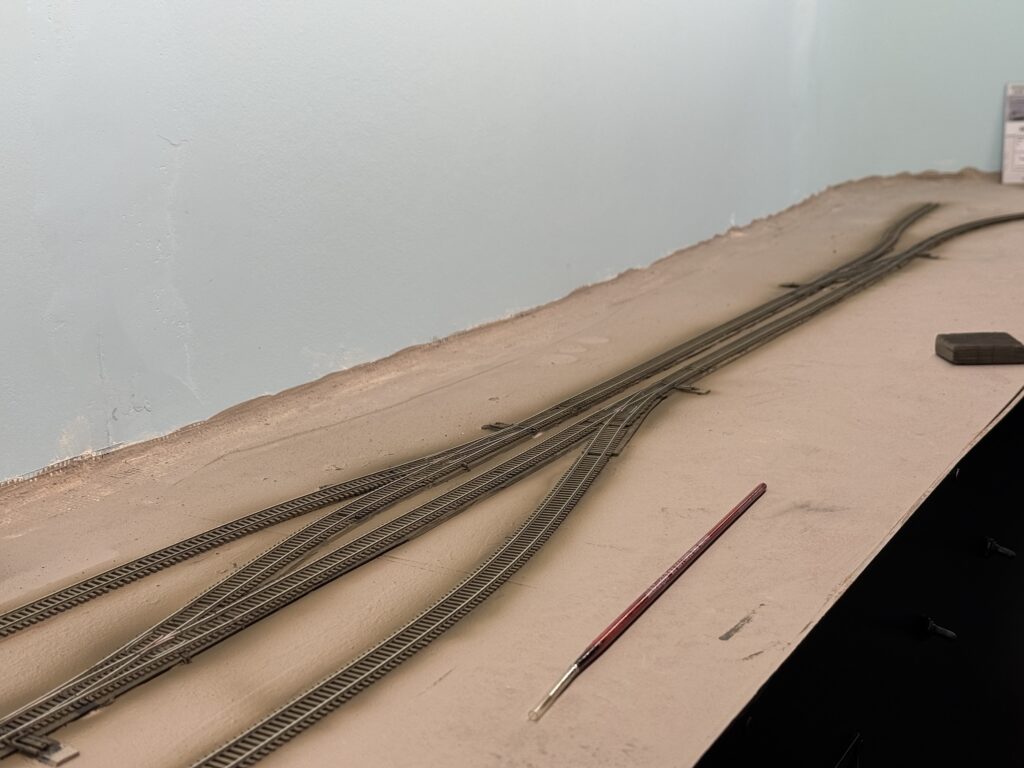
A painted track makes a huge difference in the final appearance of a layout. Even a light coat of color immediately tones down the unrealistic shine of the raw plastic ties and the bright nickel-silver rails.
The Atlas code 55 ties, in particular, have a uniform brownish tone that looks toy-like until blended with a more natural brown-gray wash. Painting before ballasting gives the scene a visual foundation. Rails, ties, and ballast will later merge into a single, believable texture.
Once weathered and ballasted, the track will no longer stand out as a manufactured part, but rather blend seamlessly into the landscape, enhancing the realism of the entire scene.