Month: February 2025

Painting an SP caboose

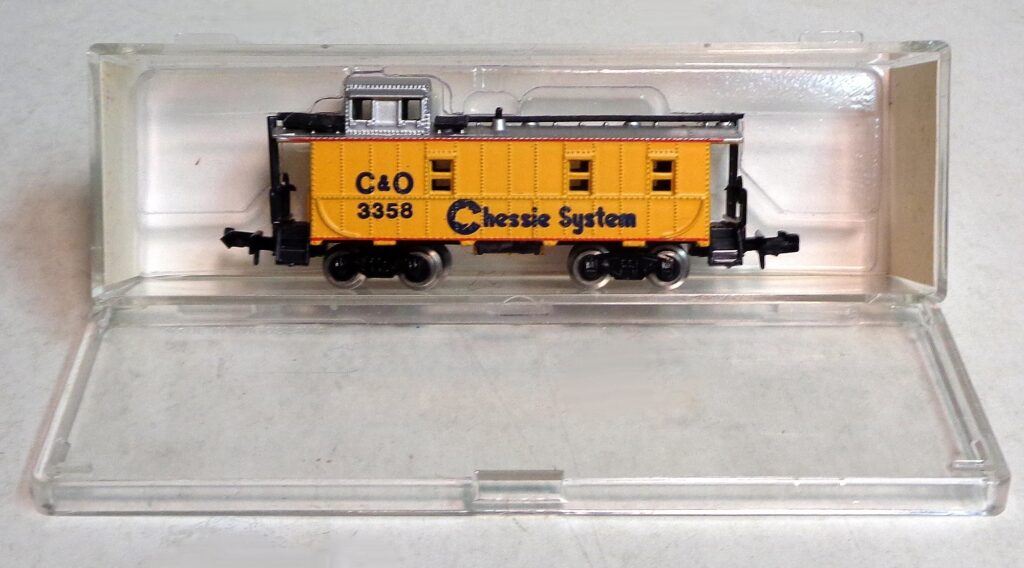
Painting an SP caboose, originally in Chessie System color scheme.

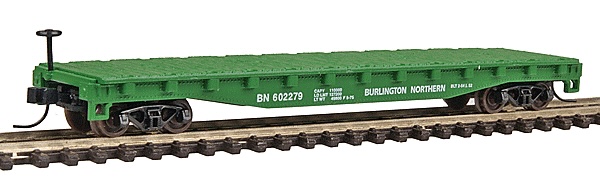
Step-by-step on painting an SP caboose. In the late 2000s, I was gifted an inexpensive (and rather imprecise) Chessie System caboose manufactured by Model Power. I wasn’t sure what to do with it until I found reference photos online. I discovered that some older cabooses were repainted with orange ends after 1955.

Chessie System N scale caboose

By the 1970s, it wasn’t uncommon to see these cabooses with their roofwalks and ladders removed. This inspired me to modify and repaint the caboose in Southern Pacific’s brown and Daylight Orange scheme, to use it on my N scale layout.

I know this model isn’t a perfect replica of the C-40-1 class caboose I’m aiming for, but I’m willing to accept the compromise. This project is a great opportunity to learn new techniques and, most importantly, have fun.
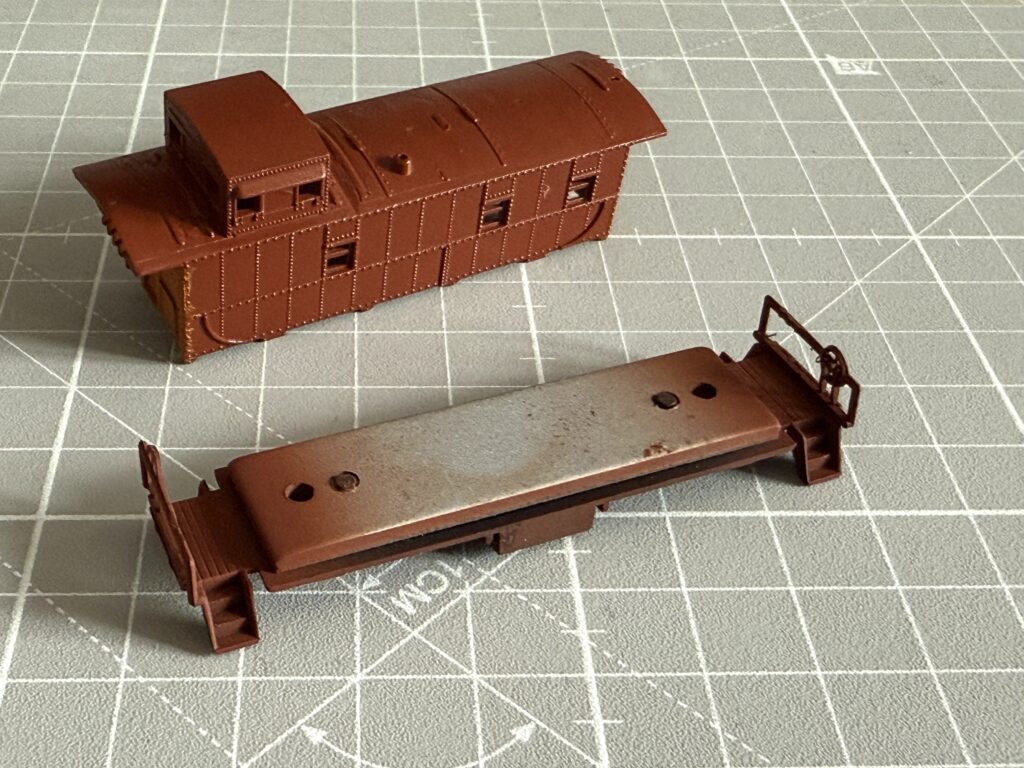
Filling holes

Using Tamiya Putty to fill the whole left by the removed roofwalks.

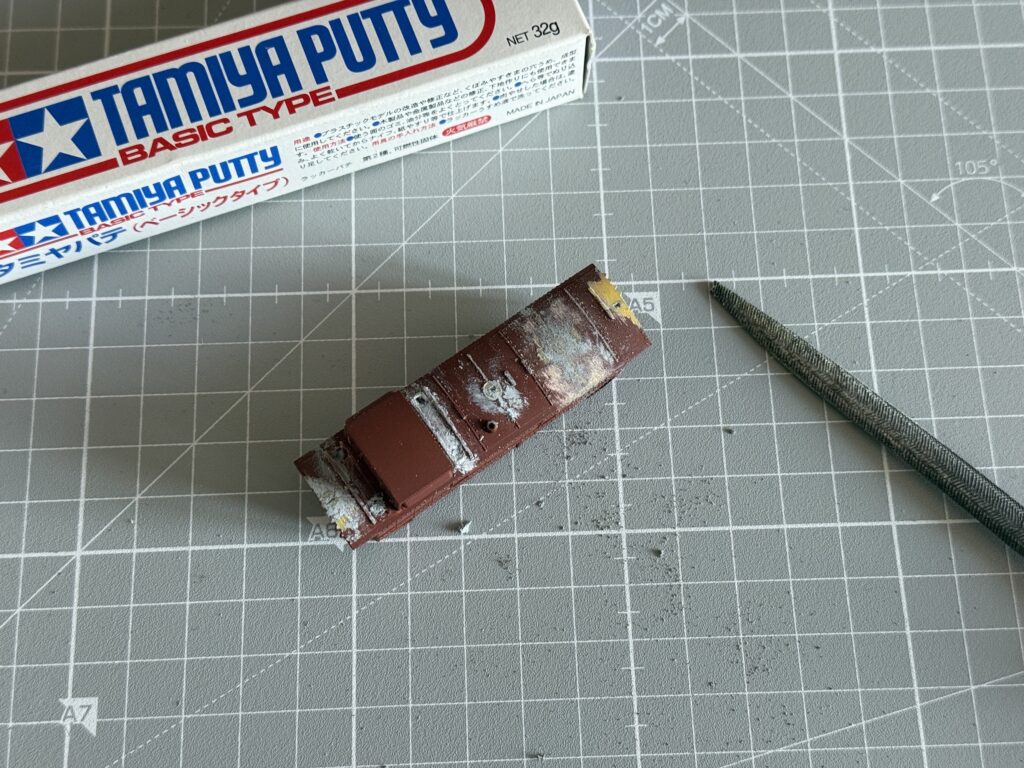
To fill the holes left in the roof after removing the roofwalks, I used Tamiya Putty.

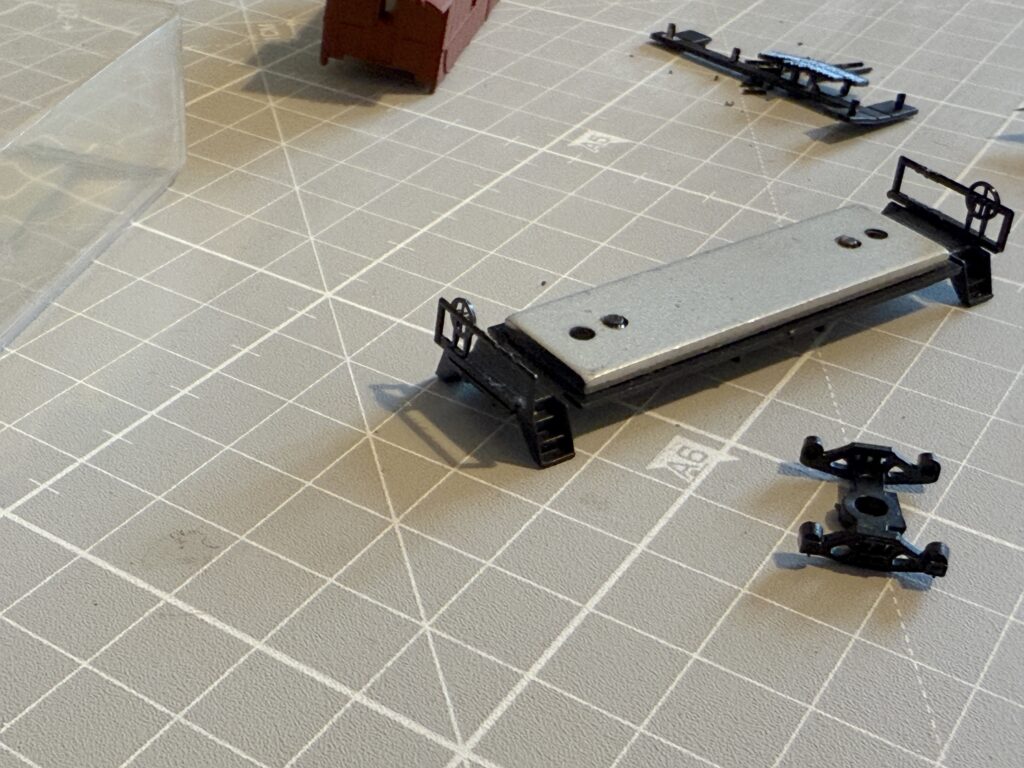
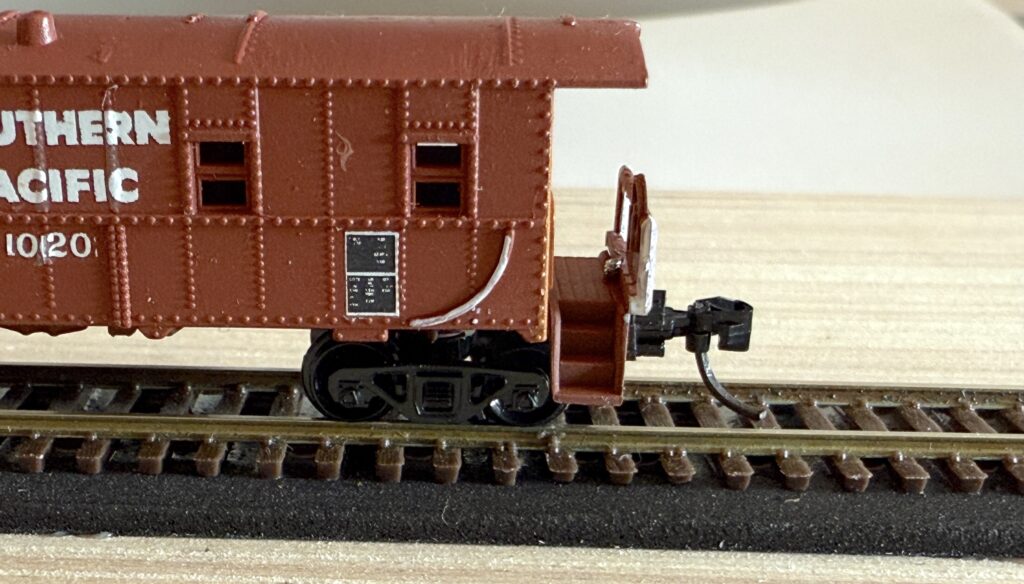
Using a hobby knife, I removed the ladders from the end platforms, leaving only the brake wheel and a low handrail. I also removed the Rapido coupler from the truck to install a Micro-Trains 1015 body-mount knuckle coupler.

Removing ladders from the end platform

Painting an SP caboose

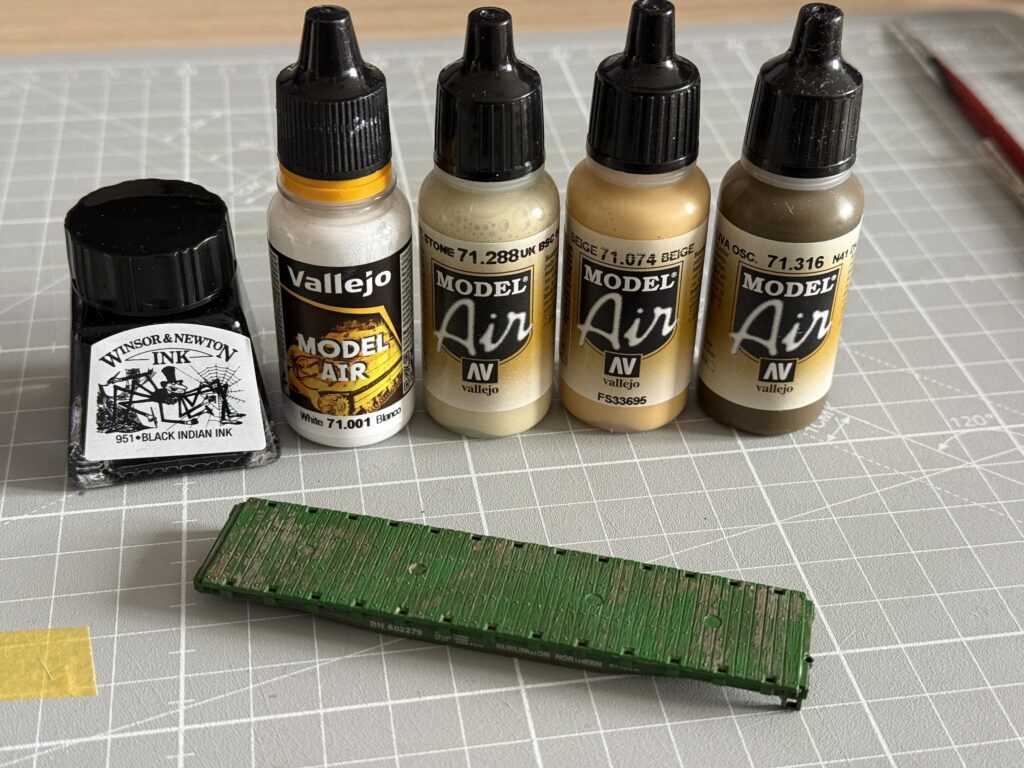
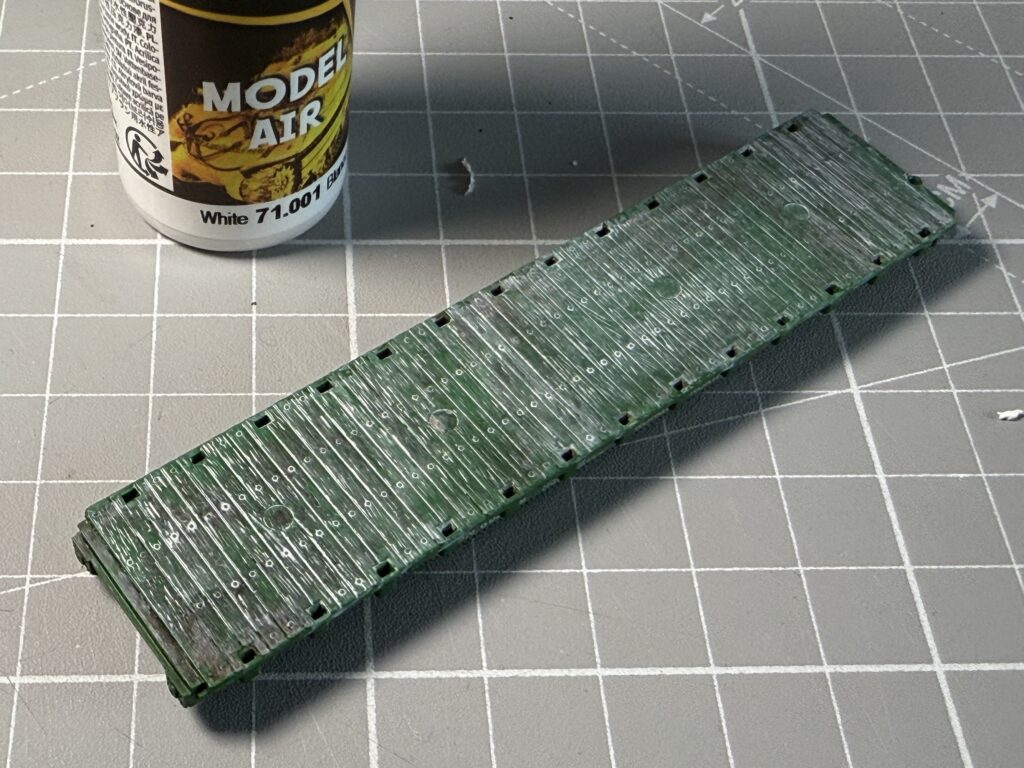
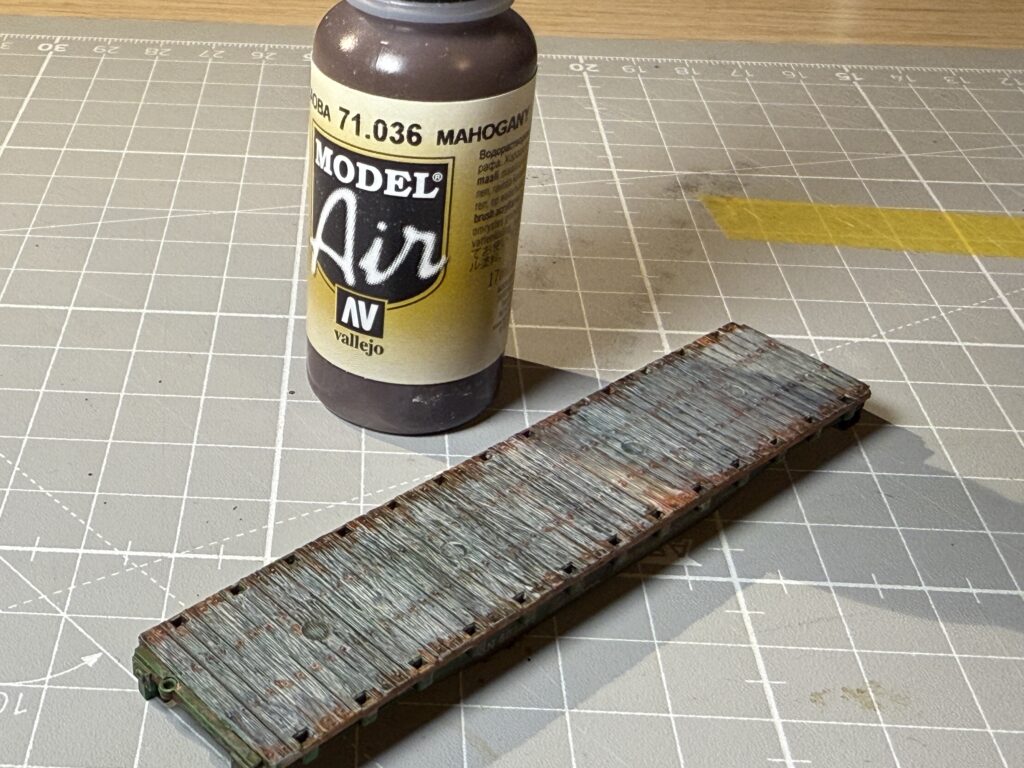
After filling the holes with putty and smoothly sanding them down, I painted the caboose. For the brown, I mixed two Vallejo Model Air colors, adding a few extra drops of Vallejo Brown RLM26 (71.105) to Vallejo Camouflage Medium Brown (71.038) instead of using a 1:1 ratio.

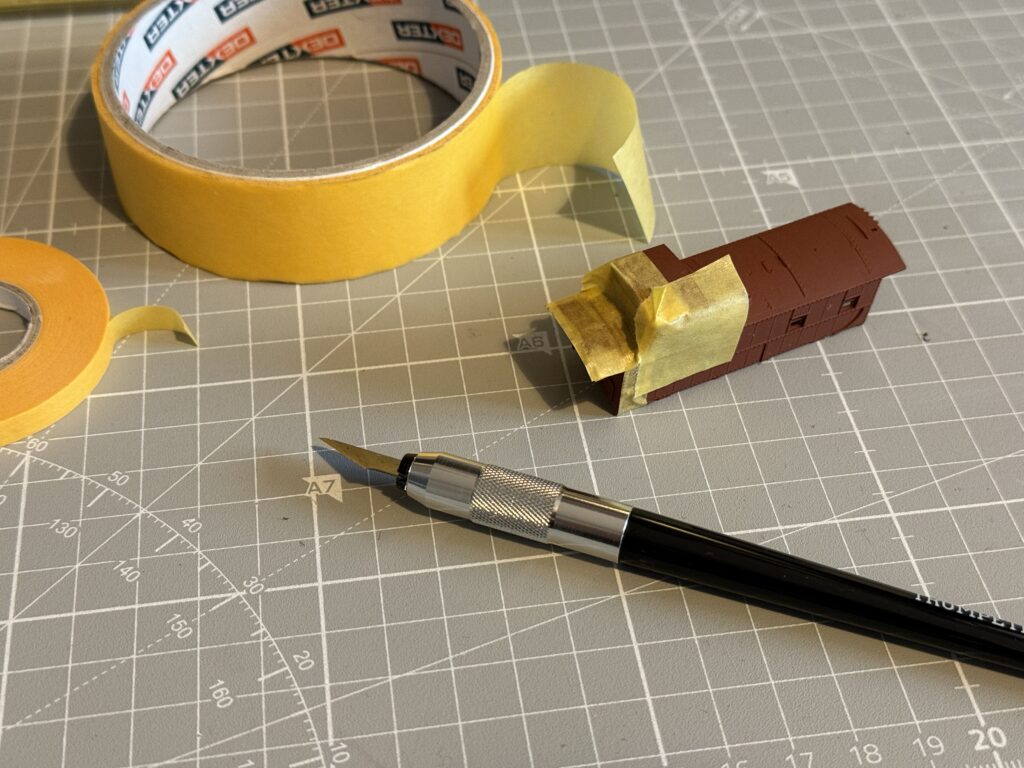
I then masked the shell for the Daylight Orange coat. I used Tamiya 6mm masking tape along with a wider masking tape purchased from a DIY store.

Painting an SP caboose: masking.

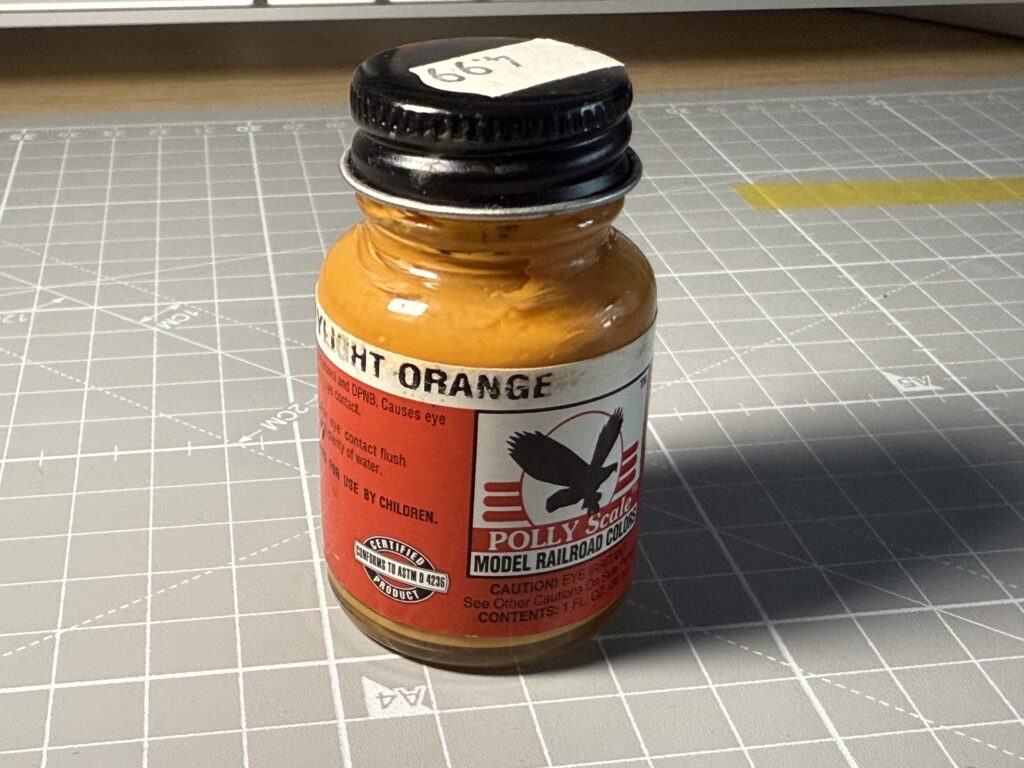
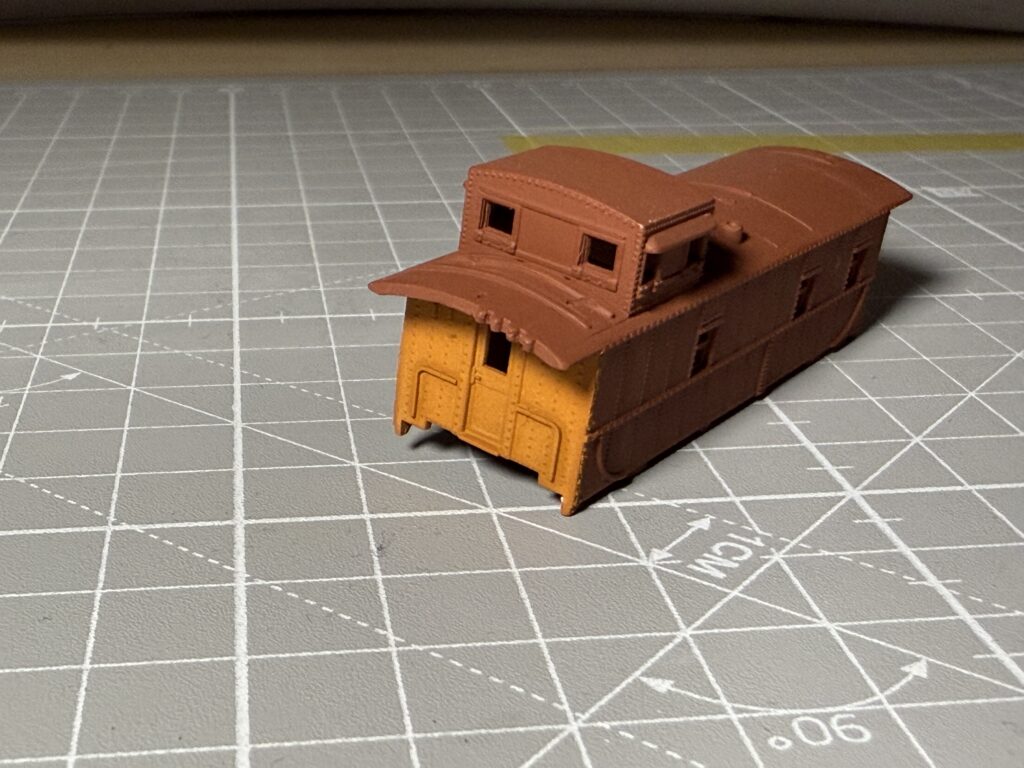
To paint the ends Daylight Orange, I used a very old bottle of (now discontinued) Polly Scale SP Daylight Orange that I’ve had since the mid-2000s. I carefully stirred the paint for a few minutes and thinned it at a 2:3 ratio (two parts paint and three parts thinner). Since the paint had aged poorly, I applied it in thin layers to achieve a smooth finish.

Discontinued SP Daylight Orange Polly Scale paint.

The shell is painted, and now I’m ready to paint the chassis. The stairs and the end platform will be painted brown.

Painting an SP caboose: main colors are done

After the paint have dried, I applied a coat of gloss varnish.

Still unlettered, this SP caboose now received a coat of gloss varnish.

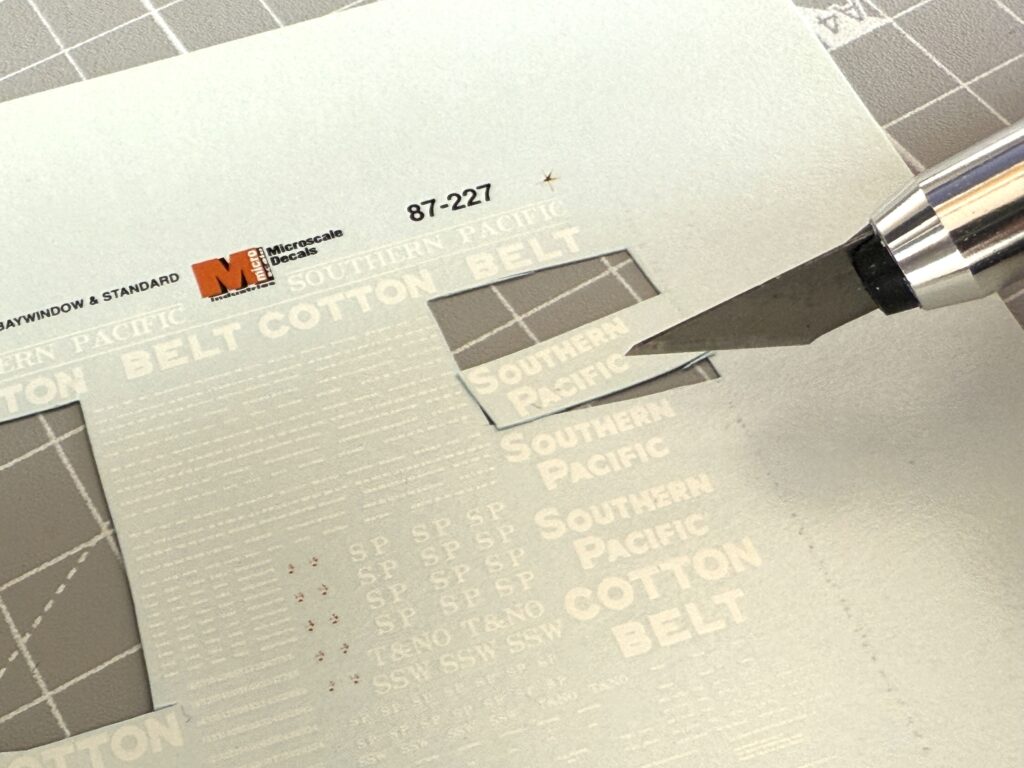
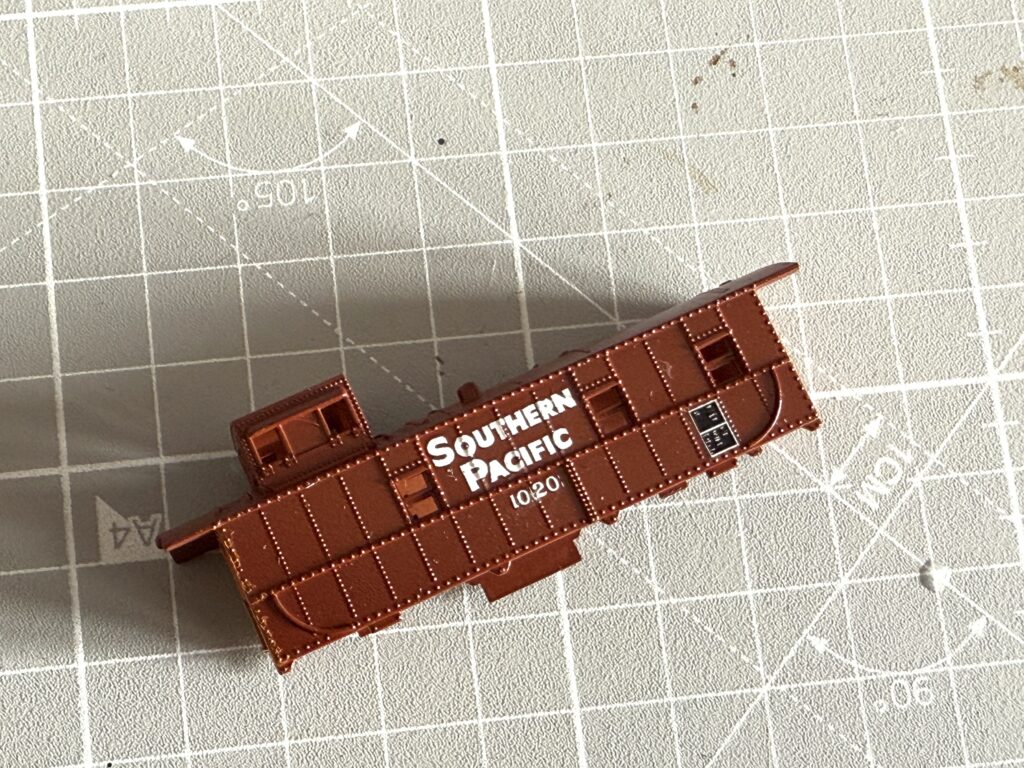
Lettering (applying waterslide decals)

To apply the decals, I first cut them out carefully, staying close to the printed edges for a clean finish.

Painting an SP caboose: decals and setting solutions
Cutting decal sheet

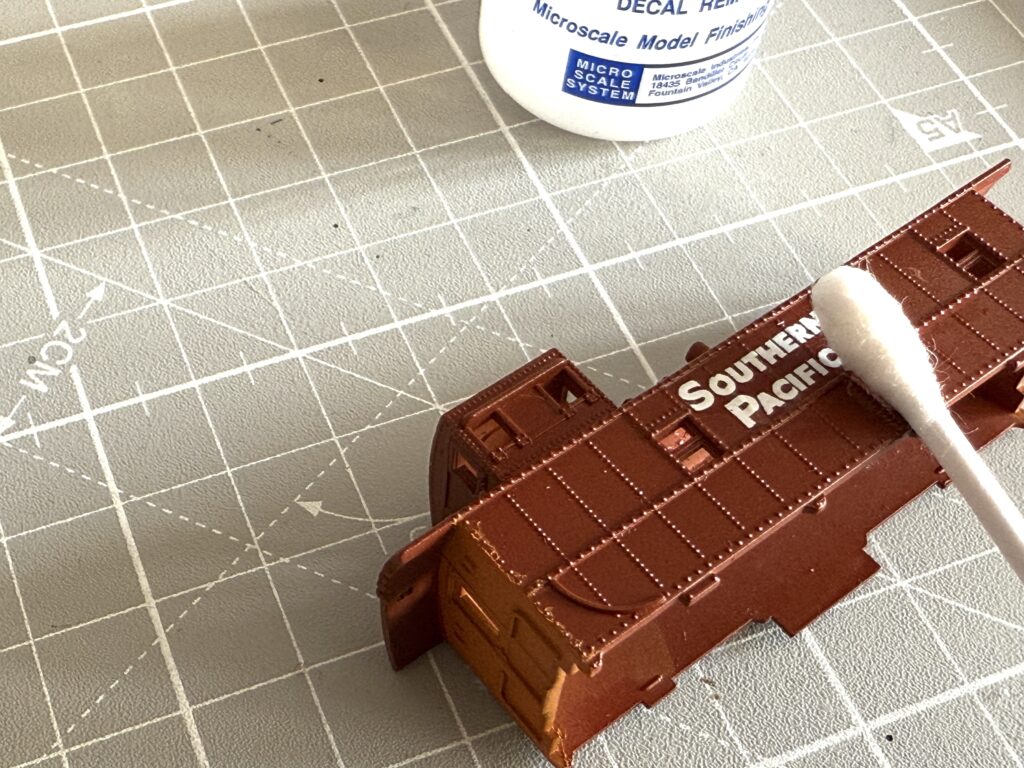
I soaked the decals in warm water for 10-15 seconds, just enough to loosen them from the backing paper without over-soaking. I gently slide the decal onto the car, positioning it with a soft brush or tweezers.

Sliding decal onto the model

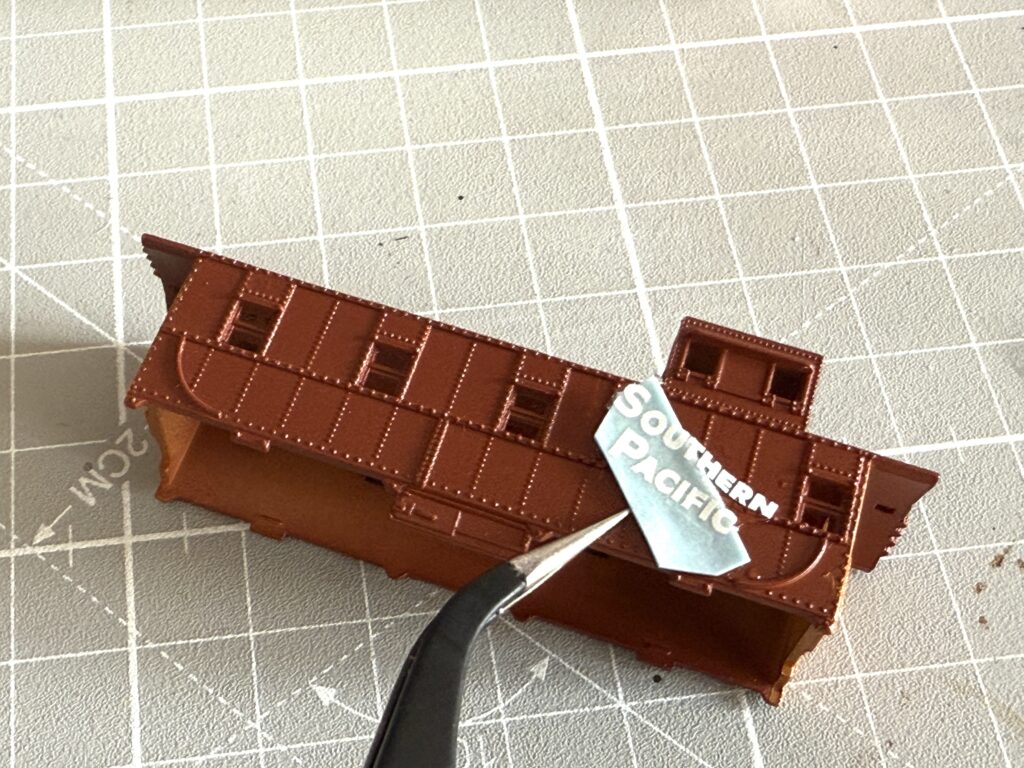
For tricky areas, I used Microscale Micro Set decal-setting solution to help the decal conform to surface details like rivets or panel lines. For the most difficult irregular surfaces I used Microscale Micro Sol, to soften the decals for a few seconds before applying it.

Painting an SP caboose: the surface where the decal will be applied is prepared with Microscale Micro Set solution

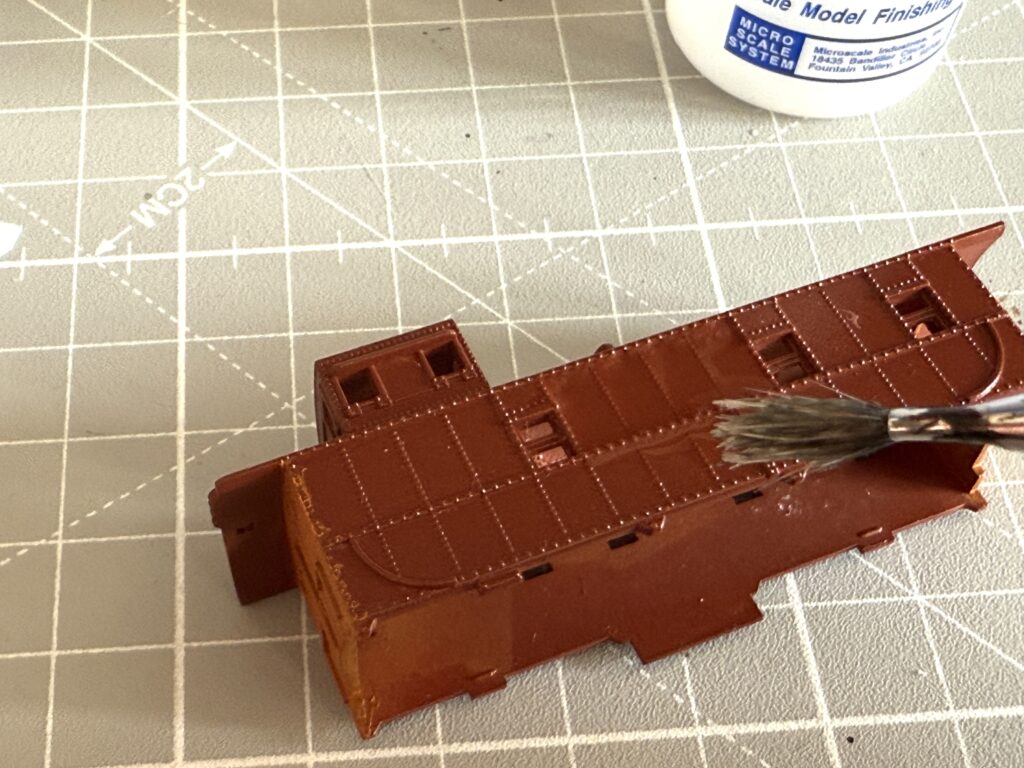
Once positioned, I lightly dabbed with a cotton swab or soft cloth to remove excess water and ensure the decal sits flush.

Dabbing with a cotton swap

I allowed the decals to dry completely before applying a final coat of clear matte to seal and protect them.

Painting an SP caboose, almost complete.

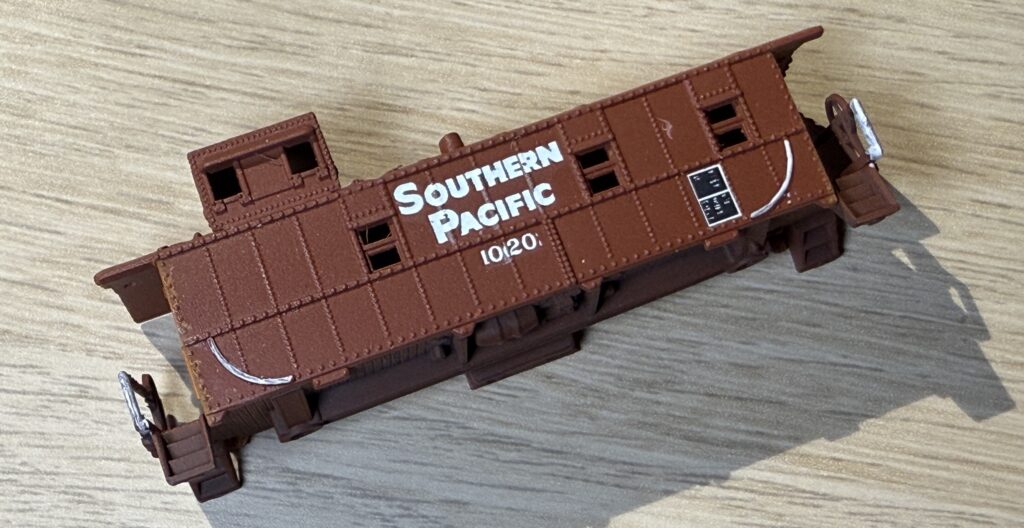
I painted the handrails white with a small paintbrush, using Vallejo white paint.
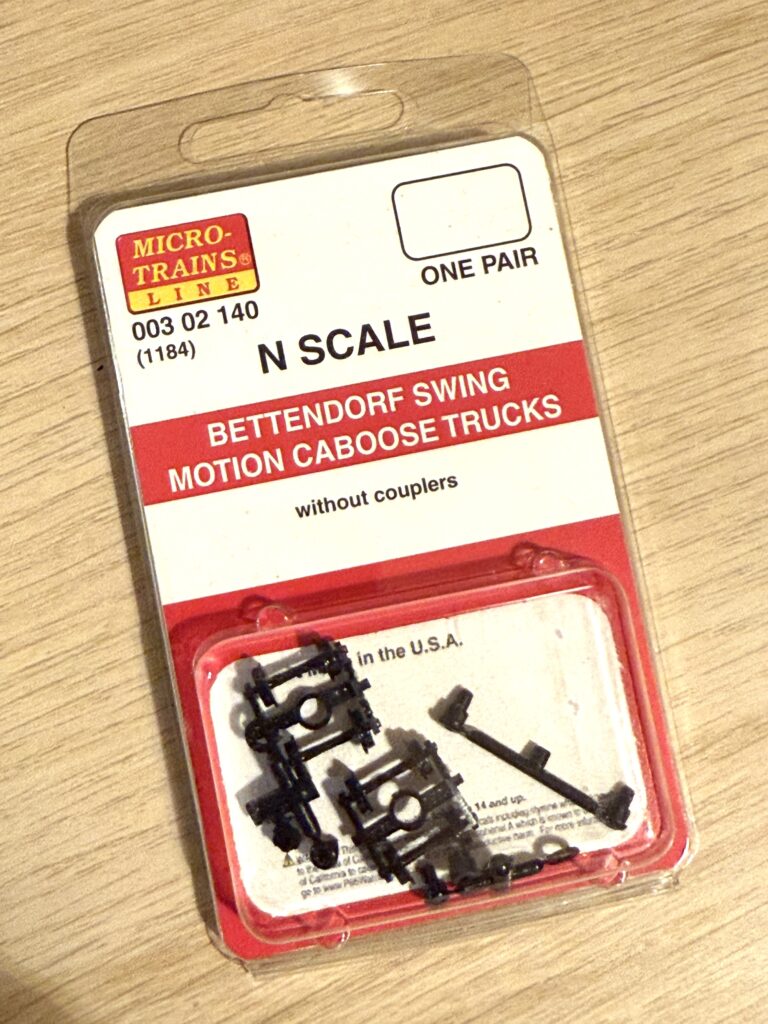
Trucks and Couplers

Trucks needed to be upgraded, so I used Micro-Trains 1184 (Bettendorf Switch Motion Caboose Trucks). I also installed Micro-Trains 1015 body-mount couplers.
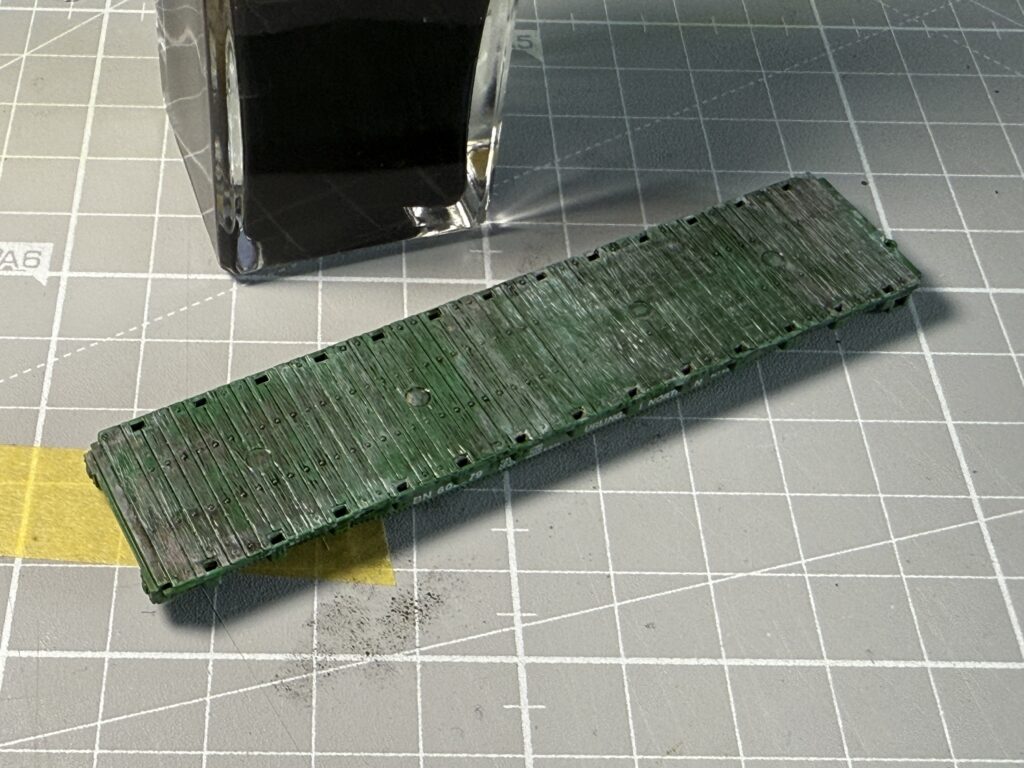
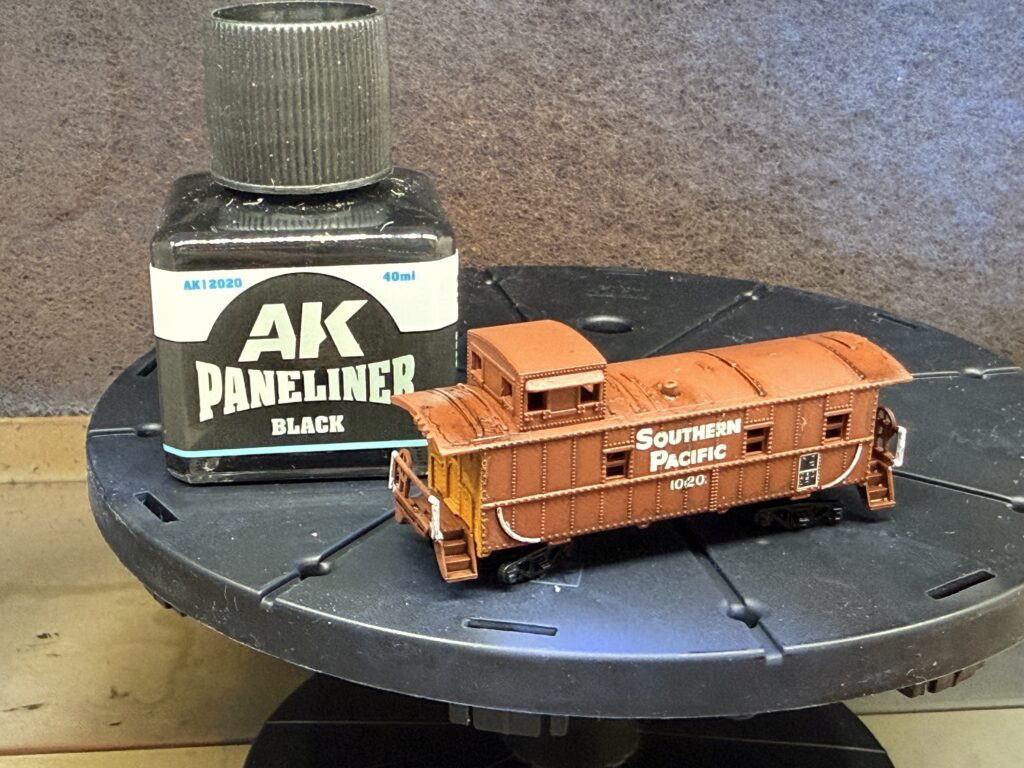
Micro-Trains 1184 trucks
Micro-Trains caboose trucks and body-mount couplers installed

Weathering

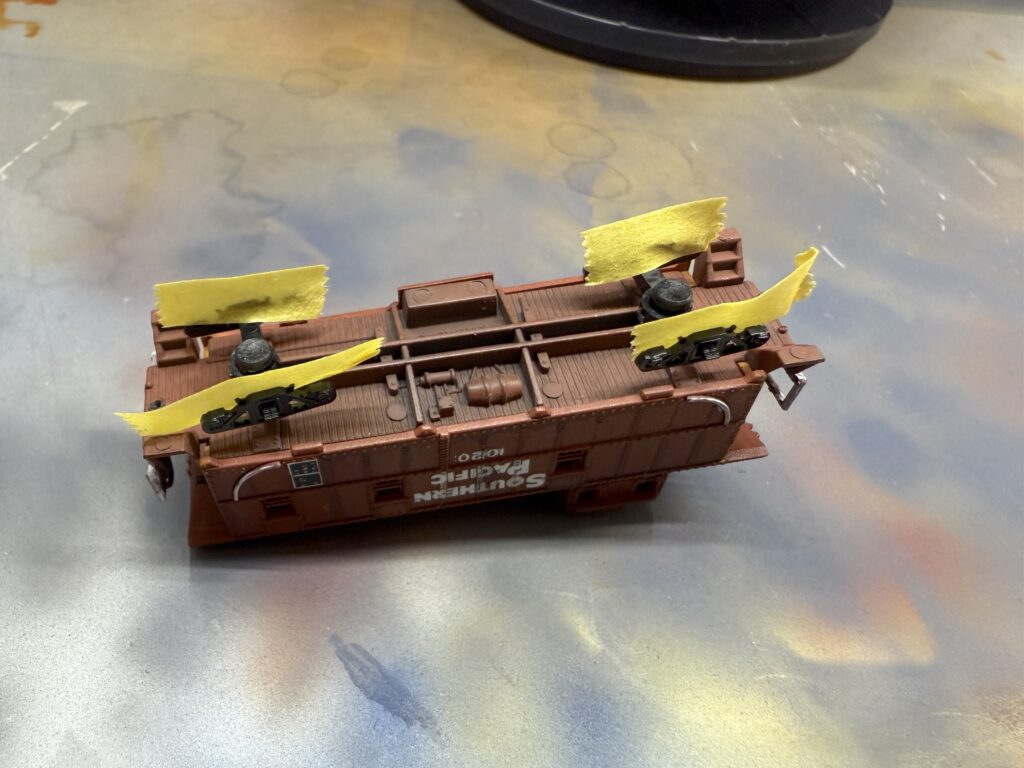
I started by applying AK Paneliner (Black) brushing it onto every panel line. Before proceeding, I removed the wheel axles and the couplers.

I then masked the sides of the trucks where the axle points sit.

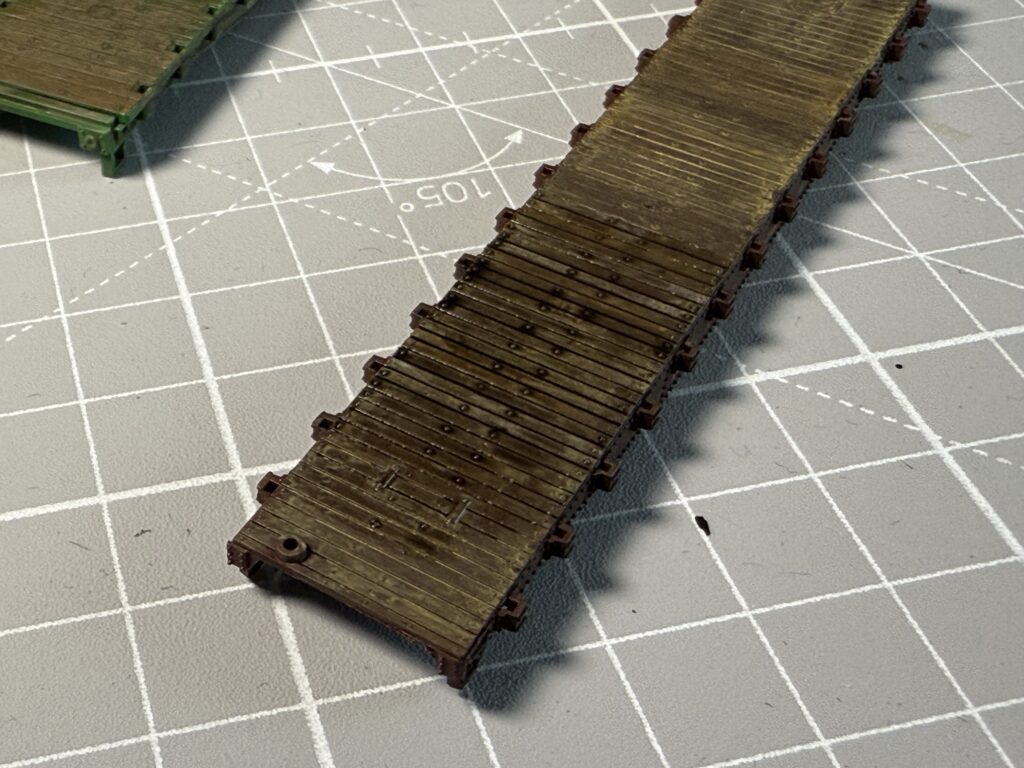
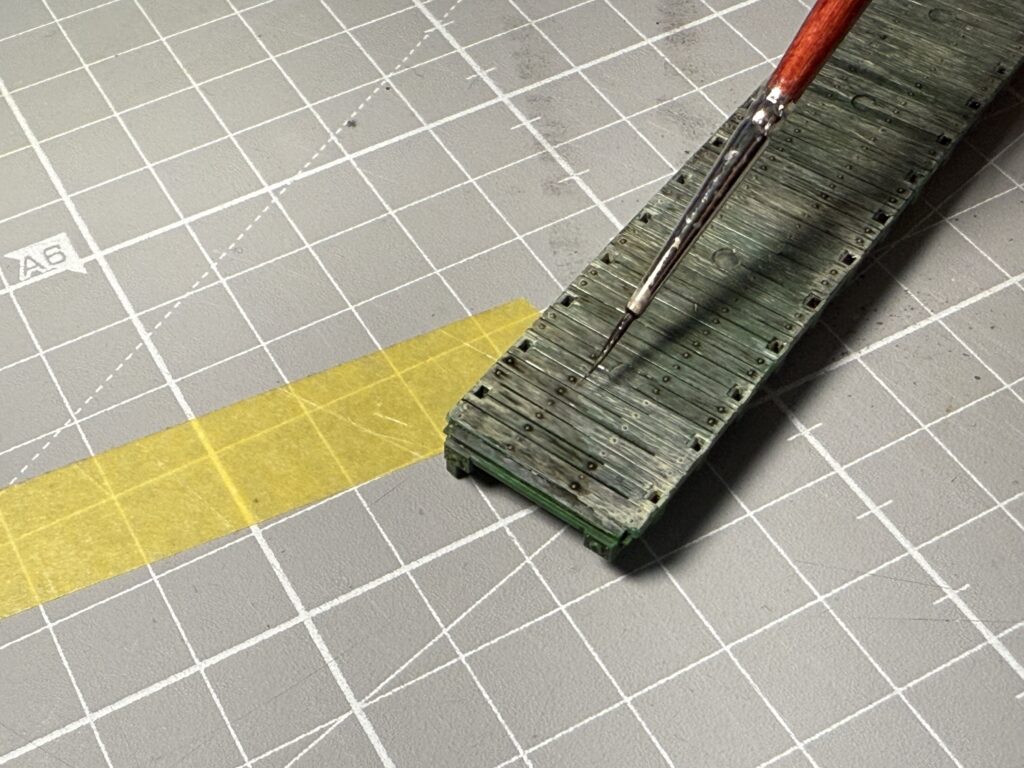
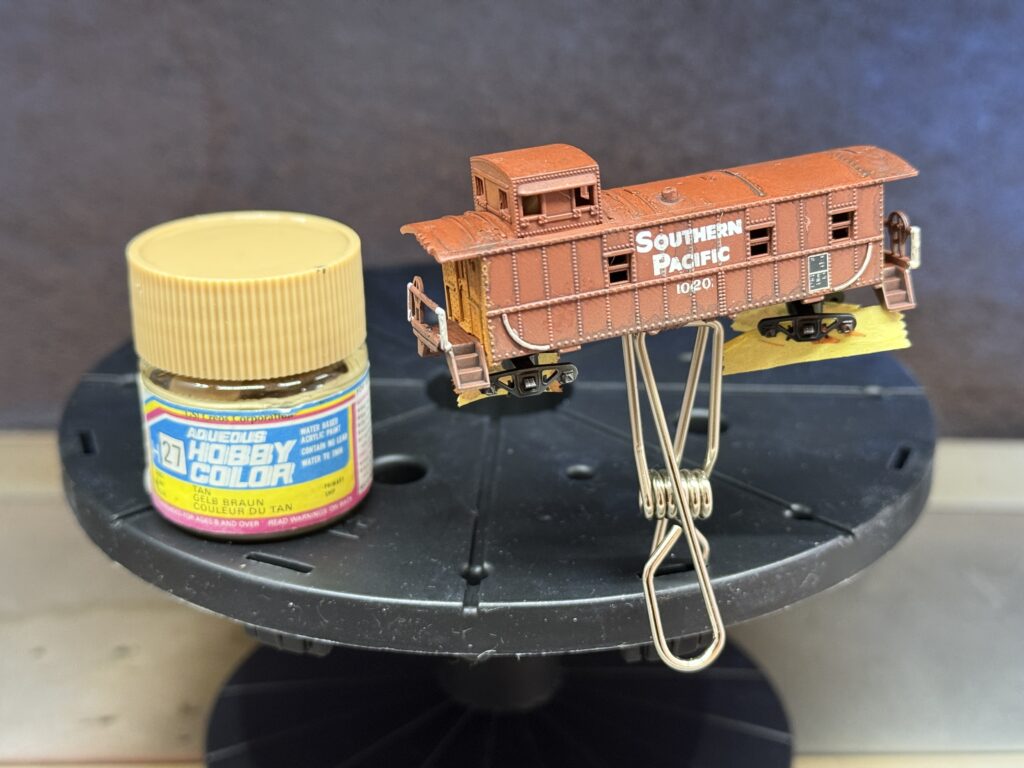
Then, I applied a thinned layer of tan paint (20% paint, 80% thinner). I had an old Acqueous Hobby Color that was still in great condition, so I used it. I applied several thin layers to the lower part of the body and trucks to simulate dust accumulation from operation.

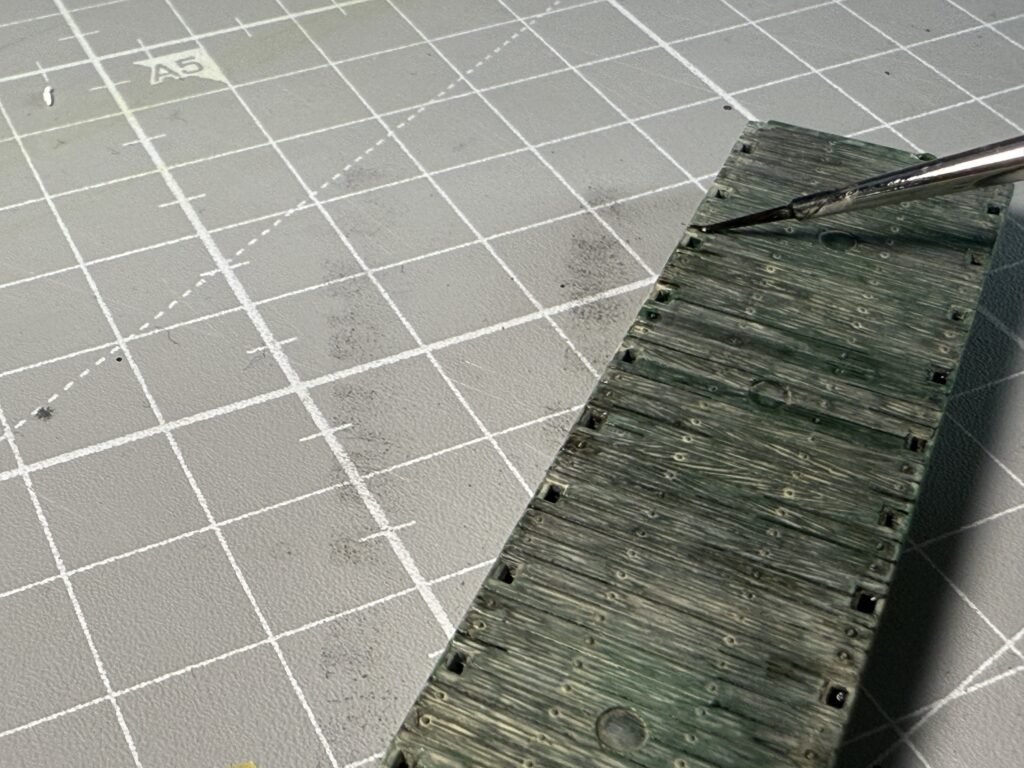
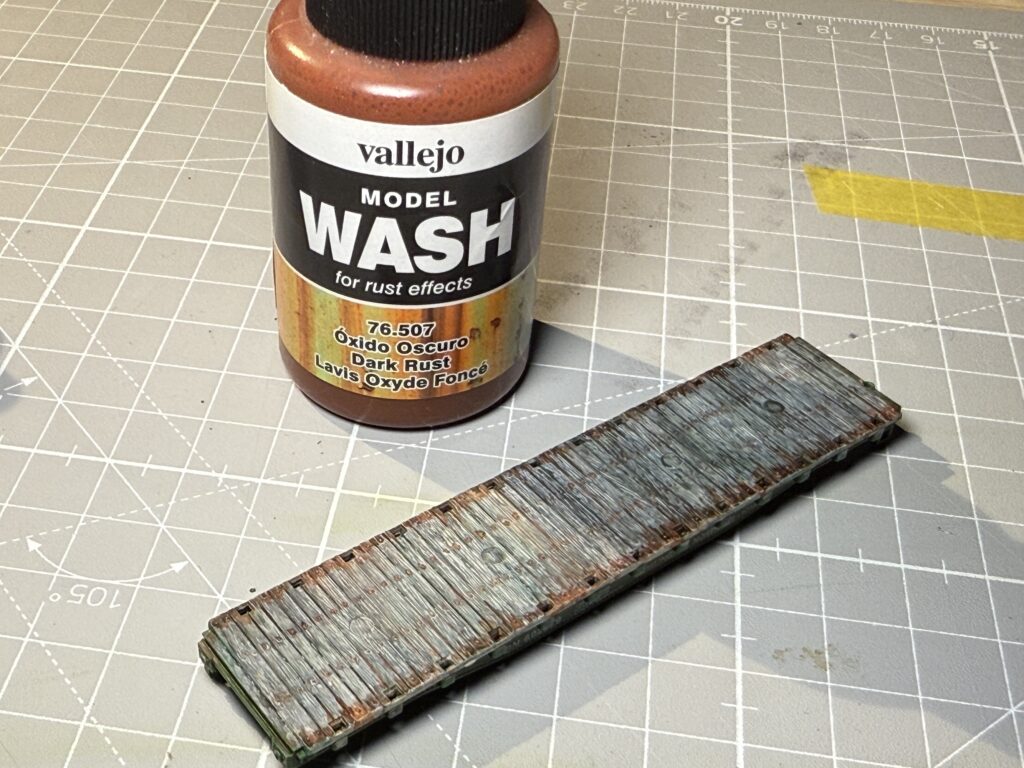
I brushed the trucks with some brown powder, which has a very flat finish and effectively simulates layers of rust and grime.

I added streaks of dirt running down from the roof exhaust.

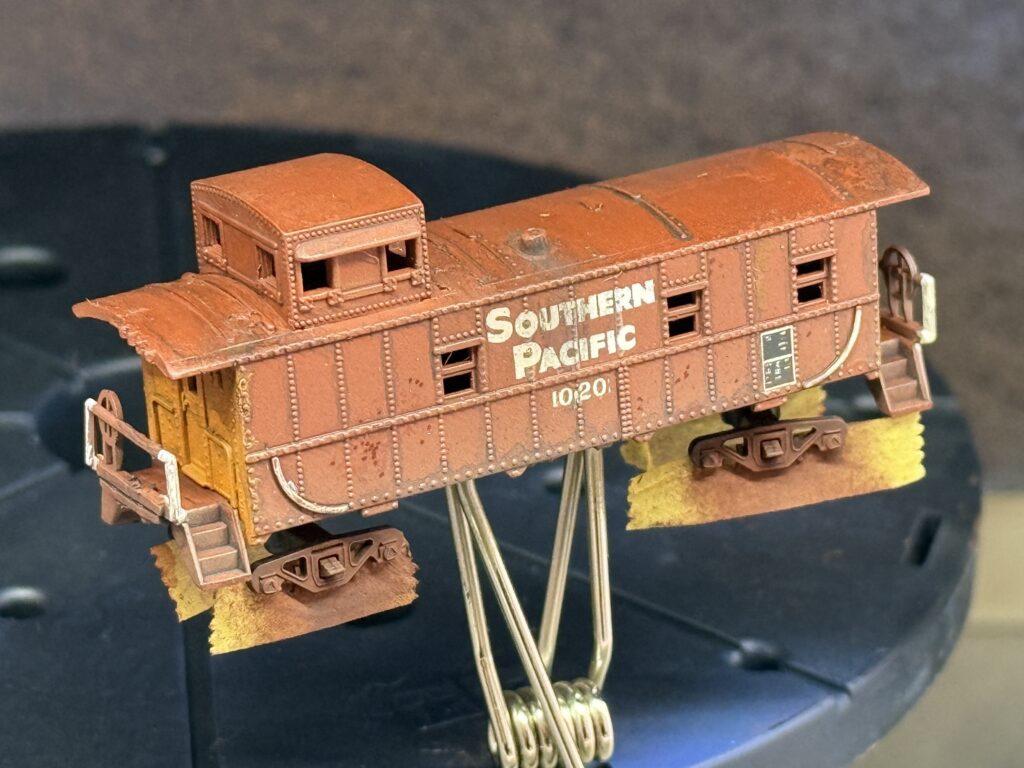
I then applied a coat of Tamiya XF-86 Flat Clear to seal the weathering on the caboose.
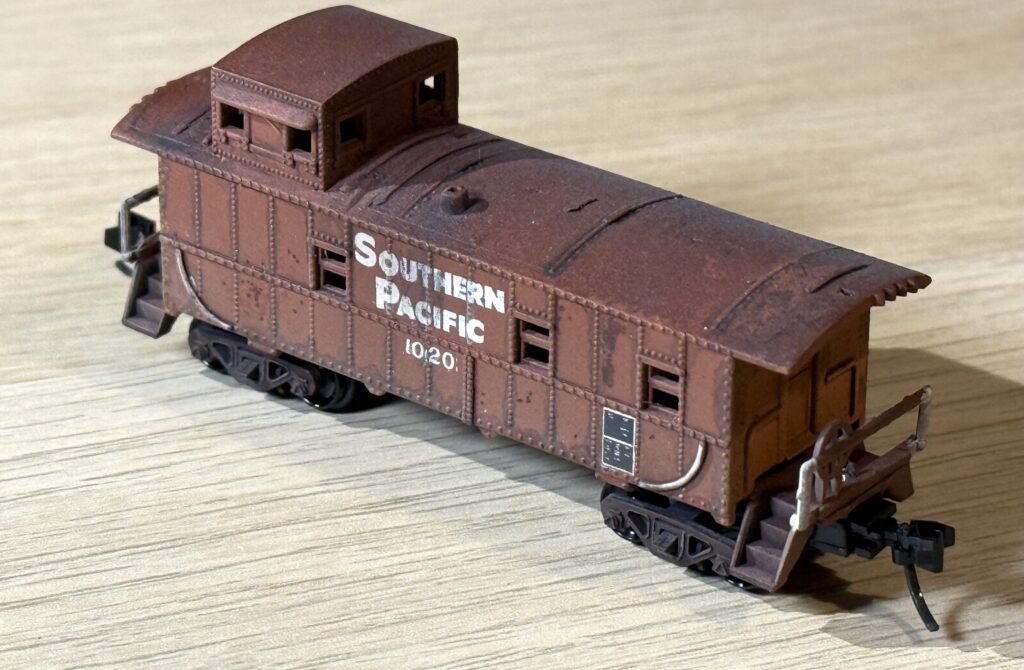
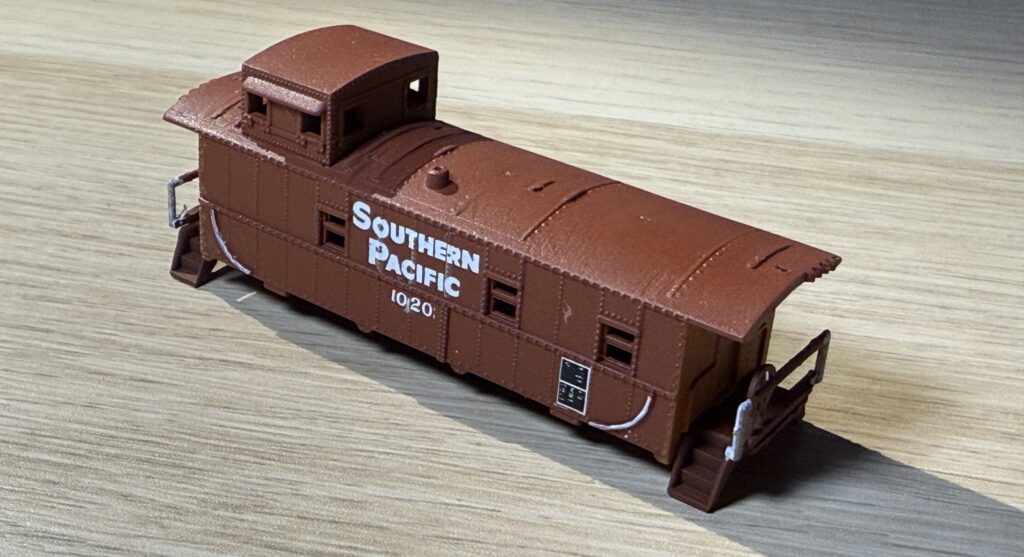
Southern Pacific N scale cupola caboose weathered

Conclusion

While this model isn’t a perfect replica of the C-40-1 class caboose, I think it’s a great addition to the roster. Plus, it’s been a fun and quick project that I completed over the course of a few evenings.

Plywood Subroadbed

Building a plywood subroadbed using 15mm-thick plywood

For a switching layout, using a plywood subroadbed is an easy and relatively quick way to establish a solid foundation for the trackwork.

Plywood subroadbed
Plywood subroadbed with longitudinal supports

I had the plywood cut to size for each of the three main sections of the layout (see track plan). Then, I reinforced the plywood base by gluing and screwing down 20mm x 35mm lumber.

I then prepared risers to hold the plywood base at the proper height (140cm – about 55″). However, I haven’t attached the base to the risers yet.

I used a laser level I bought on Amazon to install the risers at the correct height. First, I clamped the risers to the benchwork, then I double-checked that the plywood base was level with the laser line. Once everything was aligned, I drilled pilot holes in the risers and screwed them down to the benchwork.

Using a laser level
Laser level to help installing benchwork
Laser level purchased on Amazon

Using a laser level speeds up the entire construction process. I keep it on throughout the session for a constant visual reference. Then I double-checked with an old-school level 🙂 to ensure everything was at the correct height and perfectly level.

Checking with old-school level
Checking plywood subroadbed with an old-school level

I proceeded with installing the risers for the three main subroadbed sections. The plywood base is just resting on the risers for now. The reason for that is I want to be able to flip the base to wire the tracks and Tortoise switch machines more comfortably.

Installing the plywood subroadbed
Plywood base

A 15mm-thick plywood subroadbed provides a sturdy foundation, ensuring durability and stability for trackwork and scenery on my N scale layout.

Using pre-cut plywood sheets speeds up construction, reducing material waste and simplifying layout assembly. Reinforcing the plywood with lumber prevents warping and keeps the track level over time. Wiring and switch machine installation are more accessible by flipping the plywood base during construction.

This method is ideal for switching layouts, offering a reliable and efficient track-laying surface.

Weathering Flatcars

Weathering flatcars to make plastic look like wood

Using acrylic paints, India ink, and a set of paintbrushes, you can achieve convincing results when weathering flatcars. I weathered the Atlas BN flatcar pictured below as well as an old Con-Cor SP flatcar, in service on my N scale layout.

Atlas BN flatcar

I first removed the trucks with couplers, then proceeded using Vallejo acrylic colors.

The key is to work in light layers. For the Southern Pacific flatcar, which already had a brown base, I applied a wash of dark brown for added depth.

I used Vallejo colors: White (71.001), Uk BSC 64 Portland Stone (71.288), Beige (71.074), N. 41 Dark Olive Drab (71.316) and Dark Rust Wash (76.507). Additionally, I prepared a solution by mixing a couple of drops of Winsor & Newton India Ink with water and 10 drops of isopropyl alcohol. I painted each groups of 2-3 wooden planks in different shades to create natural variation.

Vallejo colors

Here is the Con-Cor SP flatcar receiving a wash of diluted black India ink.

Wash of diluted black India ink

I used Vallejo Retarder Medium (70.597) to extend the drying time of acrylics, making brushwork easier and more controlled. First, I applied a wash of White (71.001).

Applying the first wash with white Vallejo 71.001

While Retarder Medium helps with layering by slowing down drying time, it also extends the overall drying process. I made sure the paint was completely dry before applying a wash of India ink, allowing it to seep into the gaps between the wooden planks by capillary action.

Weathering flatcars with India ink wash
Using a fine brush to apply India ink
Weathering flatcars with India ink

Then I carefully applied Vallejo Wash for rust effects, focusing on the area around rivets.

Using Vallejo Model Wash for rust effects
BN flatcar with added rust effect

I applied another diluted, random layer of Mahogany (71.036) and N. 41 Dark Olive Drab (71.316) to tone down the red rust color.

Weathering flarcars using Vallejo Mahogany color
Using Dark Olive Drab

Here is the BN flatcar after the paint has dried.

BN flatcar weathered
Weathering a flatcar, done!

And here is the final result on the SP Con-Cor car. The goal was to create the look of old wooden planks weathered by the elements and stained by various load spills over time.

Weathering flatcars: SP Flatcar finished

Installing the valance

Using Faesite (Masonite) sheet, installing the valance is quick and easy.

I purchased some black Faesite (Masonite) sheets, had them cut to length, and used them to install the valance. A valance helps direct and diffuse light onto the layout while preventing glare from LED strips or other light sources.

Below is a short video showing the final result with LED lighting on my N scale layout.

Valance Installation

Just like with the backdrop, I bent the board to create a smooth, rounded corner.

Installing the valance
Valance installed on the layout

Enhanced Visual Framing

The LED strips are hidden behind the valance. Installing the valance creates a more immersive and finished look by framing the scene and keeping the viewer’s focus on the trains and scenery. The valance helps conceal ceiling lights, room clutter, and other distractions outside the layout.

LED strips hidden behind the valance

Depending on the height and depth of the valance, the valance may make the layout feel more enclosed or get in the way of taller operators. Also, installing a valance requires additional materials, cutting, mounting, and possibly bending for curved corners.

That said, a well-designed valance adds a professional touch, making the layout appear more polished and realistic.

Lighting

I use three LED strips of different colors: 2700K, 4000K and blue light. Each strip is wired to a dimmable power supplies and dimmers , allowing independent control. Remote push-buttons control the lights. I used Italian brand Bticino Matix Go push-buttons.

Push-buttons to control the LED strips

I usually use a combination of 4000K and 2700K for daylight, while the blue light is on for night operations. In the photo below, the blue appears more saturated than it does in person.

Installing the valance: 4000K + 2700K
Blue light for nighttime operations

A well-planned valance and lighting setup transforms the look and feel of a model railroad. By combining different LED color temperatures, it’s possible to replicate natural lighting transitions, enhancing realism without drawing attention away from the trains.

Adjustable dimming and remote controls add convenience, allowing for seamless shifts between day and night scenes. Thoughtful lighting makes a huge difference in bringing the layout to life while keeping the focus on the trains and scenery.

LED Strips Installation

LED strips installation behind the valance

I started the LED strips installation by fixing the aluminum profiles on the valance ceiling, to light my N scale layout. The profiles are great for holding the LED strips in place and dissipating the heat they generate.

I initially planned to use only two LED strips – one 4000K and one 2700K – with dimmers to adjust the lighting color combination. Then, I decided to add a third blue LED strip for night operations. I’m not sure if I’ll use the blue LED strip, but I figured it would be easier to install it now rather than add it later.

LED Strips Installation: aluminum profiles

I cut the aluminum profiles to length and screwed them into the valance ceiling.

I cut the aluminum profiles to length

I then measured and cut the LED strips, soldering short wires to connect the corners. The LED strips are self-adhesive, so I proceeded securing them to the aluminum profiles.

Securing the LED strips with self-adhesive tape.

Illumination

After installing the LED strips I quickly realized they mainly illuminated the area directly beneath them. Part of the backdrop was clearly left in shadow. I needed to mount the LED strips at an angle to minimize the shadow effect.

LED strips illuminating the layout area.

Door wedges to the rescue! I purchased some wooden door wedges and I used them to mount the LED profile holders at an angle.

Wooden door wedges used to mount the LED strips at an angle
LED strip installation at an angle

The LEDs installed at an angle provide better illumination for the entire area. Below, you can see the three strips turned on: 2700K, 4000K, and Blue light.

All three LED strips are turned on: 2700K, 4000K and Blue light.

The next step is installing the valance using Faesite (Masonite) board. The valance helps frame the layout and masks the LED lights, preventing them from shining directly into the operators’ eyes.

Painting the backdrop sky blue

Using acrylic or latex paint with a soft roller is a quick way for painting the backdrop sky blue.

Painting the backdrop sky blue is a simple yet effective way to enhance the realism of a model railroad layout. The benchwork’s depth limits the world we can model; thus, the backdrop creates the illusion of extending the space.

There is a school of thought in model railroading that advocates for using a very light blue. The idea is that the backdrop should serve as a subtle foundation rather than a focal point.

This approach helps maintain realism and it enhances the illusion of depth without drawing unnecessary attention.

I used this particular brand of wall paint because it offers excellent coverage and a smooth, flat finish, perfect for creating a seamless backdrop. It’s made by Dulux, a British brand.

Acrylic light blue wall paint

After sanding the backdrop panel joints, the backdrop is ready for a coat of paint.

Backdrop joints smoothed out

First coat!

Painting the backdrop sky blue with a first coat of acrylic wall paint.

After the first coat of paint, I let it dry for about 24 hours before applying the second coat. I then waited another 24 hours before adding a third coat. Here is the backdrop after the paint has dried.

Backdrop painted, paint fully dry.

By using subtle colors and smooth transitions, the backdrop serves as a supporting element – complementing the scene rather than competing with it. In the end, the goal is not to create a detailed painting but to establish a convincing setting where the trains remain the focal point.

For added depth, distant mountains can be painted onto the backdrop, especially those characteristic of the San Fernando Valley, California. Soft, hazy outlines in muted earth tones can suggest the presence of the Santa Susana or Verdugo Mountains without overwhelming the scene.

Subtle atmospheric perspective – lighter tones and reduced detail – helps create a sense of distance. With careful shading and color transitions, the backdrop seamlessly integrates with the modeled environment, enhancing realism without distraction.